Stihl SR 450 Product Instruction Manual - Page 36
Tensioning the rewind spring, Replacing a broken rewind spring - replacement parts
 |
View all Stihl SR 450 manuals
Add to My Manuals
Save this manual to your list of manuals |
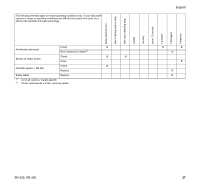
Page 36 highlights
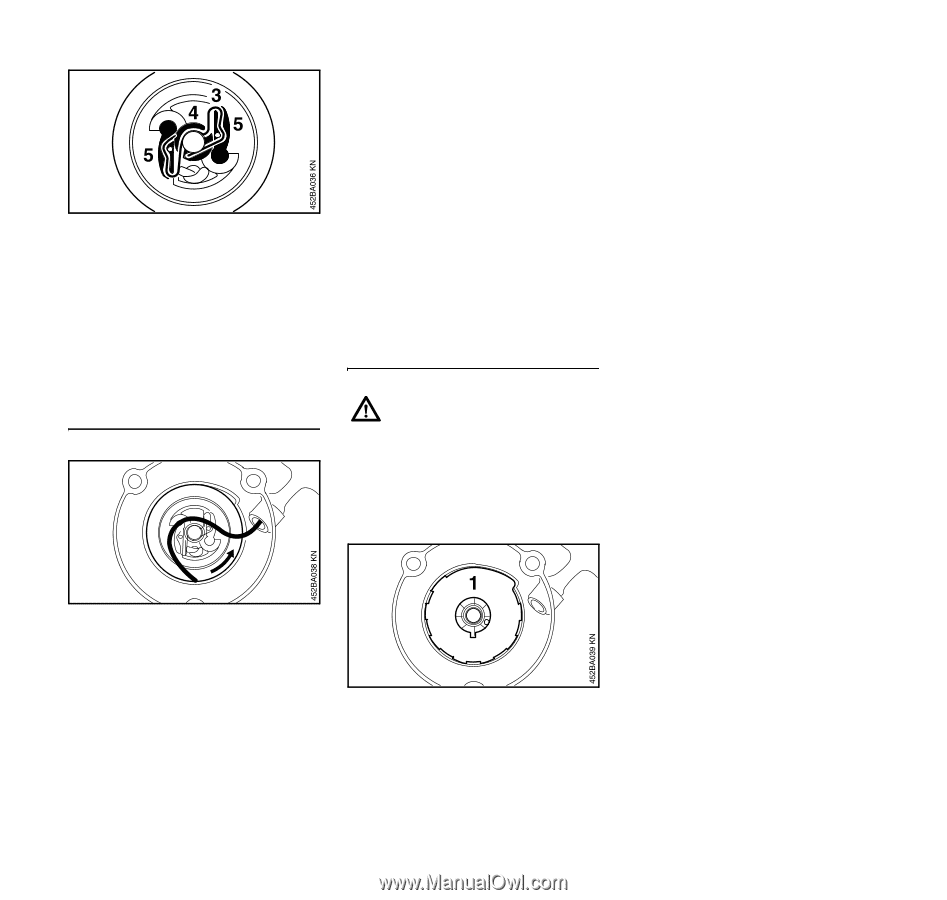
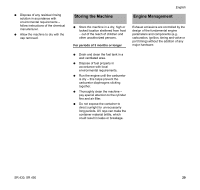
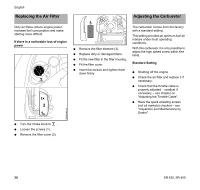
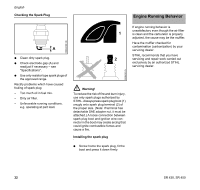
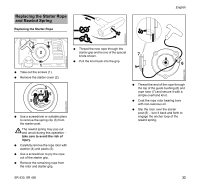
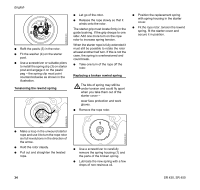
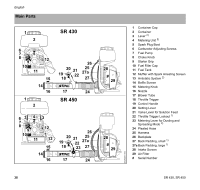
English N Refit the pawls (5) in the rotor. N Fit the washer (4) on the starter post. N Use a screwdriver or suitable pliers to install the spring clip (3) on starter post and engage it on the pawls' peg - the spring clip must point counterclockwise as shown in the illustration. Tensioning the rewind spring N Let go of the rotor. N Release the rope slowly so that it winds onto the rotor. The starter grip must locate firmly in the guide bushing. If the grip droops to one side: Add one more turn on the rope rotor to increase spring tension. When the starter rope is fully extended it must still be possible to rotate the rotor at least another half turn. If this is not the case, the spring is overtensioned and could break. N Take one turn of the rope off the rotor. Replacing a broken rewind spring The bits of spring may still be under tension and could fly apart when you take them out of the starter cover - wear face protection and work gloves. N Remove the rope rotor. N Position the replacement spring with spring housing in the starter cover. N Fit the rope rotor, tension the rewind spring, fit the starter cover and secure it in position. N Make a loop in the unwound starter rope and use it to turn the rope rotor six full revolutions in the direction of the arrow. N Hold the rotor steady. N Pull out and straighten the twisted rope. N Use a screwdriver to carefully remove the spring housing (1) and the parts of the broken spring. N Lubricate the new spring with a few drops of non-resinous oil. 34 SR 430, SR 450
-
 1
1 -
2
-
3
-
4
-
5
-
6
-
7
-
8
-
9
-
10
-
11
-
12
-
13
-
14
-
15
-
16
-
17
-
18
-
19
-
20
-
21
-
22
-
23
-
24
-
25
-
26
-
27
-
28
-
29
-
30
-
 31
31 -
 32
32 -
 33
33 -
 34
34 -
 35
35 -
 36
36 -
 37
37 -
 38
38 -
 39
39 -
 40
40 -
 41
41 -
42
-
43
-
44
-
45
-
46
-
47
-
48
-
49
-
50
-
51
-
52
-
53
-
54
-
55
-
56
-
57
-
58
-
59
-
60
-
61
-
62
-
63
-
64
-
65
-
66
-
67
-
68
-
69
-
70
-
71
-
72
-
73
-
74
-
75
-
76
-
77
-
78
-
79
-
80
-
81
-
82
-
83
-
84
-
85
-
86
-
87
-
88
-
89
-
90
-
91
-
92
-
93
-
94
-
95
-
96
-
97
-
98
-
99
-
100
 |
 |