TP-Link Archer D5 Archer D9 Print Server Application Guide - Page 10
Tools->Auto-Connect Printer List, Auto-Connect for Printing
 |
View all TP-Link Archer D5 manuals
Add to My Manuals
Save this manual to your list of manuals |
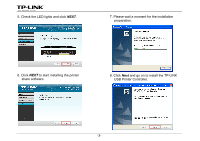
Page 10 highlights
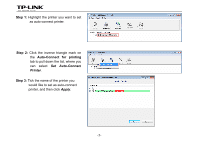
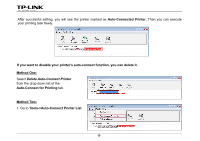
After successful setting, you will see the printer marked as Auto-Connected Printer. Then you can execute your printing task freely. If you want to disable your printer's auto-connect function, you can delete it. Method One: Select Delete Auto-Connect Printer from the drop-down list of the Auto-Connect for Printing tab. Method Two: 1. Go to Tools->Auto-Connect Printer List. -8-
-
 1
1 -
2
-
3
-
4
-
 5
5 -
 6
6 -
 7
7 -
 8
8 -
 9
9 -
 10
10 -
 11
11 -
 12
12 -
 13
13 -
 14
14 -
 15
15 -
16
-
17
-
18
-
19
-
20
-
21
-
22
-
23
-
24
-
25
-
26
-
27
-
28
-
29
-
30
-
31
-
32
-
33
-
34
-
35
-
36
 |
 |
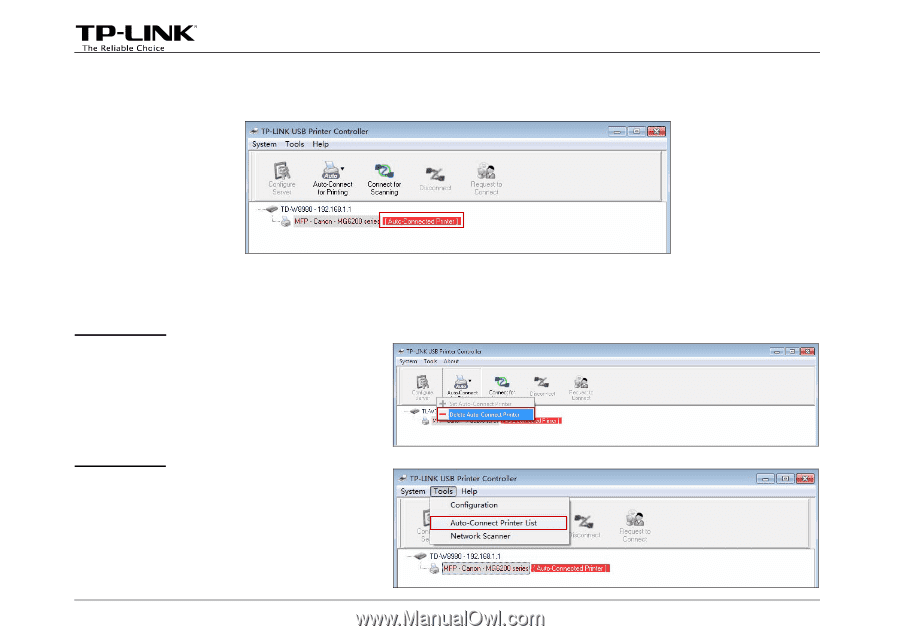
After successful setting, you will see the printer marked as
Auto-Connected Printer
. Then you can execute
your printing task freely.
If you want to disable your printer's auto-connect function, you can delete it.
Method One:
Select
Delete Auto-Connect Printer
from the drop-down list of the
Auto-Connect for Printing
tab.
Method Two:
1. Go to
Tools->Auto-Connect Printer List
.
-8-