TP-Link Archer D5 Archer D9 Print Server Application Guide - Page 14
Step 6, Method Two: Connect for Scanning, Request to Connect
 |
View all TP-Link Archer D5 manuals
Add to My Manuals
Save this manual to your list of manuals |
Page 14 highlights
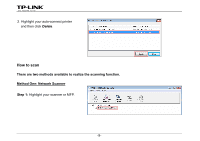
Step 6: When it is 100% processed and saved, please click Close to complete it. Then go to the location you've chosen in the previous Step 4 and find your picture scanned. Method Two: Connect for Scanning ) Note: If you choose this method for scanning, no one else in your LAN can share the scanner or MFP to either print or scan, until you click the tab Disconnect for Scanning to release it or accept their Request to Connect. Step 1: Highlight your scanner or MFP. -12-
-
 1
1 -
2
-
3
-
4
-
5
-
6
-
7
-
8
-
 9
9 -
 10
10 -
 11
11 -
 12
12 -
 13
13 -
 14
14 -
 15
15 -
 16
16 -
 17
17 -
 18
18 -
 19
19 -
20
-
21
-
22
-
23
-
24
-
25
-
26
-
27
-
28
-
29
-
30
-
31
-
32
-
33
-
34
-
35
-
36
 |
 |
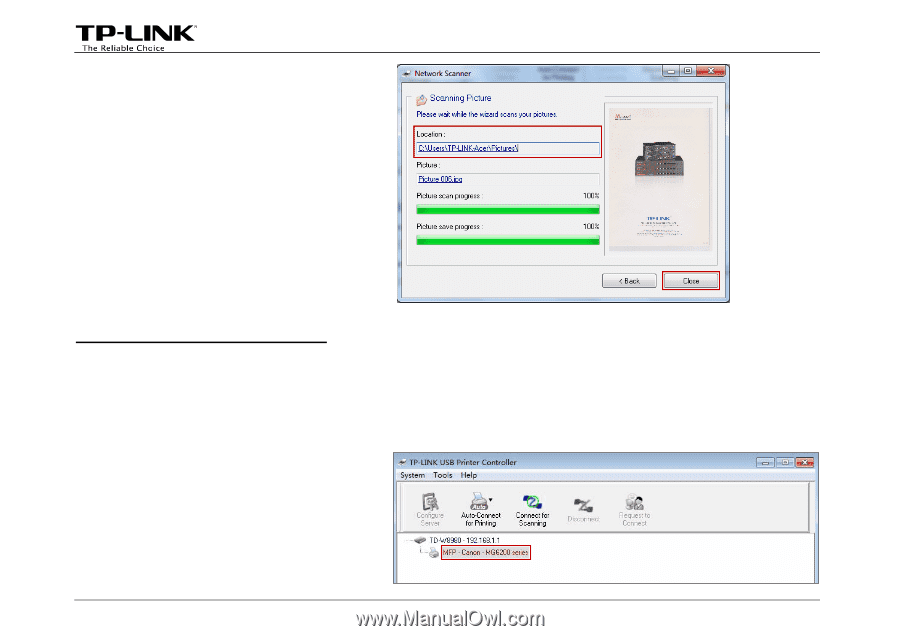
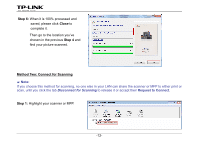
Step 6:
When it is 100% processed and
saved, please click
Close
to
complete it.
Then go to the location you’ve
chosen in the previous
Step 4
and
find your picture scanned.
Method Two: Connect for Scanning
)
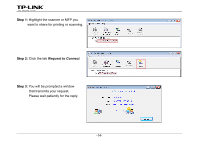
Note:
If you choose this method for scanning, no one else in your LAN can share the scanner or MFP to either print or
scan, until you click the tab
Disconnect for Scanning
to release it or accept their
Request to Connect
.
Step 1:
Highlight your scanner or MFP.
-12-