TP-Link Archer D5 Archer D9 Print Server Application Guide - Page 15
Step 2, Request to Connect, Connects for Scanning, Disconnect - manual
 |
View all TP-Link Archer D5 manuals
Add to My Manuals
Save this manual to your list of manuals |
Page 15 highlights
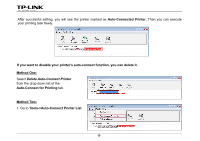
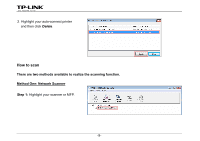
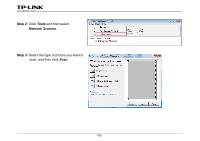
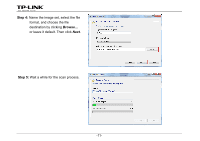
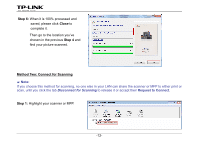
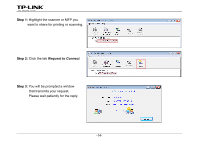
Step 2: Click the tab Connect for Scanning. Successfully set and ready for scanning, it will display Manually Connected by..., when you can start your scanning task. Step 3: After finishing your scanning task, please do remember to click the tab Disconnect to release the scanner or MFP. ¾ Request to Connect When one computer in you LAN Connects for Scanning, it is occupying the scanner or MFP; then if you would like to use the printer as well, you will have to Request for Connect. -13-
-
 1
1 -
2
-
3
-
4
-
5
-
6
-
7
-
8
-
9
-
 10
10 -
 11
11 -
 12
12 -
 13
13 -
 14
14 -
 15
15 -
 16
16 -
 17
17 -
 18
18 -
 19
19 -
 20
20 -
21
-
22
-
23
-
24
-
25
-
26
-
27
-
28
-
29
-
30
-
31
-
32
-
33
-
34
-
35
-
36
 |
 |
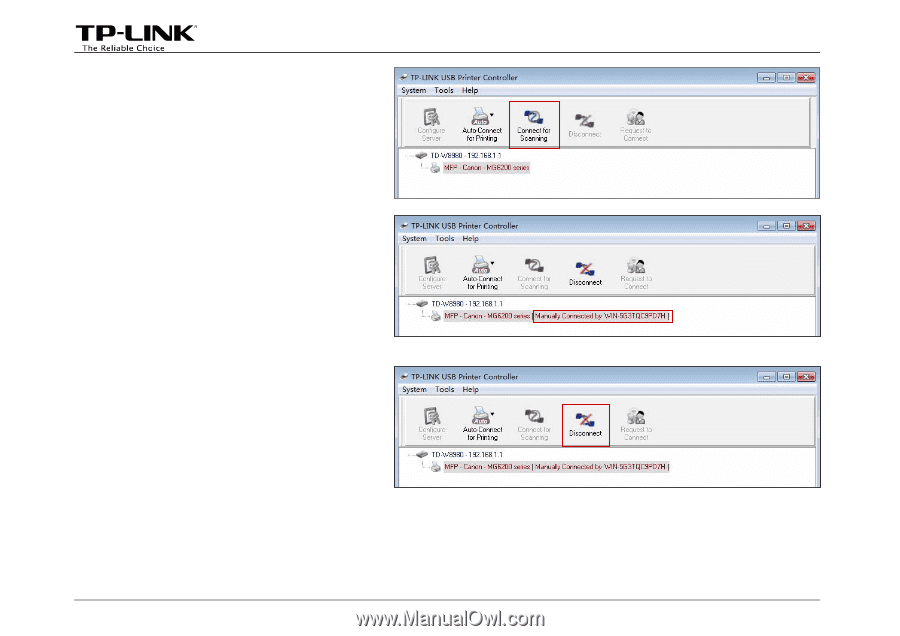
Step 2:
Click the tab
Connect for Scanning
.
Successfully set and ready for scanning,
it will display
Manually Connected by…
,
when you can start your scanning task.
Step 3:
After finishing your scanning task,
please do remember to click the
tab
Disconnect
to release the
scanner or MFP.
¾
Request to Connect
When one computer in you LAN
Connects for Scanning
, it is occupying the scanner or MFP; then if you would
like to use the printer as well, you will have to
Request for Connect
.
-13-