TP-Link TL-R460 User Guide - Page 23
Quick Setup, 4.3 Network, 4.3.1 LAN, TL-R460, Traffic Statistics, System Up Time, Network
 |
UPC - 845973040031
View all TP-Link TL-R460 manuals
Add to My Manuals
Save this manual to your list of manuals |
Page 23 highlights
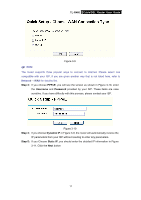
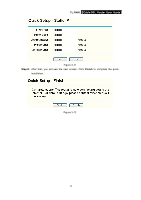
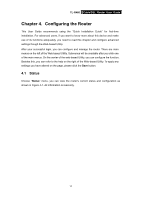
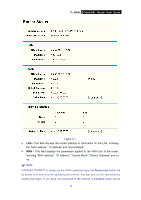
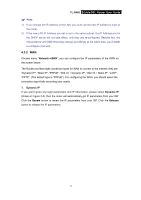
TL-R460 Cable/DSL Router User Guide shown, you can then establish the connection by clicking the button. ¾ Traffic Statistics: This field displays the router's traffic statistics. ¾ System Up Time: This field displays the time of the router running from the time it is powered on or is reset. 4.2 Quick Setup Please refer to Chapter 3"Quick Installation Guide." 4.3 Network Choose menu "Network", you can see the submenus under the Network menu: LAN, WAN and MAC Clone. Figure 4-2 Click any of them, and you will be able to configure the corresponding function. The detailed explanations for each submenu are provided below. 4.3.1 LAN Choose menu "Network→LAN", you can configure the IP parameters of the LAN on the screen below. Figure 4-3 ¾ MAC Address - This field displays the physical address of the LAN. The value can't be changed. ¾ IP Address - Enter the IP address for the LAN of the Router, the formal is in dotted-decimal notation (the factory default value is 192.168.1.1). ¾ Subnet Mask - Enter the subnet mask for the LAN of the Router, this address code determines the size of the network. Normally use 255.255.255.0 as the subnet mask. 16
-
 1
1 -
2
-
3
-
4
-
5
-
6
-
7
-
8
-
9
-
10
-
11
-
12
-
13
-
14
-
15
-
16
-
17
-
 18
18 -
 19
19 -
 20
20 -
 21
21 -
 22
22 -
 23
23 -
 24
24 -
 25
25 -
 26
26 -
 27
27 -
 28
28 -
29
-
30
-
31
-
32
-
33
-
34
-
35
-
36
-
37
-
38
-
39
-
40
-
41
-
42
-
43
-
44
-
45
-
46
-
47
-
48
-
49
-
50
-
51
-
52
-
53
-
54
-
55
-
56
-
57
-
58
-
59
-
60
-
61
-
62
-
63
-
64
-
65
-
66
-
67
-
68
-
69
-
70
-
71
-
72
-
73
-
74
-
75
-
76
 |
 |
