TP-Link TL-WR340G User Guide - Page 12
The Back Panel, System Requirements - set up wireless
 |
UPC - 845973051075
View all TP-Link TL-WR340G manuals
Add to My Manuals
Save this manual to your list of manuals |
Page 12 highlights
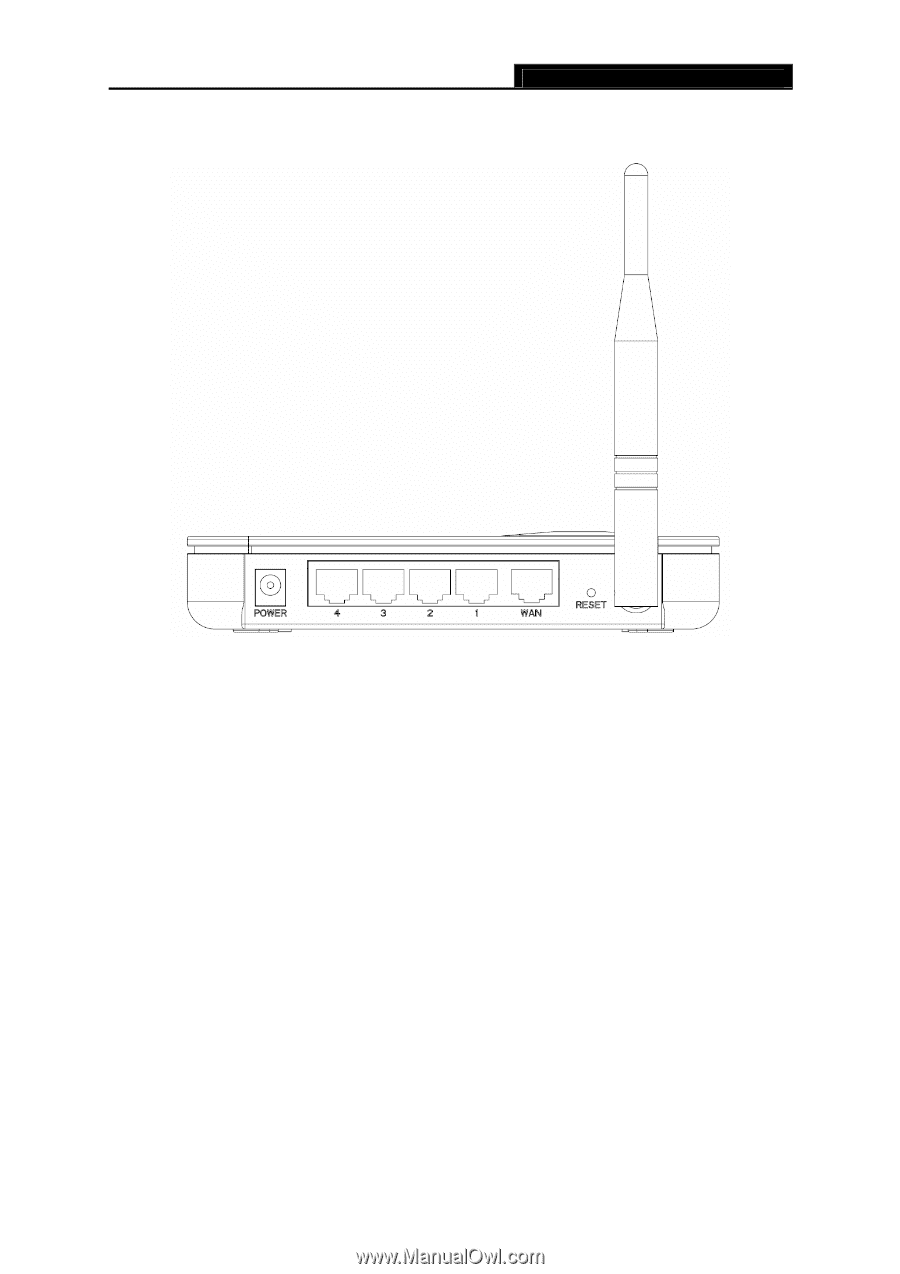
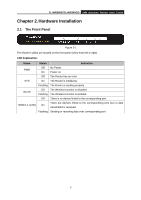
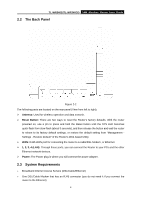
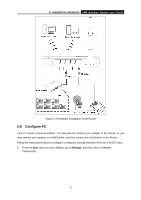
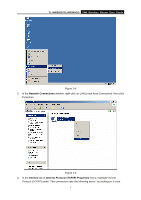
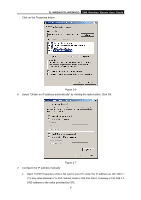
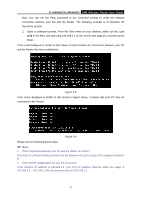
TL-WR340G/TL-WR340GD 54M Wireless Router User Guide 2.2 The Back Panel Figure 2-2 The following parts are located on the rear panel (View from left to right). ¾ Antenna: Used for wireless operation and data transmit. ¾ Reset Button: There are two ways to reset the Router's factory defaults. With the router powered on, use a pin to press and hold the Reset button until the SYS LED becomes quick-flash from slow-flash (about 5 seconds), and then release the button and wait the router to reboot to its factory default settings, or restore the default setting from "Management Settings - Restore Default "of the Router's Web-based Utility. ¾ WAN: RJ45 WAN port for connecting the router to a cable/DSL Modem, or Ethernet. ¾ 1, 2, 3, 4 (LAN): Through these ports, you can connect the Router to your PCs and the other Ethernet network devices. ¾ Power: The Power plug is where you will connect the power adapter. 2.3 System Requirements ¾ Broadband Internet Access Service (DSL/Cable/Ethernet) ¾ One DSL/Cable Modem that has an RJ45 connector (you do not need it if you connect the router to the Ethernet) 4
-
 1
1 -
2
-
3
-
4
-
5
-
6
-
 7
7 -
 8
8 -
 9
9 -
 10
10 -
 11
11 -
 12
12 -
 13
13 -
 14
14 -
 15
15 -
 16
16 -
 17
17 -
18
-
19
-
20
-
21
-
22
-
23
-
24
-
25
-
26
-
27
-
28
-
29
-
30
-
31
-
32
-
33
-
34
-
35
-
36
-
37
-
38
-
39
-
40
-
41
-
42
-
43
-
44
-
45
-
46
-
47
-
48
-
49
-
50
-
51
-
52
-
53
-
54
-
55
-
56
-
57
-
58
-
59
-
60
-
61
-
62
-
63
-
64
-
65
-
66
-
67
-
68
-
69
-
70
-
71
-
72
 |
 |