TRENDnet TE100-P1U User Guide - Page 63
Windows 2000/2003 Server, Add Printer, Network Printer, Printers, Sharing
 |
UPC - 710931204100
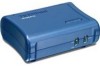
View all TRENDnet TE100-P1U manuals
Add to My Manuals
Save this manual to your list of manuals |
Page 63 highlights
Windows 2000/2003 Server 1. Start the Add Printer Wizard, select Network Printer, then click Next to browse for the Print Server. 2. Locate and double-click the Print Server, select the desired port, and click Next. A message like the following will be displayed: Figure 40: Windows 2000 Message Figure 41: Windows2003 Message 3. Click "OK", and select the correct Manufacturer and Model for this printer. 4. Follow the prompts to complete the installation. 5. In the Printers folder, right-click the new printer, and select Sharing. • Select "Shared As:" and enter an appropriate name for this printer. Users will see this name when browsing for the printer during installation. • If desired, click "Additional Drivers" and install printer drivers for other versions of Windows, such as Windows 98. This will assist users during the installation process. 6. Click OK to close this Window. Configuration is now complete. Client PCs can now be configured as described in Chapter 4 - Client Configuration. Page 60
-
 1
1 -
2
-
3
-
4
-
5
-
6
-
7
-
8
-
9
-
10
-
11
-
12
-
13
-
14
-
15
-
16
-
17
-
18
-
19
-
20
-
21
-
22
-
23
-
24
-
25
-
26
-
27
-
28
-
29
-
30
-
31
-
32
-
33
-
34
-
35
-
36
-
37
-
38
-
39
-
40
-
41
-
42
-
43
-
44
-
45
-
46
-
47
-
48
-
49
-
50
-
51
-
52
-
53
-
54
-
55
-
56
-
57
-
 58
58 -
 59
59 -
 60
60 -
 61
61 -
 62
62 -
 63
63 -
 64
64 -
 65
65 -
 66
66 -
 67
67 -
 68
68 -
69
-
70
-
71
-
72
 |
 |
