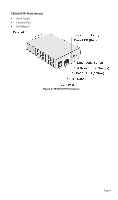
TRENDnet TE100-P1U User Guide - Page 8
LED Indicators, Diagnostic Push Button, To restore the factory default settings - firmware
 |
UPC - 710931204100
View all TRENDnet TE100-P1U manuals
Add to My Manuals
Save this manual to your list of manuals |
Page 8 highlights
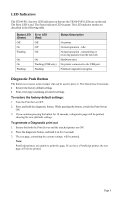
LED Indicators The TE100-P1U has two LED indicators on the top; the TE100-P1P's LEDs are on the end. The Error LED is red. The Status indicator LED is green. The LED indicator modes are described in the following table. Status LED (Green) Off On Flashing On On Flashing Error LED (Red) Off Off Off On Flashing (USB only) Flashing Status Description No power. Normal operation - Idle. Normal operation - transmitting or receiving packets from the network. Hardware error. No printer connected to the USB port. Firmware upgrade in progress. Diagnostic Push Button The button is recessed; a pin or paper clip can be used to press it. This button has 2 functions: • Restore the factory default settings • Print a test page containing all current settings. To restore the factory default settings: 1. Turn the Print Server OFF. 2. Press and hold the diagnostic button. While pressing the button, switch the Print Server ON. 3. If you continue pressing the button for 10 seconds, a diagnostic page will be printed, showing the new (default) settings. To generate a Diagnostic print out 1. Ensure that both the Print Server and the attached printer are ON. 2. Press the diagnostic button, and hold it in for 2 seconds. 3. The test page, containing the current settings, will be printed. Note: PostScript printers are unable to print this page. If you have a PostScript printer, the test page will not be printed. Page 5
-
 1
1 -
2
-
 3
3 -
 4
4 -
 5
5 -
 6
6 -
 7
7 -
 8
8 -
 9
9 -
 10
10 -
 11
11 -
 12
12 -
 13
13 -
14
-
15
-
16
-
17
-
18
-
19
-
20
-
21
-
22
-
23
-
24
-
25
-
26
-
27
-
28
-
29
-
30
-
31
-
32
-
33
-
34
-
35
-
36
-
37
-
38
-
39
-
40
-
41
-
42
-
43
-
44
-
45
-
46
-
47
-
48
-
49
-
50
-
51
-
52
-
53
-
54
-
55
-
56
-
57
-
58
-
59
-
60
-
61
-
62
-
63
-
64
-
65
-
66
-
67
-
68
-
69
-
70
-
71
-
72
 |
 |