Toshiba DVR3 Owners Manual - Page 14
Manual Clock Set, Auto Clock Set
 |
View all Toshiba DVR3 manuals
Add to My Manuals
Save this manual to your list of manuals |
Page 14 highlights
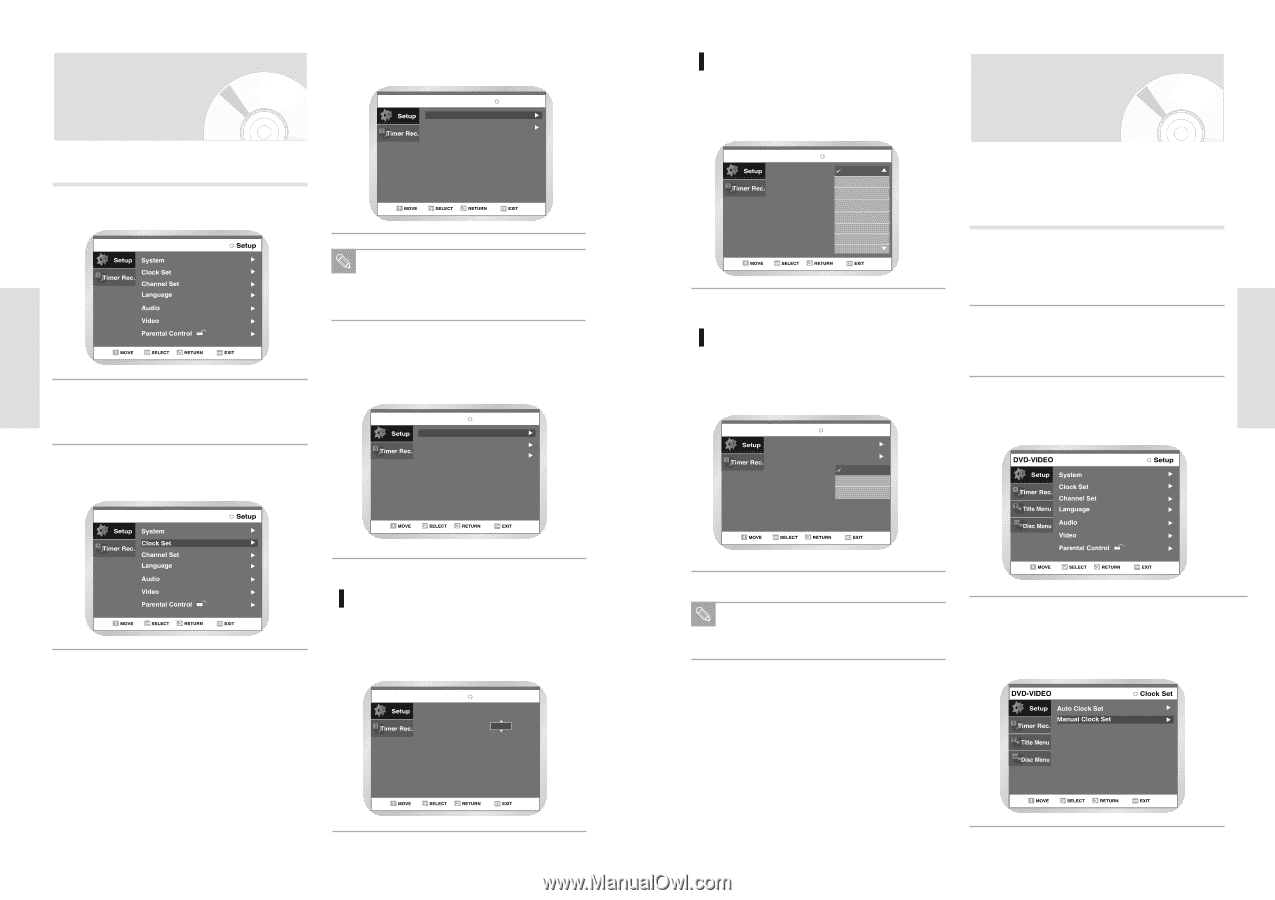
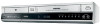
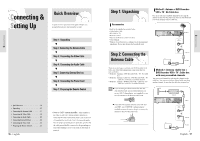
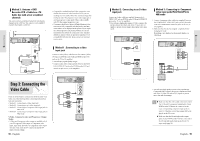
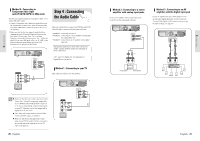
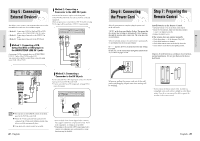
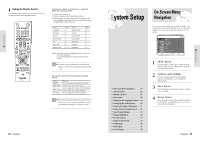
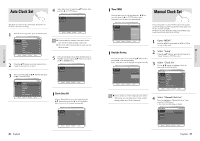
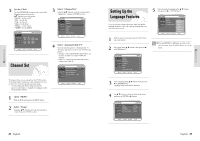
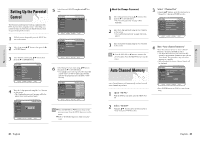
System Setup System Setup Auto Clock Set This menu is used to set the current time. You need to set the time to use timer recording. 4 Select Auto Clock Set using the œ❷¤buttons, then press the ❿ or ENTER button. No Disc Clock Set Auto Clock Set Manual Clock Set 1 With the unit in Stop mode, press the MENU button. No Disc You must have the antenna connected to set the Auto Clock. See page Antenna Connections Note The Clock will be automatically set when you turn off the recorder. 2 Using the œ❷¤buttons, move the selection bar to "Setup" then press Enter to select. 3 Select Clock Set using the œ❷¤buttons, then press the ❿ or ENTER button. No Disc 5 Select the sub menu (Clock Data CH, Time Zone or Daylight Saving) using the œ❷ buttons, then press the ❿ or ENTER button. No Disc Auto Clock Set Clock Data CH Time Zone Daylight Saving : Automatic : Automatic : Automatic Clock Data CH Select a channel that carries a time signal using the œ❷¤buttons then press the ❿¤or ENTER button. Select Auto to set the channel automatically. No Disc Clock Data CH Select channel : Auto Time ZONE Select the time zone of your area using the œ❷¤buttons then press the ❿¤or ENTER button. Select Automatic to set the time zone automatically. Manual Clock Set No Disc Auto Clock Set Clock Data CH Time Zone Daylight Saving : AAuutotommaatitcic : AAuttloanmtaictic : AEuatsotmerantic Central Mountain Pacific Alaska Hawaii If Auto Setup fails to set the DVD Recorder-VCR's internal clock by locating a local TV station, follow these steps to set the date and time manually. NOTE: For accurate Timer Recording, your DVD RecorderVCR's internal clock must be set correctly. 1 Open "MENU" Press the MENU button while the DVD or VCR is in Stop or Play mode. Daylight Saving Select the On, Off or Auto using the œ❷¤buttons then press the ❿¤or the ENTER button. Select Automatic to set the daylight saving automatically. No Disc Auto Clock Set Clock Data CH Time Zone Daylight Saving : Automatic : Automatic : AuAtuotmomataictic Yes No 2 Select "Setup" Using the œ❷ buttons, move the selection bar to "Setup" then press ENTER to select. 3 Select "Clock Set" Use the œ❷ buttons to highlight "Clock Set" then press the ENTER button. If your clock is set to the wrong time zone or dayNote light saving, you can adjust these settings without turning off the Auto Clock Set function. 4 Select "Manual Clock Set" Move the highlight to "Manual Clock Set", then press the ENTER button. • The Clock Set will change as shown. 26 - English English - 27
-
 1
1 -
2
-
3
-
4
-
5
-
6
-
7
-
8
-
 9
9 -
 10
10 -
 11
11 -
 12
12 -
 13
13 -
 14
14 -
 15
15 -
 16
16 -
 17
17 -
 18
18 -
 19
19 -
20
-
21
-
22
-
23
-
24
-
25
-
26
-
27
-
28
-
29
-
30
-
31
-
32
-
33
-
34
-
35
-
36
-
37
-
38
-
39
-
40
-
41
-
42
-
43
-
44
-
45
-
46
-
47
-
48
-
49
-
50
-
51
-
52
-
53
-
54
-
55
-
56
-
57
-
58
-
59
-
60
 |
 |