Toshiba Portege M500 PPM51C-GF201EF Users Manual Canada; English - Page 180
Battery Charger, USB floppy disk drive (USB FDD Kit), External monitor, Operating Basics, The Keyboard
 |
View all Toshiba Portege M500 PPM51C-GF201EF manuals
Add to My Manuals
Save this manual to your list of manuals |
Page 180 highlights
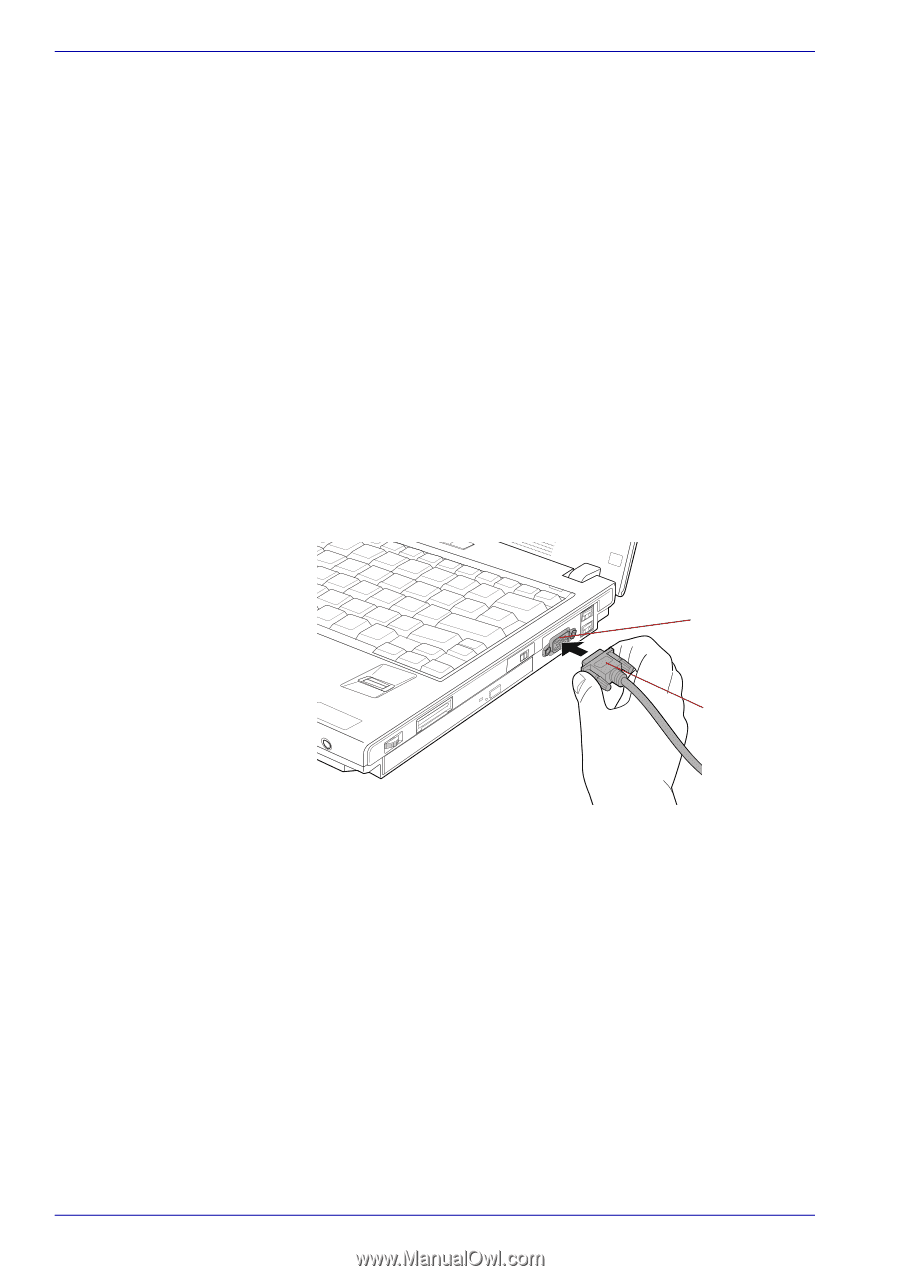
Optional Devices Battery Charger The battery charger provides a convenient way to charge battery packs without requiring the use of your computer. The battery charger holds up to two battery packs (lithium ion). USB floppy disk drive (USB FDD Kit) The USB floppy disk drive module can be connected to the USB port. For details on connecting the USB floppy disk drive module, refer to Chapter 4, Operating Basics. External monitor An external analog monitor can be connected to the external monitor port on the computer. To connect a monitor, follow the steps below. 1. Turn the computer's power off. 2. Connect the monitor cable to the external monitor port and tighten the screws on the left and right hand side. External monitor port Monitor cable Figure 8-15 Connecting the monitor cable to the external monitor port 3. Turn the monitor's power on. 4. Turn the computer's power on. When you turn on the power, the computer automatically recognizes the monitor and determines whether it is color or monochrome. However, the Windows Desktop appears on a display device that you used last time to shut down your computer, if the display device exists when you turn on the power. To change the display settings, press Fn + F5. If you disconnect the external monitor before you turn the computer's power off, be sure to press Fn + F5 to switch to the internal display. Refer to Chapter 5, The Keyboard, for details on using hot keys to change the display setting. 8-16 User's Manual
-
 1
1 -
2
-
3
-
4
-
5
-
6
-
7
-
8
-
9
-
10
-
11
-
12
-
13
-
14
-
15
-
16
-
17
-
18
-
19
-
20
-
21
-
22
-
23
-
24
-
25
-
26
-
27
-
28
-
29
-
30
-
31
-
32
-
33
-
34
-
35
-
36
-
37
-
38
-
39
-
40
-
41
-
42
-
43
-
44
-
45
-
46
-
47
-
48
-
49
-
50
-
51
-
52
-
53
-
54
-
55
-
56
-
57
-
58
-
59
-
60
-
61
-
62
-
63
-
64
-
65
-
66
-
67
-
68
-
69
-
70
-
71
-
72
-
73
-
74
-
75
-
76
-
77
-
78
-
79
-
80
-
81
-
82
-
83
-
84
-
85
-
86
-
87
-
88
-
89
-
90
-
91
-
92
-
93
-
94
-
95
-
96
-
97
-
98
-
99
-
100
-
101
-
102
-
103
-
104
-
105
-
106
-
107
-
108
-
109
-
110
-
111
-
112
-
113
-
114
-
115
-
116
-
117
-
118
-
119
-
120
-
121
-
122
-
123
-
124
-
125
-
126
-
127
-
128
-
129
-
130
-
131
-
132
-
133
-
134
-
135
-
136
-
137
-
138
-
139
-
140
-
141
-
142
-
143
-
144
-
145
-
146
-
147
-
148
-
149
-
150
-
151
-
152
-
153
-
154
-
155
-
156
-
157
-
158
-
159
-
160
-
161
-
162
-
163
-
164
-
165
-
166
-
167
-
168
-
169
-
170
-
171
-
172
-
173
-
174
-
 175
175 -
 176
176 -
 177
177 -
 178
178 -
 179
179 -
 180
180 -
 181
181 -
 182
182 -
 183
183 -
 184
184 -
 185
185 -
186
-
187
-
188
-
189
-
190
-
191
-
192
-
193
-
194
-
195
-
196
-
197
-
198
-
199
-
200
-
201
-
202
-
203
-
204
-
205
-
206
-
207
-
208
-
209
-
210
-
211
-
212
-
213
-
214
-
215
-
216
-
217
-
218
-
219
-
220
-
221
-
222
-
223
-
224
-
225
-
226
-
227
-
228
-
229
-
230
-
231
-
232
-
233
-
234
-
235
-
236
-
237
-
238
-
239
-
240
-
241
-
242
-
243
-
244
-
245
-
246
-
247
-
248
-
249
-
250
-
251
-
252
-
253
-
254
-
255
-
256
-
257
-
258
-
259
-
260
-
261
-
262
-
263
-
264
-
265
-
266
-
267
-
268
-
269
-
270
-
271
-
272
-
273
-
274
 |
 |