Toshiba Satellite L35-S2316 Toshiba Online User's Guide for Satellite L35 - Page 96
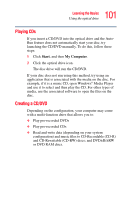
Writable discs, CDs, Drive in-use indicator light, Eject button, Manual eject hole
 |
View all Toshiba Satellite L35-S2316 manuals
Add to My Manuals
Save this manual to your list of manuals |
Page 96 highlights
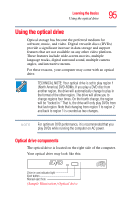
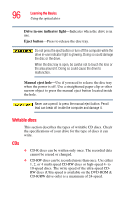
96 Learning the Basics Using the optical drive Drive in-use indicator light-Indicates when the drive is in use. Eject button-Press to release the disc tray. Do not press the eject button or turn off the computer while the drive in-use indicator light is glowing. Doing so could damage the disc or the drive. When the disc tray is open, be careful not to touch the lens or the area around it. Doing so could cause the drive to malfunction. Manual eject hole-Use if you need to release the disc tray when the power is off. Use a straightened paper clip or other narrow object to press the manual eject button located inside the hole. Never use a pencil to press the manual eject button. Pencil lead can break off inside the computer and damage it. Writable discs This section describes the types of writable CD discs. Check the specifications of your drive for the type of discs it can write. CDs ❖ CD-R discs can be written only once. The recorded data cannot be erased or changed. ❖ CD-RW discs can be recorded more than once. Use either 1, 2, or 4 multi speed CD-RW discs or high-speed 4- to 10-speed discs. The write speed of the ultra-speed CDRW discs (Ultra-speed is available on the DVD-ROM & CD-R/RW drive only) is a maximum of 24-speed.
-
 1
1 -
2
-
3
-
4
-
5
-
6
-
7
-
8
-
9
-
10
-
11
-
12
-
13
-
14
-
15
-
16
-
17
-
18
-
19
-
20
-
21
-
22
-
23
-
24
-
25
-
26
-
27
-
28
-
29
-
30
-
31
-
32
-
33
-
34
-
35
-
36
-
37
-
38
-
39
-
40
-
41
-
42
-
43
-
44
-
45
-
46
-
47
-
48
-
49
-
50
-
51
-
52
-
53
-
54
-
55
-
56
-
57
-
58
-
59
-
60
-
61
-
62
-
63
-
64
-
65
-
66
-
67
-
68
-
69
-
70
-
71
-
72
-
73
-
74
-
75
-
76
-
77
-
78
-
79
-
80
-
81
-
82
-
83
-
84
-
85
-
86
-
87
-
88
-
89
-
90
-
 91
91 -
 92
92 -
 93
93 -
 94
94 -
 95
95 -
 96
96 -
 97
97 -
 98
98 -
 99
99 -
 100
100 -
 101
101 -
102
-
103
-
104
-
105
-
106
-
107
-
108
-
109
-
110
-
111
-
112
-
113
-
114
-
115
-
116
-
117
-
118
-
119
-
120
-
121
-
122
-
123
-
124
-
125
-
126
-
127
-
128
-
129
-
130
-
131
-
132
-
133
-
134
-
135
-
136
-
137
-
138
-
139
-
140
-
141
-
142
-
143
-
144
-
145
-
146
-
147
-
148
-
149
-
150
-
151
-
152
-
153
-
154
-
155
-
156
-
157
-
158
-
159
-
160
-
161
-
162
-
163
-
164
-
165
-
166
-
167
-
168
-
169
-
170
-
171
-
172
-
173
-
174
-
175
-
176
-
177
-
178
-
179
-
180
-
181
-
182
-
183
-
184
-
185
-
186
-
187
-
188
-
189
-
190
-
191
-
192
-
193
-
194
-
195
-
196
-
197
-
198
-
199
-
200
-
201
-
202
-
203
-
204
-
205
-
206
-
207
-
208
-
209
-
210
-
211
-
212
-
213
-
214
-
215
-
216
-
217
-
218
-
219
-
220
-
221
-
222
-
223
-
224
-
225
-
226
-
227
-
228
-
229
-
230
-
231
-
232
-
233
-
234
-
235
-
236
-
237
-
238
-
239
-
240
-
241
-
242
-
243
-
244
-
245
-
246
-
247
-
248
-
249
-
250
-
251
-
252
-
253
-
254
-
255
-
256
-
257
-
258
-
259
-
260
-
261
-
262
-
263
-
264
 |
 |