Toshiba Satellite Pro S750 PSSERC-09V004 Users Manual Canada; English - Page 78
Removing a memory media, Safely Remove Hardware, memory media
 |
View all Toshiba Satellite Pro S750 PSSERC-09V004 manuals
Add to My Manuals
Save this manual to your list of manuals |
Page 78 highlights
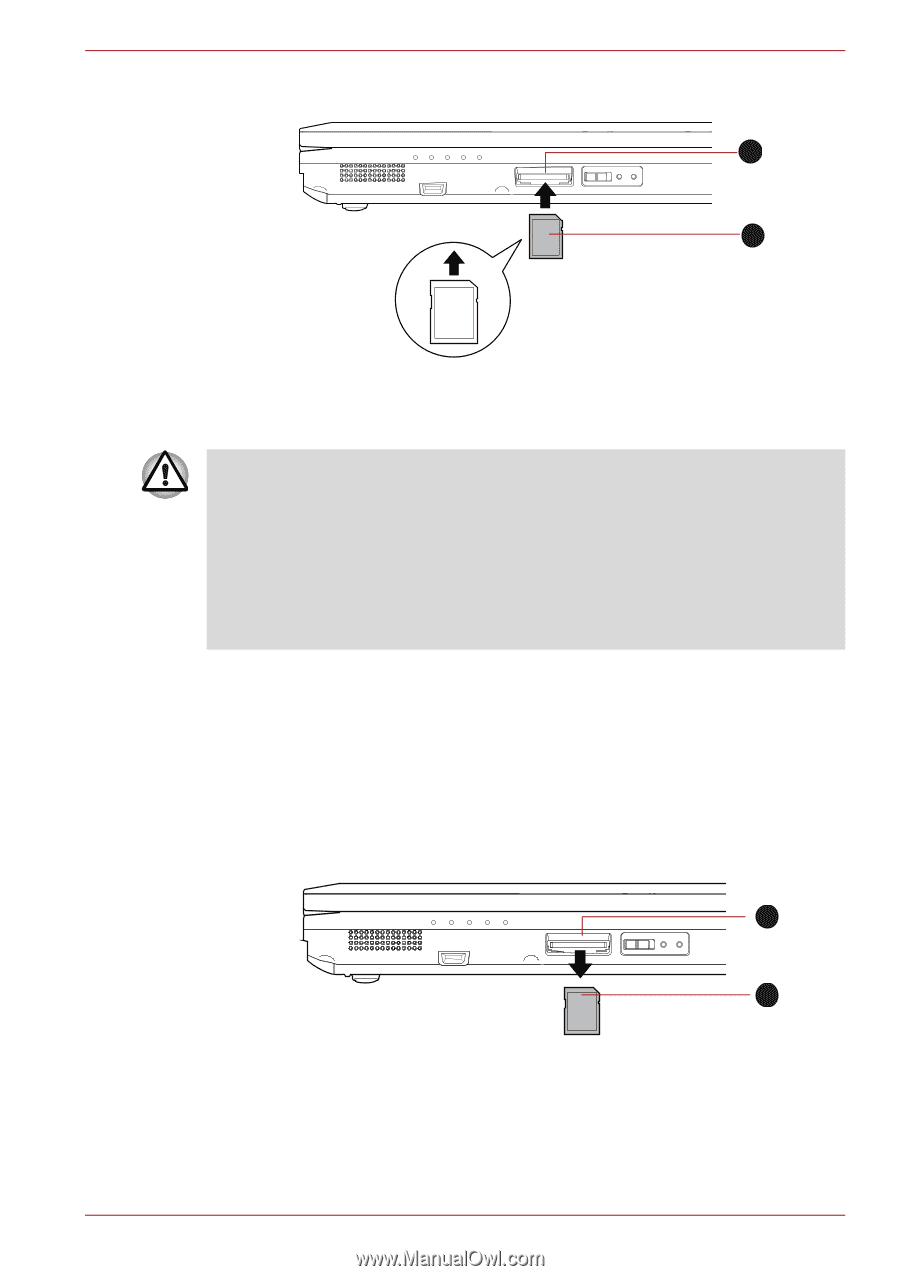
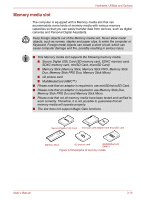
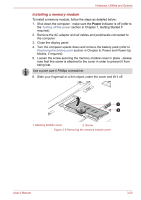
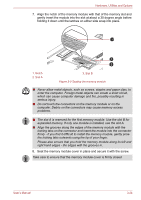
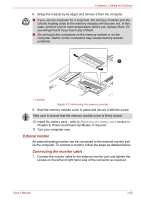
Hardware, Utilities and Options 3. Press the memory media gently to ensure a firm connection is made. 1 2 1. Memory media slot 2. Memory media Figure 3-6 Inserting a memory media ■ Make sure memory media is oriented properly before you insert it. If you insert the media in wrong direction, you may not be able to remove it. ■ When inserting memory media, do not touch the metal contacts. You could expose the storage area to static electricity, which can destroy data. ■ Do not turn the computer off or switch to Sleep Mode or Hibernation Mode while files are being copied - doing so may cause data to be lost. Removing a memory media The following instructions apply to all types of supported media devices. To remove a memory media, follow the steps as detailed below: 1. Open the Safely Remove Hardware icon on the Windows Taskbar. 2. Point to memory media and click the left Touch Pad control button. 3. Press the memory media to partially extend it out of the computer. 4. Grasp the media and remove it. 1 2 1. Memory media slot 2. Memory media Figure 3-7 Removing memory media User's Manual 3-21
-
 1
1 -
2
-
3
-
4
-
5
-
6
-
7
-
8
-
9
-
10
-
11
-
12
-
13
-
14
-
15
-
16
-
17
-
18
-
19
-
20
-
21
-
22
-
23
-
24
-
25
-
26
-
27
-
28
-
29
-
30
-
31
-
32
-
33
-
34
-
35
-
36
-
37
-
38
-
39
-
40
-
41
-
42
-
43
-
44
-
45
-
46
-
47
-
48
-
49
-
50
-
51
-
52
-
53
-
54
-
55
-
56
-
57
-
58
-
59
-
60
-
61
-
62
-
63
-
64
-
65
-
66
-
67
-
68
-
69
-
70
-
71
-
72
-
 73
73 -
 74
74 -
 75
75 -
 76
76 -
 77
77 -
 78
78 -
 79
79 -
 80
80 -
 81
81 -
 82
82 -
 83
83 -
84
-
85
-
86
-
87
-
88
-
89
-
90
-
91
-
92
-
93
-
94
-
95
-
96
-
97
-
98
-
99
-
100
-
101
-
102
-
103
-
104
-
105
-
106
-
107
-
108
-
109
-
110
-
111
-
112
-
113
-
114
-
115
-
116
-
117
-
118
-
119
-
120
-
121
-
122
-
123
-
124
-
125
-
126
-
127
-
128
-
129
-
130
-
131
-
132
-
133
-
134
-
135
-
136
-
137
-
138
-
139
-
140
-
141
-
142
-
143
-
144
-
145
-
146
-
147
-
148
-
149
-
150
-
151
-
152
-
153
-
154
-
155
-
156
-
157
-
158
-
159
-
160
-
161
-
162
-
163
-
164
-
165
-
166
-
167
-
168
-
169
-
170
-
171
-
172
-
173
-
174
-
175
-
176
-
177
-
178
-
179
-
180
-
181
-
182
-
183
-
184
-
185
-
186
-
187
-
188
-
189
-
190
-
191
-
192
-
193
-
194
-
195
-
196
-
197
-
198
-
199
-
200
-
201
-
202
-
203
-
204
 |
 |