Toshiba Tecra A6-S513 User Guide - Page 191
Fingerprint Enrollment, Enroll or Edit Fingerprints, Fingerprints
 |
View all Toshiba Tecra A6-S513 manuals
Add to My Manuals
Save this manual to your list of manuals |
Page 191 highlights
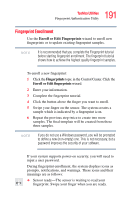
191 Toshiba Utilities Fingerprint Authentication Utility Fingerprint Enrollment Use the Enroll or Edit Fingerprints wizard to enroll new fingerprints or to update existing fingerprint samples. NOTE It is recommended that you complete the Fingerprint tutorial before starting fingerprint enrollment. The fingerprint tutorial shows how to achieve the highest quality fingerprint samples. To enroll a new fingerprint: 1 Click the Fingerprints topic in the Control Center. Click the Enroll or Edit fingerprints wizard. 2 Enter your information. 3 Complete the fingerprint tutorial. 4 Click the button above the finger you want to enroll. 5 Swipe your finger on the sensor. The system creates a sample which is indicated by a fingerprint icon. 6 Repeat the previous step twice to create two more samples. The final template will be created from these three samples. NOTE If you do not use a Windows password, you will be prompted to define a new (non-empty) one. This is not necessary, but a password improves the security of your software. If your system supports power-on security, you will need to input a user password. During fingerprint enrollment, the system displays icons as prompts, notifications, and warnings. These icons and their meanings are as follows: ❖ Sensor ready-The sensor is waiting to read your fingerprint. Swipe your finger when you are ready.
-
 1
1 -
2
-
3
-
4
-
5
-
6
-
7
-
8
-
9
-
10
-
11
-
12
-
13
-
14
-
15
-
16
-
17
-
18
-
19
-
20
-
21
-
22
-
23
-
24
-
25
-
26
-
27
-
28
-
29
-
30
-
31
-
32
-
33
-
34
-
35
-
36
-
37
-
38
-
39
-
40
-
41
-
42
-
43
-
44
-
45
-
46
-
47
-
48
-
49
-
50
-
51
-
52
-
53
-
54
-
55
-
56
-
57
-
58
-
59
-
60
-
61
-
62
-
63
-
64
-
65
-
66
-
67
-
68
-
69
-
70
-
71
-
72
-
73
-
74
-
75
-
76
-
77
-
78
-
79
-
80
-
81
-
82
-
83
-
84
-
85
-
86
-
87
-
88
-
89
-
90
-
91
-
92
-
93
-
94
-
95
-
96
-
97
-
98
-
99
-
100
-
101
-
102
-
103
-
104
-
105
-
106
-
107
-
108
-
109
-
110
-
111
-
112
-
113
-
114
-
115
-
116
-
117
-
118
-
119
-
120
-
121
-
122
-
123
-
124
-
125
-
126
-
127
-
128
-
129
-
130
-
131
-
132
-
133
-
134
-
135
-
136
-
137
-
138
-
139
-
140
-
141
-
142
-
143
-
144
-
145
-
146
-
147
-
148
-
149
-
150
-
151
-
152
-
153
-
154
-
155
-
156
-
157
-
158
-
159
-
160
-
161
-
162
-
163
-
164
-
165
-
166
-
167
-
168
-
169
-
170
-
171
-
172
-
173
-
174
-
175
-
176
-
177
-
178
-
179
-
180
-
181
-
182
-
183
-
184
-
185
-
 186
186 -
 187
187 -
 188
188 -
 189
189 -
 190
190 -
 191
191 -
 192
192 -
 193
193 -
 194
194 -
 195
195 -
 196
196 -
197
-
198
-
199
-
200
-
201
-
202
-
203
-
204
-
205
-
206
-
207
-
208
-
209
-
210
-
211
-
212
-
213
-
214
-
215
-
216
-
217
-
218
-
219
-
220
-
221
-
222
-
223
-
224
-
225
-
226
-
227
-
228
-
229
-
230
-
231
-
232
-
233
-
234
-
235
-
236
-
237
-
238
-
239
-
240
-
241
-
242
-
243
-
244
-
245
-
246
-
247
-
248
-
249
-
250
-
251
-
252
-
253
-
254
-
255
-
256
-
257
-
258
-
259
-
260
-
261
-
262
-
263
-
264
-
265
-
266
-
267
-
268
-
269
-
270
-
271
-
272
-
273
-
274
-
275
-
276
-
277
-
278
-
279
-
280
-
281
-
282
-
283
-
284
-
285
-
286
-
287
-
288
-
289
-
290
-
291
-
292
-
293
-
294
-
295
-
296
-
297
-
298
-
299
-
300
-
301
 |
 |