Toshiba Tecra C50-C1510 Users Guide for A50-C / C50-C / R50-C / Z50-C English - Page 86
Removing a Smart Card, External Display, Connecting an external display
 |
View all Toshiba Tecra C50-C1510 manuals
Add to My Manuals
Save this manual to your list of manuals |
Page 86 highlights
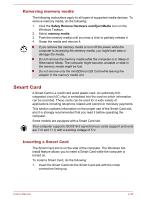
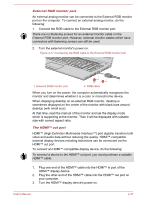
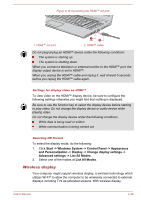
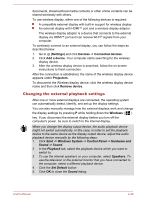
2. Press the Smart Card gently to ensure a firm connection is made. The computer will identify the Smart Card and display an icon in the Windows Taskbar. When inserting a Smart Card into the Smart Card slot, make sure to confirm that the card is oriented correctly before inserting. Insert the Smart Card until it reaches the end of the Smart Card slot. The Smart Card is partially extended beyond the chassis edge. Do not attempt to insert it further. Always remove the Smart Card from the Smart Card slot before moving the computer. Remove the Smart Card after use. Failure to follow these instructions might result in damage to the computer and/or damage to the Smart Card. 3. After inserting the Smart Card, you should refer to its documentation and also check the configuration in Windows to ensure that it is correct. Removing a Smart Card To remove a Smart Card, do the following: 1. Click the Safely Remove Hardware and Eject Media icon on the Windows Taskbar. Before removing the Smart Card, confirm that the Smart Card is not working with any program or system. Be careful not to bend the Smart Card while removing it from the computer. 2. Point to Smart Card and click the left Touch Pad control button. 3. Grasp the Smart Card and remove it. External Display Your computer video capabilities can be enhanced with additional displays. External displays allow you to share your desktop or extend the desktop area. As the port operation of all external monitors have not been confirmed, some display devices might not function properly. Connecting an external display Your computer comes with a built-in display, but you can also connect other external displays via available ports on the computer. User's Manual 4-36
-
 1
1 -
2
-
3
-
4
-
5
-
6
-
7
-
8
-
9
-
10
-
11
-
12
-
13
-
14
-
15
-
16
-
17
-
18
-
19
-
20
-
21
-
22
-
23
-
24
-
25
-
26
-
27
-
28
-
29
-
30
-
31
-
32
-
33
-
34
-
35
-
36
-
37
-
38
-
39
-
40
-
41
-
42
-
43
-
44
-
45
-
46
-
47
-
48
-
49
-
50
-
51
-
52
-
53
-
54
-
55
-
56
-
57
-
58
-
59
-
60
-
61
-
62
-
63
-
64
-
65
-
66
-
67
-
68
-
69
-
70
-
71
-
72
-
73
-
74
-
75
-
76
-
77
-
78
-
79
-
80
-
 81
81 -
 82
82 -
 83
83 -
 84
84 -
 85
85 -
 86
86 -
 87
87 -
 88
88 -
 89
89 -
 90
90 -
 91
91 -
92
-
93
-
94
-
95
-
96
-
97
-
98
-
99
-
100
-
101
-
102
-
103
-
104
-
105
-
106
-
107
-
108
-
109
-
110
-
111
-
112
-
113
-
114
-
115
-
116
-
117
-
118
-
119
-
120
-
121
-
122
-
123
-
124
-
125
-
126
-
127
-
128
-
129
-
130
-
131
-
132
-
133
-
134
-
135
-
136
-
137
-
138
-
139
-
140
-
141
-
142
-
143
-
144
-
145
-
146
-
147
-
148
-
149
-
150
-
151
-
152
-
153
-
154
-
155
-
156
-
157
-
158
-
159
-
160
-
161
-
162
-
163
-
164
-
165
-
166
-
167
-
168
-
169
-
170
-
171
-
172
-
173
-
174
-
175
-
176
-
177
-
178
-
179
-
180
-
181
-
182
-
183
 |
 |
