Vtech i5868 User Manual - Page 16
Basic Operation, Handset Menu - review
 |
UPC - 735078006875
View all Vtech i5868 manuals
Add to My Manuals
Save this manual to your list of manuals |
Page 16 highlights
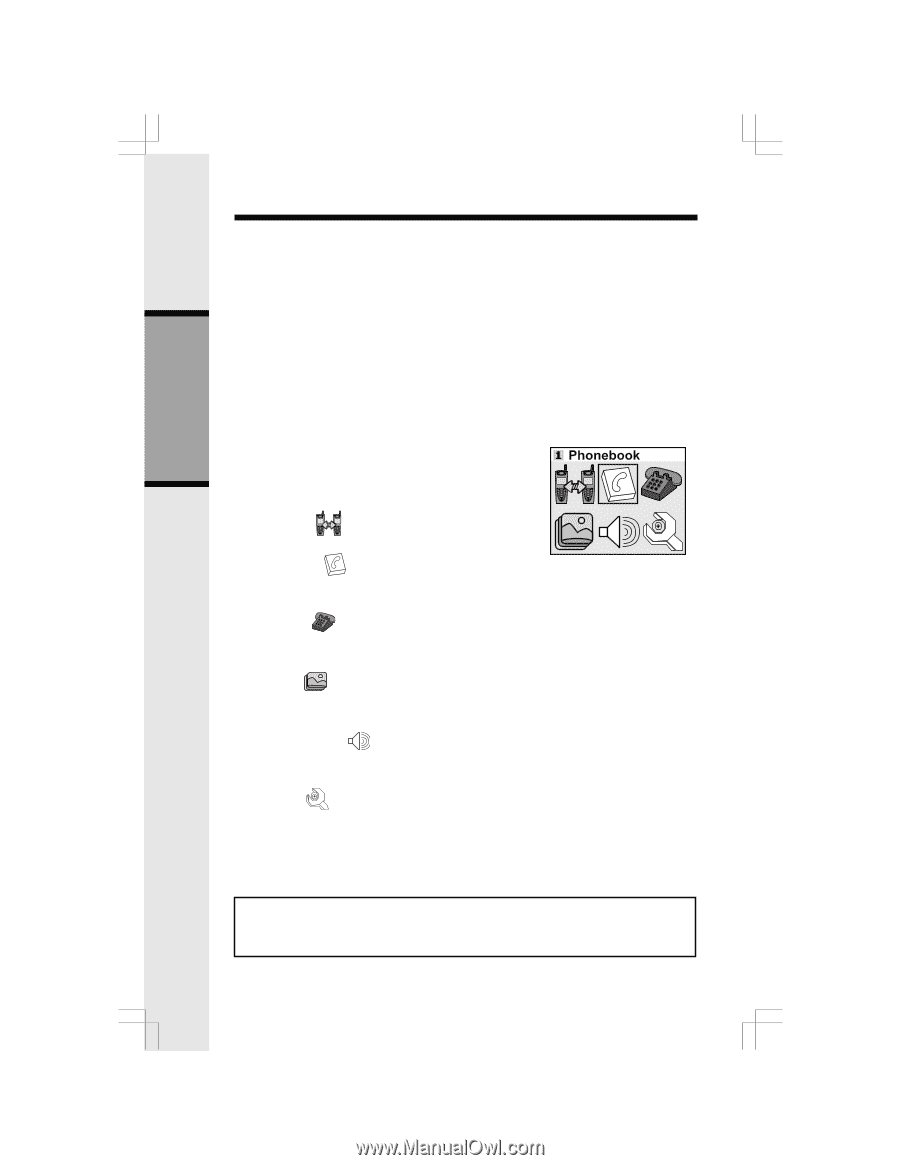
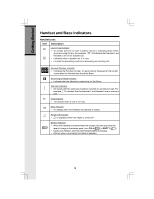
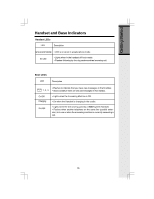
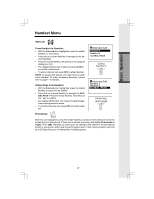
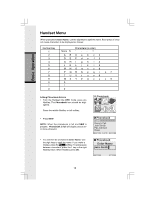
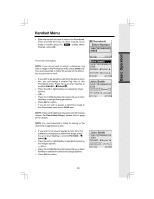
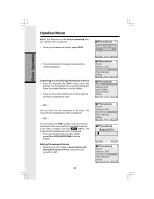
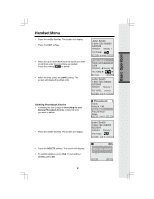
Handset Menu Basic Operation Navigation Keys (NavKeys): • Press any NavKey to display the Main Menu. Press the NavKeys (left, right, up and down) to maneuver through menus. Press the middle NavKey to select the highlighted menu item. Menu Shortcuts • When viewing menu options, pressing the corresponding number on the dialing pad will automatically select that item. • For example, in the Main Menu screen, pressing the 1 key will automatically take you to the Intercom menu screen, pressing the 6 key will automatically take you to the Settings menu screen, and so on through all 6 menu options. • Similarly, when viewing a list menu, pressing the corresponding number will automatically select that option (and save it, if necessary). For example, pressing the 2 key when in the Appearance screen will select and save the Green option. Main Menu Press any NavKey to display the 6 menu options. Then use the Navkeys to navigate to the desired menu option. You can also press the dialing key assigned for each icon (see information below for the assigned key numbers), to activate that menu option. Intercom (dialing key 1) - Talk between Handsets(s), or use to page the cordless Handset(s). Phonebook (dialing key 2) - Enter and retrieve up to 50 names and phone numbers, each can be assigned a distinctive ring and image. Calls Log (dialing key 3) - Review Caller ID data; select and dial from the Caller ID data or from the Redial list which contains the last 10 phone numbers dialed. Pictures (dialing key 4) - Choose from the many preset images or download new images into the Handset to be used as your idle screen (wall paper) or assign an image to a specific phonebook directory. Sounds & Alerts (dialing key 5) - Record custom sound clips, turn ringer and vibrate feature on and off, select main ringer tone, turn tones (low battery, keypad, and out-of-range) on or off. Settings (dialing key 6) - Set the time, adjust screen contrast, reset to de- fault settings, change color of the text, register new Handsets, change screen language. Press the NavKeys to navigate to the desired menu option, then press the middle NavKey to select the highlifhted option. You can also press the dialing key assigned to each menu item. The top menu is assigned to dialing key 1 and so forth on down the menu. NOTE: After 30 seconds of inactivity, your Handset will go into screen saver mode. While in screen saver mode the Handset will display a clock and new calls count (if you have new calls). To illuminate the screen, read the clock and see the new calls count, simply press the volume button on the right side of the Handset. 16
-
 1
1 -
2
-
3
-
4
-
5
-
6
-
7
-
8
-
9
-
10
-
 11
11 -
 12
12 -
 13
13 -
 14
14 -
 15
15 -
 16
16 -
 17
17 -
 18
18 -
 19
19 -
 20
20 -
 21
21 -
22
-
23
-
24
-
25
-
26
-
27
-
28
-
29
-
30
-
31
-
32
-
33
-
34
-
35
-
36
-
37
-
38
-
39
-
40
-
41
-
42
-
43
-
44
-
45
-
46
-
47
-
48
-
49
 |
 |