Weider 4990 I Uk Manual - Page 22
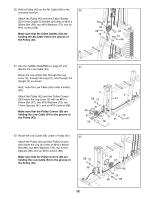
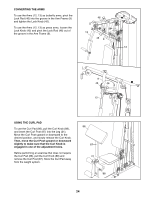
Attach the Curl Pad 86 to the Curl Post 87
 |
View all Weider 4990 I manuals
Add to My Manuals
Save this manual to your list of manuals |
Page 22 highlights
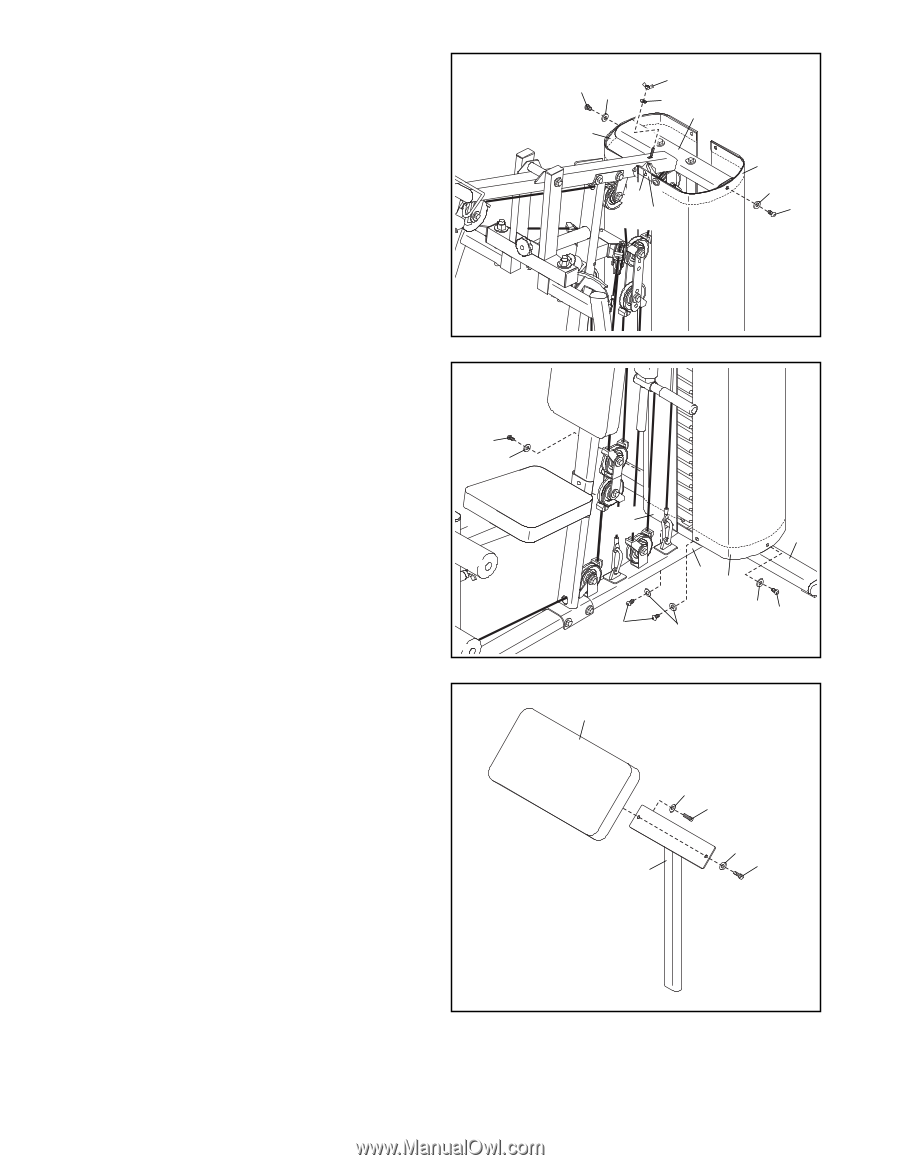
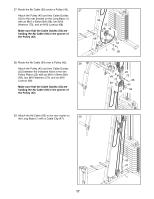
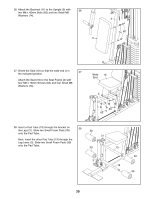
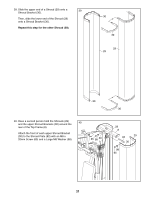
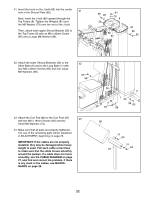
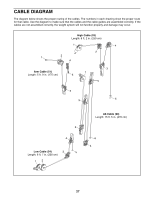
41. Insert the hook on the J-bolt (80) into the center hole in the Shroud Plate (82). 41 Next, insert the J-bolt (80) upward through the Top Frame (8). Tighten the Wingnut (81) and the M6 Washer (79) onto the end of the J-bolt. Then, attach each upper Shroud Bracket (30) to the Top Frame (8) with an M8 x 20mm Screw (65) and a Large M8 Washer (98). 65 98 30 81 79 8 80 82 30 98 65 42. Attach the lower Shroud Brackets (30) to the Short Base (6) and to the Long Base (1) with four M8 x 20mm Screws (65) and four Large M8 Washers (98). 42 65 98 43. Attach the Curl Pad (86) to the Curl Post (87) 43 with two M8 x 16mm Screws (63) and two Small M8 Washers (74). 44. Make sure that all parts are properly tightened. The use of the remaining parts will be explained in ADJUSTMENT, beginning on page 23. IMPORTANT: If the cables are not properly installed, they may be damaged when heavy weight is used. Pull each cable a few times to make sure that the cable moves smoothly around the pulleys. If a cable does not move smoothly, see the CABLE DIAGRAM on page 27, and find and correct the problem. If there is any slack in the cables, see MAINTENANCE on page 26. 30 6 1 30 65 98 98 65 86 74 63 74 87 63 22
-
 1
1 -
2
-
3
-
4
-
5
-
6
-
7
-
8
-
9
-
10
-
11
-
12
-
13
-
14
-
15
-
16
-
 17
17 -
 18
18 -
 19
19 -
 20
20 -
 21
21 -
 22
22 -
 23
23 -
 24
24 -
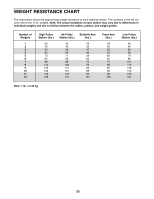 25
25 -
 26
26 -
 27
27 -
28
-
29
-
30
-
31
-
32
 |
 |