Weider 7000 Crosstrainer English Manual - Page 18
Bracket Assemblies
 |
View all Weider 7000 Crosstrainer manuals
Add to My Manuals
Save this manual to your list of manuals |
Page 18 highlights
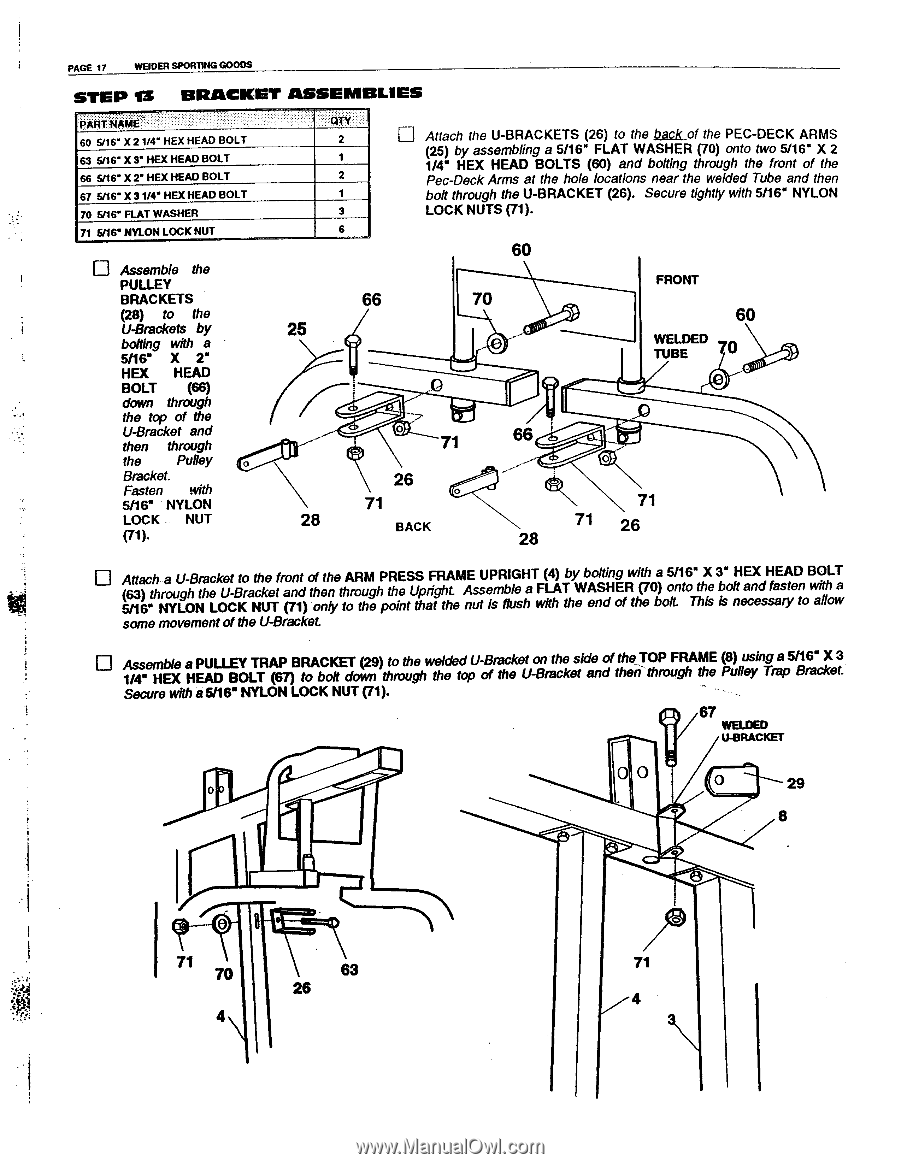
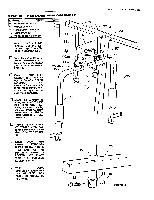
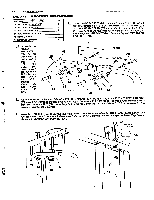
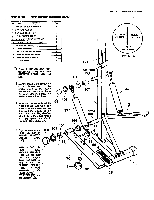
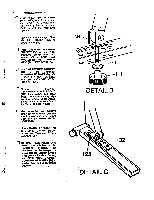
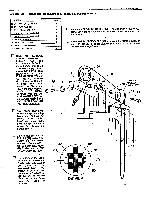
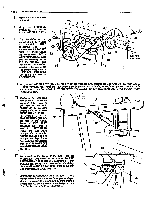
PAGE 17 WELDER SPORTING GOODS STEP 13 BRACKET ASSEMBLIES PARTNAME ,• 60 5/16X21/4" HEX HEAD BOLT 63 5/16" X 3" HEX HEAD BOLT 66 6116" X 2" HEX HEAD BOLT 67 5116X31/4" HEX HEAD BOLT 70 5116" FLAT WASHER :::QTY.: , 2 1 2 1 3 Attach the U-BRACKETS (26) to the back of the PEC-DECK ARMS (25) by assembling a 5/16" FLAT WASHER (70) onto two 5/16" X 2 1/4" HEX HEAD BOLTS (60) and bolting through the front of the Pec-Deck Arms at the hole locations near the welded Tube and then bolt through the U-BRACKET (26). Secure tightly with 5/16" NYLON LOCK NUTS (71). 71 916" NYLON LOCK NUT 6 Assemble the PULLEY BRACKETS (28) to the U-Brackets by bolting with a 5/16" X 2" HEX HEAD BOLT (66) down through the top of the U-Bracket and then through the Pulley Bracket. Fasten with 5/16' NYLON LOCK NUT (71). 25 GO 28 60 66 70 0 FRONT WELDED TUBE 60 0 001,51 0'0 cb 7- O 71 26 a 71 BACK 66 0; 1.0 71 28 71 26 El Attach a U-Bracket to the front of the ARM PRESS FRAME UPRIGHT (4) by bolting with a 5/16' X 3" HEX HEAD BOLT (63) through the U-Bracket and then through the Upright Assemble a FLAT WASHER (70) onto the bolt and fasten with a 5/16* NYLON LOCK NUT (71) only to the point that the nut is flush with the end of the bolt. This is necessary to allow some movement of the U-Bracket u Assemble a PULLEY TRAP BRACKET (29) to the welded U-Bracket on the side of the TOP FRAME (8) using a 5/16' X 3 1/4" HEX HEAD BOLT (67) to bolt down through the top of the U-Bracket and then- through the Pulley Trap Bracket. Secure with a 5/16" NYLON LOCK NUT (71). 1 67 WELDED U-BRACKET 0 29 8 71 70 63 71 26 4
-
 1
1 -
2
-
3
-
4
-
5
-
6
-
7
-
8
-
9
-
10
-
11
-
12
-
 13
13 -
 14
14 -
 15
15 -
 16
16 -
 17
17 -
 18
18 -
 19
19 -
 20
20 -
 21
21 -
 22
22 -
 23
23 -
24
-
25
-
26
-
27
-
28
 |
 |