Xerox C2424 User Guide Section 5: Printing - Page 50
Printing Custom Size Paper from Tray 1, Change, Custom, Custom Width W, Custom Height H
 |
UPC - 095205676532
View all Xerox C2424 manuals
Add to My Manuals
Save this manual to your list of manuals |
Page 50 highlights
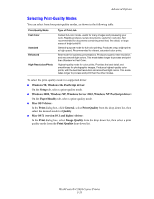
Custom Size Paper Printing Custom Size Paper from Tray 1 1. Insert custom size paper into Tray 1 as follows: ■ Single-sided printing: Insert the side to be printed facedown with the top of page against the roller. ■ 2-sided printing: Insert side one faceup with the bottom of the page against the roller. 2. Adjust the paper guides to fit against the paper. 2424-041 3. At the control panel, set the custom paper size. The Custom Width (W) is the distance between the paper guides. The Custom Height (H) is the other dimension. a. Select Change, then press the Enter button. b. Select Custom for paper size, then press the Enter button. c. If the Custom Width (W) is correct, press the Enter button. Otherwise, select Change, press the Enter button, scroll up or down to the desired width, then press the Enter button. d. If the Custom Height (H) is correct, press the Enter button. Otherwise, select Change, press the Enter button, scroll up or down to the desired height, then press the Enter button. e. Select the appropriate paper type, then press the Enter button. WorkCentre® C2424 Copier-Printer 5-50
-
 1
1 -
2
-
3
-
4
-
5
-
6
-
7
-
8
-
9
-
10
-
11
-
12
-
13
-
14
-
15
-
16
-
17
-
18
-
19
-
20
-
21
-
22
-
23
-
24
-
25
-
26
-
27
-
28
-
29
-
30
-
31
-
32
-
33
-
34
-
35
-
36
-
37
-
38
-
39
-
40
-
41
-
42
-
43
-
44
-
 45
45 -
 46
46 -
 47
47 -
 48
48 -
 49
49 -
 50
50 -
 51
51 -
 52
52 -
 53
53 -
 54
54 -
 55
55 -
56
-
57
-
58
-
59
-
60
-
61
-
62
-
63
-
64
-
65
 |
 |
