Yamaha AW4416 Owner's Manual - Page 231
Automix punch-in/out
 |
View all Yamaha AW4416 manuals
Add to My Manuals
Save this manual to your list of manuals |
Page 231 highlights
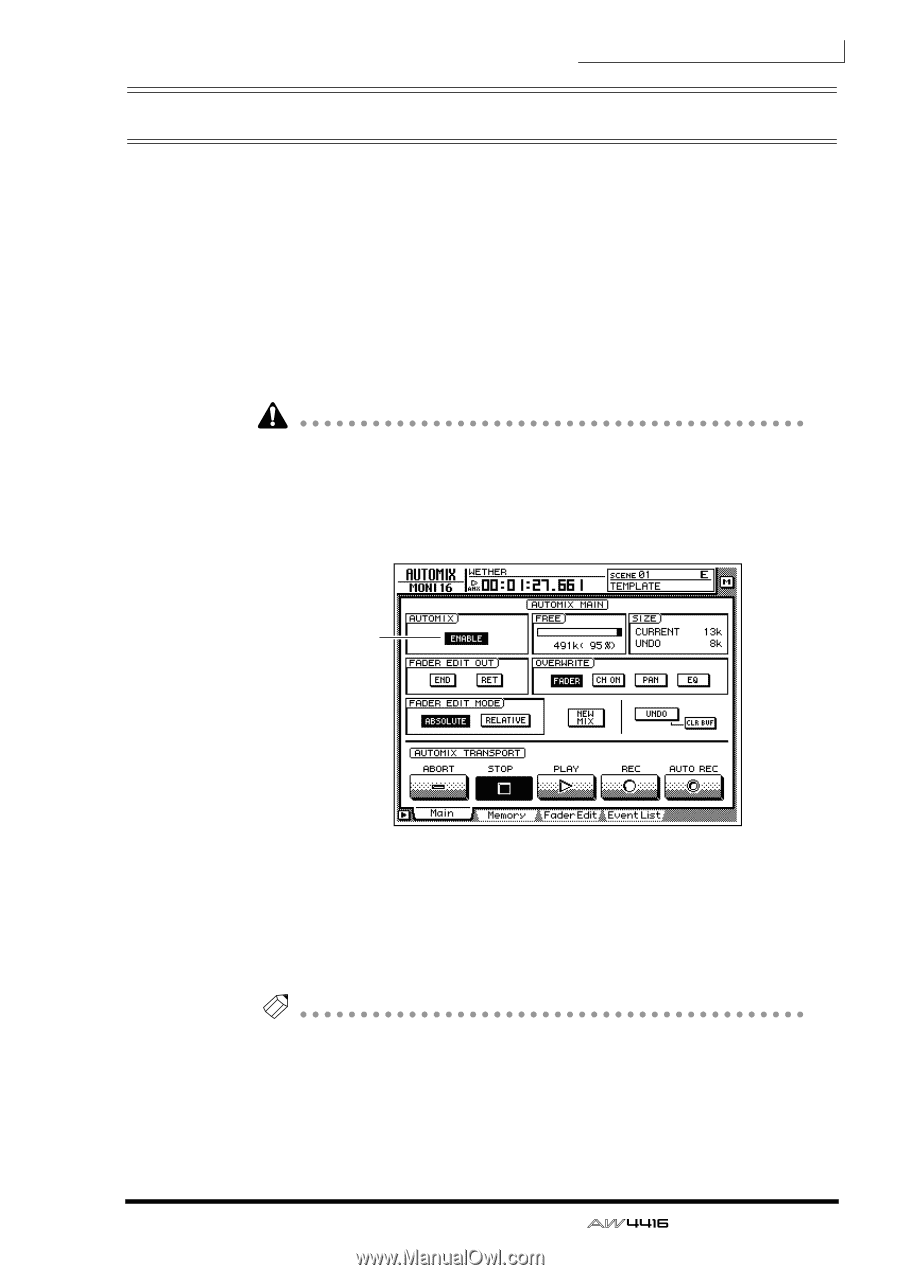
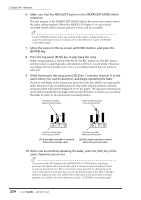
Chapter14-Automix Automix punch-in/out If you make a mistake while recording the automix, you can re-record just the location of your error (punch-in/out). As an example here, we will explain how to punch-in/out to re-record the pan operations of monitor channel 1 that you already recorded. When punching-in/out on only a specific channel, it is convenient to use the on-screen AUTO REC button instead of the on-screen REC button. 1. Press the [HOME] key in the FADER MODE section, and the [MONI] key in the MIXING LAYER section. 2. Locate the song to a point slightly earlier than the location where you wish to punch-in. If you will be punching-in/out repeatedly on the automix, it is convenient to set a locate point at a location earlier than the intended punch-in. For details on locate points, refer to page 109. 3. Press the [AUTOMIX] key ¡ [F1] key. Make sure that the AUTOMIX button is displayed as "ENABLE." On 4. Move the cursor to the OVERWRITE field. Turn the PAN button on, and the remaining buttons (FADER, CH ON, EQ) off. 5. Move the cursor to the AUTO REC button in the lower right of the screen, and press the [ENTER] key. The AUTO REC button will turn on. Note When you use the AUTO REC button instead of the REC button, you can select the recording channel after placing automix in record-ready mode. It is not necessary to use the [SEL] keys to select the channel beforehand. 221 - Operation Guide
-
 1
1 -
2
-
3
-
4
-
5
-
6
-
7
-
8
-
9
-
10
-
11
-
12
-
13
-
14
-
15
-
16
-
17
-
18
-
19
-
20
-
21
-
22
-
23
-
24
-
25
-
26
-
27
-
28
-
29
-
30
-
31
-
32
-
33
-
34
-
35
-
36
-
37
-
38
-
39
-
40
-
41
-
42
-
43
-
44
-
45
-
46
-
47
-
48
-
49
-
50
-
51
-
52
-
53
-
54
-
55
-
56
-
57
-
58
-
59
-
60
-
61
-
62
-
63
-
64
-
65
-
66
-
67
-
68
-
69
-
70
-
71
-
72
-
73
-
74
-
75
-
76
-
77
-
78
-
79
-
80
-
81
-
82
-
83
-
84
-
85
-
86
-
87
-
88
-
89
-
90
-
91
-
92
-
93
-
94
-
95
-
96
-
97
-
98
-
99
-
100
-
101
-
102
-
103
-
104
-
105
-
106
-
107
-
108
-
109
-
110
-
111
-
112
-
113
-
114
-
115
-
116
-
117
-
118
-
119
-
120
-
121
-
122
-
123
-
124
-
125
-
126
-
127
-
128
-
129
-
130
-
131
-
132
-
133
-
134
-
135
-
136
-
137
-
138
-
139
-
140
-
141
-
142
-
143
-
144
-
145
-
146
-
147
-
148
-
149
-
150
-
151
-
152
-
153
-
154
-
155
-
156
-
157
-
158
-
159
-
160
-
161
-
162
-
163
-
164
-
165
-
166
-
167
-
168
-
169
-
170
-
171
-
172
-
173
-
174
-
175
-
176
-
177
-
178
-
179
-
180
-
181
-
182
-
183
-
184
-
185
-
186
-
187
-
188
-
189
-
190
-
191
-
192
-
193
-
194
-
195
-
196
-
197
-
198
-
199
-
200
-
201
-
202
-
203
-
204
-
205
-
206
-
207
-
208
-
209
-
210
-
211
-
212
-
213
-
214
-
215
-
216
-
217
-
218
-
219
-
220
-
221
-
222
-
223
-
224
-
225
-
 226
226 -
 227
227 -
 228
228 -
 229
229 -
 230
230 -
 231
231 -
 232
232 -
 233
233 -
 234
234 -
 235
235 -
 236
236 -
237
-
238
-
239
-
240
-
241
-
242
-
243
-
244
-
245
-
246
-
247
-
248
-
249
-
250
-
251
-
252
-
253
-
254
-
255
-
256
-
257
-
258
-
259
-
260
-
261
-
262
-
263
-
264
-
265
-
266
-
267
-
268
-
269
-
270
-
271
-
272
-
273
-
274
-
275
-
276
-
277
-
278
-
279
 |
 |