Yamaha CVP-69 Owner's Manual - Page 82
Start Playback & Recording, Select a Punch-in Mode, Engage the Punch-in Record Ready Mode, Stop
 |
View all Yamaha CVP-69 manuals
Add to My Manuals
Save this manual to your list of manuals |
Page 82 highlights
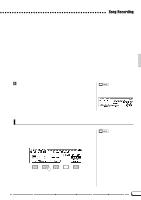
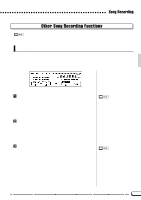
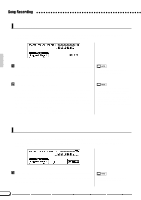
Song Recording VSelect a Punch-in Mode Use the MODE LCD button to select the 1ST KEY or PEDAL punchin mode. 1ST KEY PEDAL Recording will begin with the first key played after the PUNCH IN LCD button is pressed. Recording will begin when the left pedal is pressed after the PUNCH IN LCD button is pressed. • When the PEDAL punch-in mode is selected, the left pedal is used for this function only (the usual pedal function is canceled). BEngage the Punch-in Record Ready Mode Press the PUNCH IN LCD button to engage the punch-in record ready mode - the PUNCH IN button will be highlighted. NStart Playback & Recording Press the [START/STOP] or [o PAUSE] button to start playback from the current pause location, then, if the 1ST KEY mode is selected, begin playing at the point you want to record from. Recording will begin as soon as you begin playing on the keyboard. If the PEDAL mode is selected press the left pedal at the point you want to record from. MStop Recording Press the PUNCH OUT LCD button to stop recording at the point at which you want to "punch out", leaving all data following the punch-out point intact. Use the panel [START/STOP] button to stop recording if you want all data following the punch-out point to be erased. Press the [RECORD] button so that its indicator goes out, or the [EXIT] button, to exit from the punch-in/out record mode. When the PEDAL punch-in mode is selected: • Recording can be started directly by pressing the left pedal while playback is paused (without first pressing the [START/STOP] or [PAUSE] button). • Recording can also be stopped by pressing the left pedal. In this case the data following the punch-out point will be left active. • If you start recording by pressing the left pedal while playback is paused, and stop by the [START/STOP] button, the result will be that all the data after the punch-in point will be erased. (If you stop by using the PUNCH OUT LCD button or the left pedal, only the data between the punch-in and punchout points will be erased.) • If you press the [START/STOP] button or [o PAUSE] button to start recording, and the [START/STOP] button or the PUNCH OUT LCD button to stop recording without actually recording anything in between, the original data will be left untouched. 79
-
 1
1 -
2
-
3
-
4
-
5
-
6
-
7
-
8
-
9
-
10
-
11
-
12
-
13
-
14
-
15
-
16
-
17
-
18
-
19
-
20
-
21
-
22
-
23
-
24
-
25
-
26
-
27
-
28
-
29
-
30
-
31
-
32
-
33
-
34
-
35
-
36
-
37
-
38
-
39
-
40
-
41
-
42
-
43
-
44
-
45
-
46
-
47
-
48
-
49
-
50
-
51
-
52
-
53
-
54
-
55
-
56
-
57
-
58
-
59
-
60
-
61
-
62
-
63
-
64
-
65
-
66
-
67
-
68
-
69
-
70
-
71
-
72
-
73
-
74
-
75
-
76
-
 77
77 -
 78
78 -
 79
79 -
 80
80 -
 81
81 -
 82
82 -
 83
83 -
 84
84 -
 85
85 -
 86
86 -
 87
87 -
88
-
89
-
90
-
91
-
92
-
93
-
94
-
95
-
96
-
97
-
98
-
99
-
100
-
101
-
102
-
103
-
104
-
105
-
106
-
107
-
108
-
109
-
110
-
111
-
112
-
113
-
114
-
115
-
116
-
117
-
118
-
119
-
120
-
121
-
122
-
123
-
124
-
125
-
126
-
127
-
128
-
129
-
130
-
131
-
132
-
133
-
134
-
135
-
136
-
137
-
138
-
139
-
140
-
141
-
142
-
143
-
144
-
145
-
146
-
147
-
148
-
149
-
150
-
151
-
152
-
153
-
154
-
155
-
156
-
157
-
158
-
159
-
160
-
161
-
162
-
163
 |
 |
