Yamaha DTX402K DTX402K/DTX432K/DTX452K Owners Manual - Page 45
Kit Settings, 4. Number Button Lighting Pattern, 1. Pad Sound, 2. Pad Volume
 |
View all Yamaha DTX402K manuals
Add to My Manuals
Save this manual to your list of manuals |
Page 45 highlights
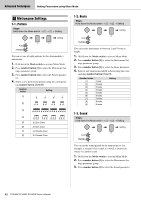
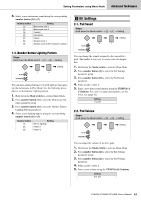
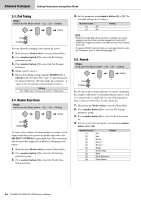
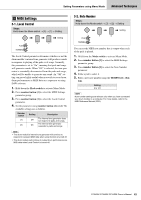
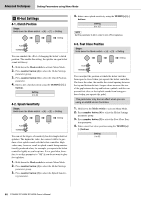
Setting Parameters using Menu Mode Advanced Techniques 4. Select a new metronome sound using the corresponding number button [1] to [7]. Number button [1] [2] [3] [4] [5] [6] [7] Setting Metronome click 1 Metronome click 2 Cowbell Drumsticks Claves Spoken count 1 Spoken count 2 (with measure number) x Kit Settings 2-1. Pad Sound Steps: Hold down the Mode switch [2] [1] Setting Setting 1-4. Number Button Lighting Pattern Steps: Hold down the Mode switch [1] [4] Setting Setting You can have number buttons [1] to [10] light up when playing the metronome in Play Mode. Use the following procedure to set the buttons' lighting pattern. 1. Hold down the Mode switch to activate Menu Mode. 2. Press number button [1] to select the Metronome Set- tings parameter group. 3. Press number button [4] to select the Number Button Lighting Pattern parameter. 4. Select a new lighting pattern using the corresponding number button [1] to [3]. Number button [1] [2] [3] Setting Off (no lighting) Pattern 1 Pattern 2 You can change the sounds assigned to the current kit's pads. This makes it very easy to create your own unique kits. 1. Hold down the Mode switch to activate Menu Mode. 2. Press number button [2] to select the Kit Settings parameter group. 3. Press number button [1] to select the Pad Sound parameter. 4. Strike a pad to select it. 5. Enter a new drum-sound number using the TEMPO[+]/ [-] buttons. For a list of sounds and numbers, see the Voice List (page 62). Setting 1 to 287 2-2. Pad Volume Steps: Hold down the Mode switch [2] [2] Setting Setting You can adjust the volume of the kit's pads. 1. Hold down the Mode switch to activate Menu Mode. 2. Press number button [2] to select the Kit Settings parameter group. 3. Press number button [2] to select the Pad Volume parameter. 4. Strike a pad to select it. 5. Enter a new volume using the TEMPO[+]/[-] buttons. Setting 0 to 127 DTX402K DTX432K DTX452K Owner's Manual 43
-
 1
1 -
2
-
3
-
4
-
5
-
6
-
7
-
8
-
9
-
10
-
11
-
12
-
13
-
14
-
15
-
16
-
17
-
18
-
19
-
20
-
21
-
22
-
23
-
24
-
25
-
26
-
27
-
28
-
29
-
30
-
31
-
32
-
33
-
34
-
35
-
36
-
37
-
38
-
39
-
 40
40 -
 41
41 -
 42
42 -
 43
43 -
 44
44 -
 45
45 -
 46
46 -
 47
47 -
 48
48 -
 49
49 -
 50
50 -
51
-
52
-
53
-
54
-
55
-
56
-
57
-
58
-
59
-
60
-
61
-
62
-
63
-
64
-
65
-
66
-
67
-
68
-
69
-
70
-
71
-
72
 |
 |