Yamaha PSR-A1000 Owner's Manual - Page 99
Creating Accompaniment Styles — Style Creator, About Creating Accompaniment Styles
 |
View all Yamaha PSR-A1000 manuals
Add to My Manuals
Save this manual to your list of manuals |
Page 99 highlights
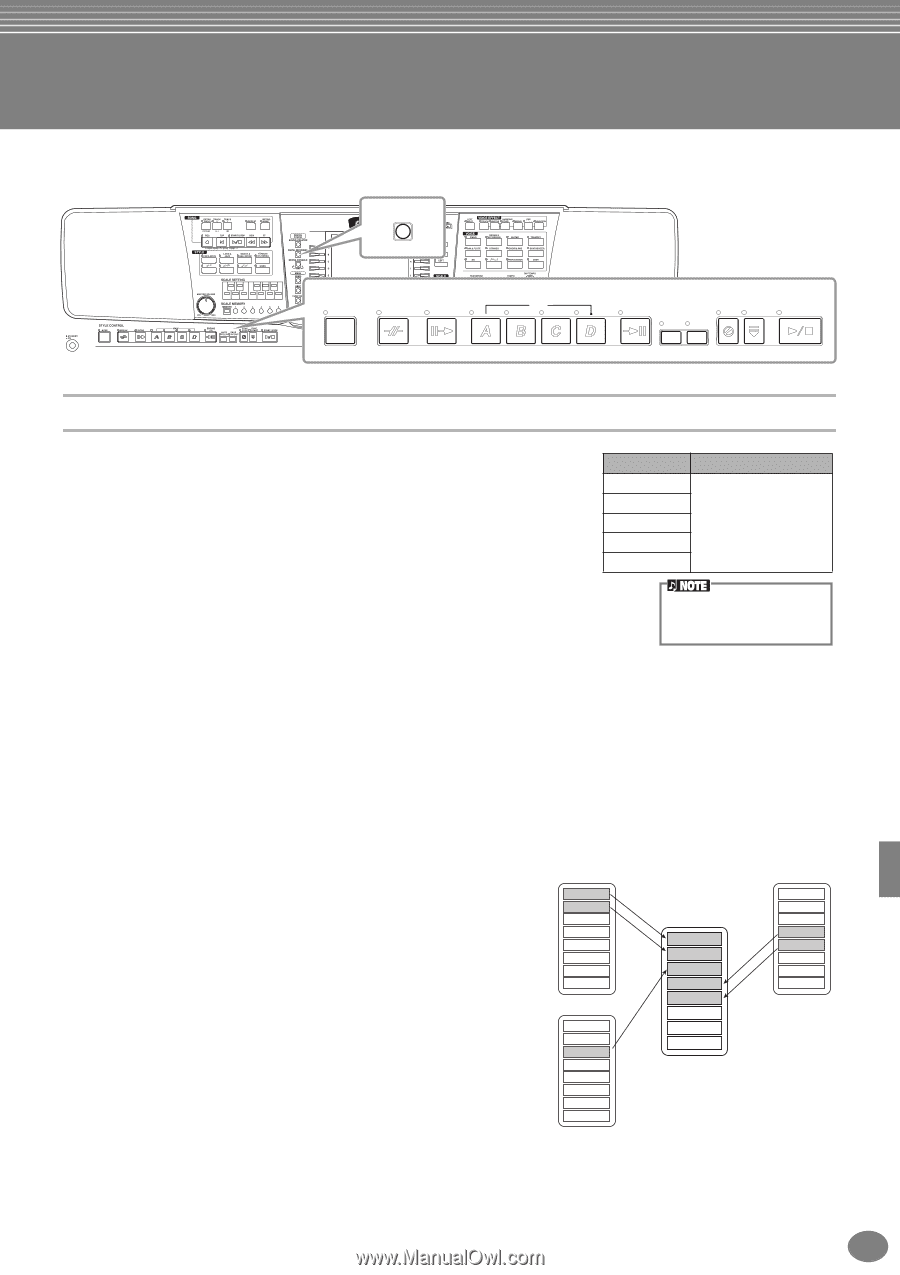
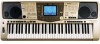
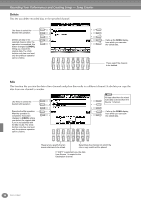
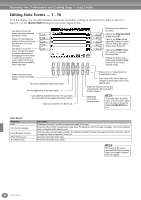
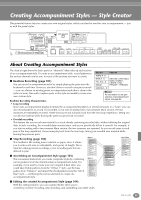
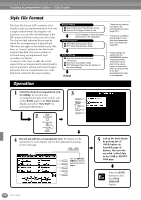
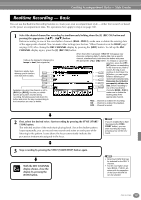
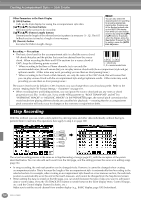
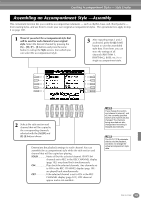
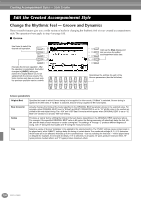
Creating Accompaniment Styles - Style Creator This powerful feature lets you create your own original styles, which can then be used for auto accompaniment - just as with the preset styles. DIGITAL RECORDING STYLE CONTROL ACMP BREAK INTRO MAIN ENDING / rit. AUTO FADE FILL IN IN/OUT SYNC. SYNC. STOP START START/STOP About Creating Accompaniment Styles The chart at right shows the basic parts (or "channels") that make up each section of an accompaniment style. To create an accompaniment style, record patterns to Section Channel the various channels one by one, for each of the sections you want to create. INTRO A - D I Realtime Recording (page 101) You can record accompaniment styles by simply playing the parts from the MAIN A - D FILL IN A - D BREAK RHYTHM 1, RHYTHM 2, BASS, CHORD 1, CHORD 2, PAD, PHRASE 1, PHRASE 2 keyboard in real time. However, you don't have to record every part yourself ENDING A - D - you can choose an existing preset accompaniment style that is close to the style you want, then add or replace parts in that style as needed to create your own custom style. For information on the part structure of accompaniment Realtime Recording Characteristics styles, see page 85. • Loop recording Since auto accompaniment playback repeats the accompaniment patterns of several measures in a "loop," you can also record patterns in a loop. For example, if you start recording with a two-measure Main section, the two measures are repeatedly recorded. Notes that you record will play back from the next loop (repetition), letting you record new material while hearing the parts you previously recorded. • Overdub recording This feature lets you record new material to a track already containing recorded data, without deleting the original data. In style recording, the recorded data remains intact, unless you specifically delete it yourself. For example, if you start recording with a two-measure Main section, the two measures are repeated. As you record notes to each pass of the loop (repetition), those notes play back from the next loop, letting you overdub new material while hearing the previous parts. I Step Recording (page 102) This method is like writing music notation on paper, since it allows you to enter each note or individually, and specify its length. This is ideal for making precise recordings, or for recording parts that are difficult to play. I Assembling an Accompaniment Style (page 103) This convenient feature lets you create composite styles by combining various patterns from the internal preset accompaniment styles. For example, if you want to create your own original 8-beat style, you could take rhythm patterns from the "8 Beat 1" style, use the bass pattern from "8 Beat 2," and import the chord patterns from the "60's 8 Beat" style - combining the various elements to create one accompaniment style. 8Beat 1 Rhythm 1 Rhythm 2 Bass Chord 1 Chord 2 Pad Phrase 1 Phrase 2 8Beat 2 Rhythm 1 Rhythm 2 Bass Chord 1 Chord 2 Pad Phrase 1 Phrase 2 Rhythm 1 Rhythm 2 Bass Chord 1 Chord 2 Pad Phrase 1 Phrase 2 60's 8 Beat Rhythm 1 Rhythm 2 Bass Chord 1 Chord 2 Pad Phrase 1 Phrase 2 I Editing the created Accompaniment Style (page 104) With the editing features, you can custom edit the styles you've created by real time recording, step recording, and assembling from other styles. PSR-A1000 99
-
 1
1 -
2
-
3
-
4
-
5
-
6
-
7
-
8
-
9
-
10
-
11
-
12
-
13
-
14
-
15
-
16
-
17
-
18
-
19
-
20
-
21
-
22
-
23
-
24
-
25
-
26
-
27
-
28
-
29
-
30
-
31
-
32
-
33
-
34
-
35
-
36
-
37
-
38
-
39
-
40
-
41
-
42
-
43
-
44
-
45
-
46
-
47
-
48
-
49
-
50
-
51
-
52
-
53
-
54
-
55
-
56
-
57
-
58
-
59
-
60
-
61
-
62
-
63
-
64
-
65
-
66
-
67
-
68
-
69
-
70
-
71
-
72
-
73
-
74
-
75
-
76
-
77
-
78
-
79
-
80
-
81
-
82
-
83
-
84
-
85
-
86
-
87
-
88
-
89
-
90
-
91
-
92
-
93
-
 94
94 -
 95
95 -
 96
96 -
 97
97 -
 98
98 -
 99
99 -
 100
100 -
 101
101 -
 102
102 -
 103
103 -
 104
104 -
105
-
106
-
107
-
108
-
109
-
110
-
111
-
112
-
113
-
114
-
115
-
116
-
117
-
118
-
119
-
120
-
121
-
122
-
123
-
124
-
125
-
126
-
127
-
128
-
129
-
130
-
131
-
132
-
133
-
134
-
135
-
136
-
137
-
138
-
139
-
140
-
141
-
142
-
143
-
144
-
145
-
146
-
147
-
148
-
149
-
150
-
151
-
152
-
153
-
154
-
155
-
156
 |
 |