Yamaha PSR-EW425 PSR-E473/PSR-EW425 Owners Manual - Page 28
Adding Effects to Performance and Playback, Adding DSP Effects
 |
View all Yamaha PSR-EW425 manuals
Add to My Manuals
Save this manual to your list of manuals |
Page 28 highlights
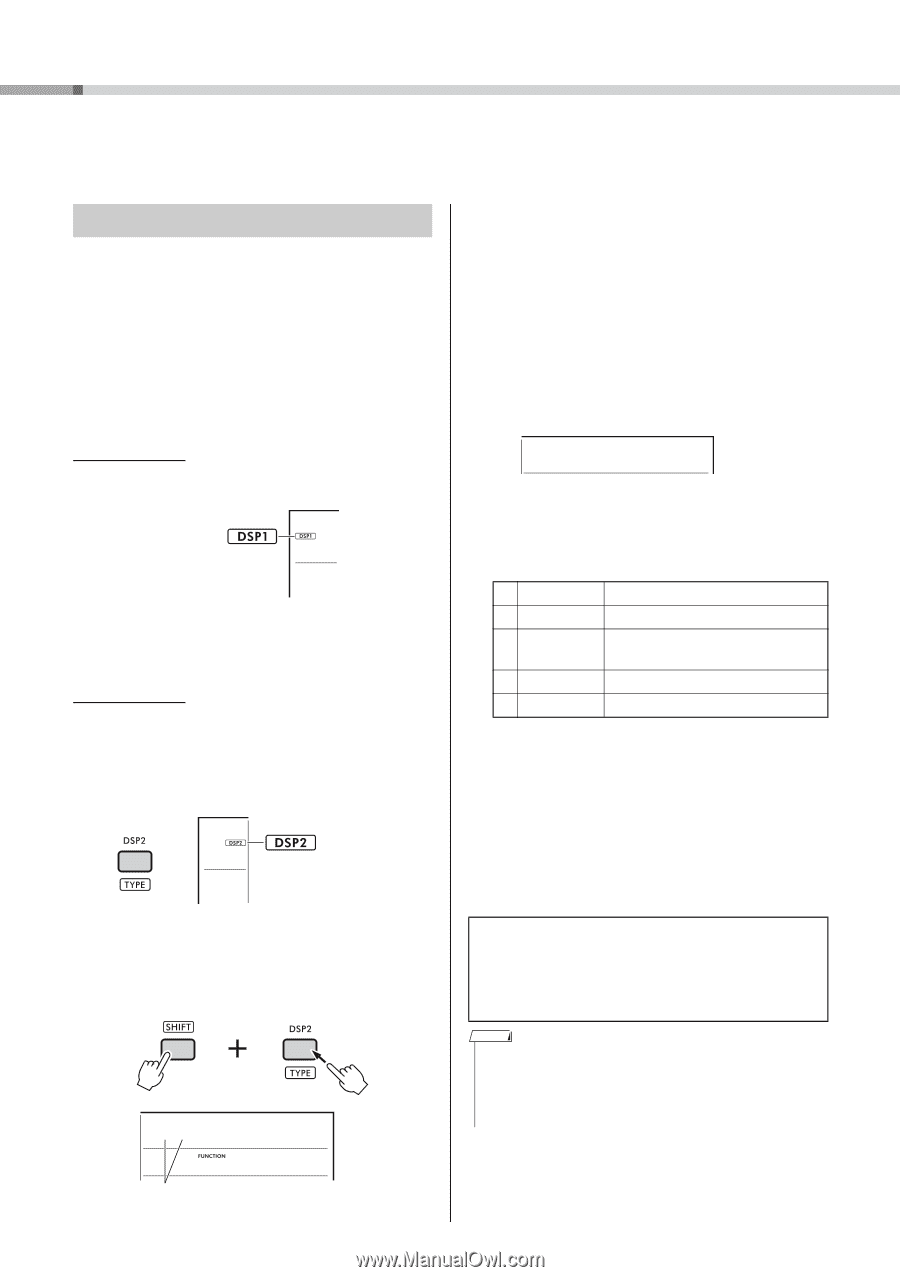
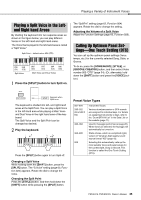
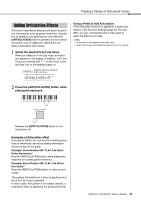
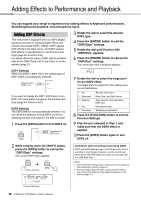
Adding Effects to Performance and Playback You can expand your range of expression by adding effects to keyboard performances, Style/Song/Groove playback, and microphone input. Adding DSP Effects This instrument is equipped with two DSPs (digital signal processors) for applying digital effects that enhance the sound (DSP1, DSP2). DSP1 applies DSP effects to the Main Voice, and DSP2 applies DSP effects to specified parts in the Function Settings (page 63, Function 043). For details about the types of DSP effects available, refer to the "Effect Type List" in the Data List on the website (page 11). 3 Rotate the dial to select the desired DSP2 type. 4 Press the [ENTER] button to exit the "DSP2Type" settings. 5 Rotate the dial until Function 043 "DSP2Part" appears. 6 Press the [ENTER] button to call up the "DSP2Part" settings. The current part that is targeted appears. DSP1 Settings When you select a Main Voice, the optimal type of DSP1 effect is automatically selected. Appears when DSP1 is on. If you want to change the DSP1 effect type or turn DSP1 off, make these changes in the Function Settings (page 63, Function 041). DSP2 Settings The DSP2 effect is not automatically selected. You can utilize this effect by turning DSP2 on/off and selecting the type and target for the effect yourself. 1 Press the [DSP2] button to turn DSP2 on. Appears when DSP2 is on. 1All 7 Rotate the dial to select the target part for the DSP2 effect. The target parts correspond to the setting value are as listed below. 1 All 2 Keyboard 3 Backing 4 Mic 5 Sampling All parts from 2 to 5 Main, Dual, and Split Voices Style, Groove, Song playback, MIDI input Microphone input Sampling pad playback 8 Press the [FUNCTION] button to exit the Function Settings. 9 Play the part selected in Step 7, and make sure that the DSP2 effect is applied. 10 Press the [DSP2] button again to turn DSP2 off. 2 While holding down the [SHIFT] button, press the [DSP2] button to call up the "DSP2Type" settings. The current DSP2 type appears. Press and hold 01RotarySp 042 Current DSP2 type Limitations when recording a User Song (MIDI) DSP1 and DSP2 settings (type, on/off, target part) are not recorded in User Songs. However, you can record your performance with DSP effects and save it as an audio file to a USB flash drive. NOTE • DSP1 and DSP2 settings can be memorized to and called up from Registration Memory (page 51). • For more details about the DSP1, DSP2 and other effects, refer to the block diagram in the Reference Manual on the website (page 11). 28 PSR-E473, PSR-EW425 Owner's Manual
-
 1
1 -
2
-
3
-
4
-
5
-
6
-
7
-
8
-
9
-
10
-
11
-
12
-
13
-
14
-
15
-
16
-
17
-
18
-
19
-
20
-
21
-
22
-
 23
23 -
 24
24 -
 25
25 -
 26
26 -
 27
27 -
 28
28 -
 29
29 -
 30
30 -
 31
31 -
 32
32 -
 33
33 -
34
-
35
-
36
-
37
-
38
-
39
-
40
-
41
-
42
-
43
-
44
-
45
-
46
-
47
-
48
-
49
-
50
-
51
-
52
-
53
-
54
-
55
-
56
-
57
-
58
-
59
-
60
-
61
-
62
-
63
-
64
-
65
-
66
-
67
-
68
-
69
-
70
-
71
-
72
-
73
-
74
-
75
-
76
 |
 |