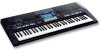
Yamaha PSR-S550B Owner's Manual - Page 60
Format, Save, Utility:Format
 |
View all Yamaha PSR-S550B manuals
Add to My Manuals
Save this manual to your list of manuals |
Page 60 highlights
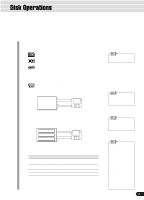
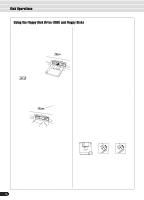
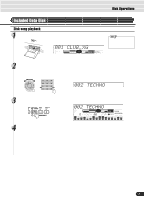
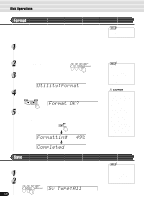
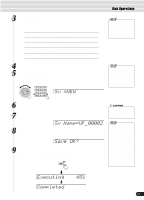
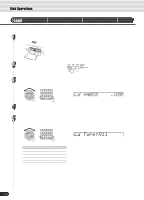
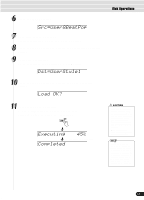
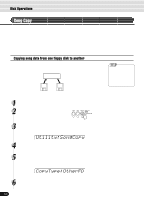
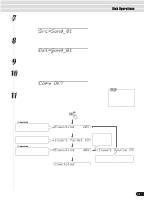
Disk Operations Format Setting up commercially available floppy disks for use with PSR-550 is called formatting. This function is useful for quickly deleting unnecessary files from an already formatted disk. Be careful when using this operation, since it automatically deletes all data on the disk. 1 Insert the floppy disk into the disk drive. When a (new) blank disk or an incompatible disk is inserted "Unformatted Disk" will be displayed on the screen. In this case, press the [EXIT] button to show "Format OK?" and then simply follow the procedure 5 below. 2 Press the [UTILITY] button. 3 Select "Format". Use the data dial, the [+/YES] button or the [-/NO] button. Utility:Format 4 Press the [NEXT] button to display the FORMAT operation screen. Format OK? 5 Execute the Format operation. Press the [+/YES] button to execute the Format operation. Press the [-/NO] button to abort the Format operation. Formatting 49% The Format operation is completed... Completed • After formatting, the capacity of a 2HD disk is 1 MB and that of a 2DD disk is 720 KB. • When the floppy disk's writeprotect tab is set to ON (page 58) or the disk is a purposely "copy-protected" disk, an alert message appears indicating that the Format function is not possible. CAUTION • If data is already saved on the disk, be careful not to format it. If you format the disk, all the previously recorded data will be deleted. • While formatting is in progress, never eject the disk or turn off the power to the PSR-550. • If a disk that cannot be read by the PSR-550 is inserted into the disk drive, it will be treated the same as an unformatted floppy disk. Take care not to erase important data by accidentally formatting a disk. Save You can save PSR-550 User styles, User pad (banks 37-40) and Registration Memory data (banks 01-16) to floppy disks. 1 Insert the floppy disk into the disk drive. 2 Press the [SAVE] button. Sv Type:All 60 • When the floppy disk's writeprotect tab is set to ON (page 58) or the disk is a purposely "copy-protected" disk, an alert message appears indicating that the Save function is not possible. 58
-
 1
1 -
2
-
3
-
4
-
5
-
6
-
7
-
8
-
9
-
10
-
11
-
12
-
13
-
14
-
15
-
16
-
17
-
18
-
19
-
20
-
21
-
22
-
23
-
24
-
25
-
26
-
27
-
28
-
29
-
30
-
31
-
32
-
33
-
34
-
35
-
36
-
37
-
38
-
39
-
40
-
41
-
42
-
43
-
44
-
45
-
46
-
47
-
48
-
49
-
50
-
51
-
52
-
53
-
54
-
 55
55 -
 56
56 -
 57
57 -
 58
58 -
 59
59 -
 60
60 -
 61
61 -
 62
62 -
 63
63 -
 64
64 -
 65
65 -
66
-
67
-
68
-
69
-
70
-
71
-
72
-
73
-
74
-
75
-
76
-
77
-
78
-
79
-
80
-
81
-
82
-
83
-
84
-
85
-
86
-
87
-
88
-
89
-
90
-
91
-
92
-
93
-
94
-
95
-
96
-
97
-
98
-
99
-
100
-
101
-
102
-
103
-
104
-
105
-
106
-
107
-
108
-
109
-
110
-
111
-
112
-
113
-
114
-
115
-
116
-
117
-
118
-
119
-
120
-
121
-
122
-
123
-
124
-
125
-
126
-
127
-
128
-
129
-
130
-
131
-
132
-
133
-
134
-
135
-
136
-
137
-
138
-
139
-
140
-
141
-
142
-
143
-
144
-
145
-
146
-
147
-
148
-
149
-
150
-
151
-
152
-
153
-
154
-
155
-
156
-
157
-
158
-
159
-
160
 |
 |
