Zenith DVR313 Operating Guide - Page 20
Before Operation
 |
UPC - 044642302436
View all Zenith DVR313 manuals
Add to My Manuals
Save this manual to your list of manuals |
Page 20 highlights
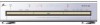
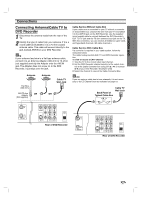
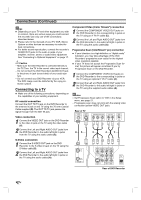
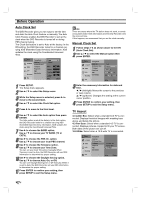
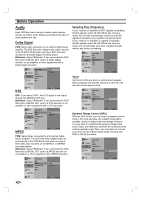
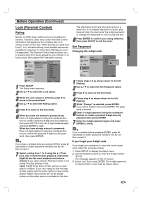
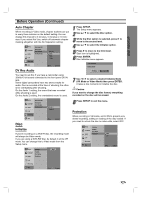
Before Operation Auto Clock Set The DVD Recorder gives you two ways to set the time and date: the Auto Clock Feature or manually. The Auto Clock Feature enables the DVD Recorder to set up the clock when the DVD Recorder is turned off or during PBS channel tuning. The Clock Set feature is set to Auto at the factory. In the ON setting, the DVD Recorder looks for a channel carrying XDS (Extended Data Services) information. XDS updates the clock using the Coordinated Universal Time. Setup Language Audio Lock Recording Tuning Band Clock Set EZ Channel Scan TV Aspect Prog. Scan PBC Set Initialize Disc Auto Manual Band PBS Ch. Time Zone Daylight Saving Prev. CATV 2 Auto Auto Select ote There are cases where the TV station does not send, or sends wrong date and/or time information and the DVD Recorder sets the incorrect time. If this happens, we recommend that you set the clock manually. Manual Clock Set 1 Follow steps 1-5 as shown above to the left (Auto Clock Set). 2 Use v / V to select the Manual option then press ENTER. Setup Language Audio Lock Recording Tuning Band Clock Set EZ Channel Scan TV Aspect Prog. Scan PBC Set Initialize Disc Auto Manual 2003 Y 1M 1D AM 0 H 0 M Prev. Select 1 Press SETUP. The Setup menu appears. 2 Use v / V to select the Setup menu. 3 While the Setup menu is selected, press B to move to the second level. 4 Use v / V to select the Clock Set option. 5 Press B to move to the third level. 6 Use v / V to select the Auto option then press ENTER. The Auto option is set at the factory. In the Auto option, the DVD Recorder looks for a channel carrying XDS (Extended Data Services) information. XDS updates the clock using the Coordinated Universal Time. 7 Use B to choose the BAND option. Use v / V to choose your TV BAND (TV or CATV). 8 Use B to choose the PBS Ch. option. Use v / V to choose your local PBS channel. 9 Use B to choose the Timezone option. Use v / V to choose your Time Zone. You can set your local Time Zone manually. When Timezone is set to Auto, the DVD Recorder will use XDS information to determine the proper setting. 10 Use B to choose the Daylight Saving option. Use v / V to choose Auto, On, or Off. You can turn Daylight Savings On or Off manually. When it is set to Auto, the DVD Recorder will use XDS information to determine the proper setting. 11 Press ENTER to confirm your setting, then press SETUP to exit the Setup menu. 3 Enter the necessary information for date and time. b / B (left/right): Moves the cursor to the previous or next column. v / V (up/down): Changes the setting at the current cursor position. 4 Press ENTER to confirm your setting, then press SETUP to exit the Setup menu. TV Aspect 4:3 Letter Box: Select when a standard 4:3 TV is connected. Displays theatrical images with masking bars above and below the picture. 4:3 Pan Scan: Select when a standard 4:3 TV is connected. Displays pictures cropped to fill your TV screen. Both sides of the picture are cut off. 16:9 Wide: Select when a 16:9 wide TV is connected. Setup Language Audio Lock Recording Tuning Band Clock Set EZ Channel Scan TV Aspect Prog. Scan PBC Set Initialize Disc 4:3 Letter Box 4:3 Pan Scan 16:9 Wide Prev. Select 20
-
 1
1 -
2
-
3
-
4
-
5
-
6
-
7
-
8
-
9
-
10
-
11
-
12
-
13
-
14
-
 15
15 -
 16
16 -
 17
17 -
 18
18 -
 19
19 -
 20
20 -
 21
21 -
 22
22 -
 23
23 -
 24
24 -
 25
25 -
26
-
27
-
28
-
29
-
30
-
31
-
32
-
33
-
34
-
35
-
36
-
37
-
38
-
39
-
40
-
41
-
42
-
43
-
44
-
45
-
46
-
47
-
48
-
49
-
50
-
51
-
52
 |
 |