ZyXEL MAX218M2W User Guide - Page 183
Snmp, 12.7 Cwmp, Table 85, Label, Description
 |
View all ZyXEL MAX218M2W manuals
Add to My Manuals
Save this manual to your list of manuals |
Page 183 highlights
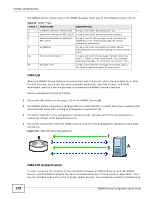
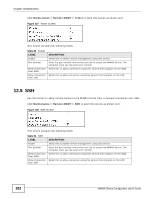
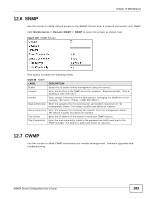
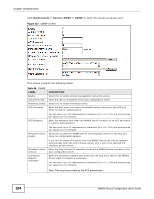
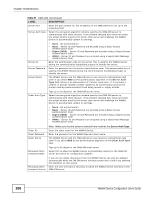
Chapter 12 Maintenance 12.6 SNMP Use this screen to allow remote access to the WiMAX Device from a network connection over SNMP. Click Maintenance > Remote MGMT > SNMP to open this screen as shown next. Figure 109 SNMP Screen This screen contains the following fields: Table 85 SNMP LABEL Enable Location Contact Read Community Write Community Trap Server Trap Community DESCRIPTION Select this to enable remote management using this service. Enter the location of the SNMP server (for example, "Engineering Dept., Floor 6, Building A, New York City"). Enter contact information for the administrator managing the SNMP server (for example, "Bill Smith, IT Dept., (555) 555-5454"). Enter the password for the incoming Get and GetNext requests from the management station. The default is public and allows all requests. Enter the password for incoming Set requests from the management station. The default is public and allows all requests. Enter the IP address of the station to send your SNMP traps to. Enter the trap community, which is the password sent with each trap to the SNMP manager. The default is public and allows all requests. 12.7 CWMP Use this screen to allow CWMP connections for remote management, firmware upgrades and troubleshooting. WiMAX Device Configuration User's Guide 183
-
 1
1 -
2
-
3
-
4
-
5
-
6
-
7
-
8
-
9
-
10
-
11
-
12
-
13
-
14
-
15
-
16
-
17
-
18
-
19
-
20
-
21
-
22
-
23
-
24
-
25
-
26
-
27
-
28
-
29
-
30
-
31
-
32
-
33
-
34
-
35
-
36
-
37
-
38
-
39
-
40
-
41
-
42
-
43
-
44
-
45
-
46
-
47
-
48
-
49
-
50
-
51
-
52
-
53
-
54
-
55
-
56
-
57
-
58
-
59
-
60
-
61
-
62
-
63
-
64
-
65
-
66
-
67
-
68
-
69
-
70
-
71
-
72
-
73
-
74
-
75
-
76
-
77
-
78
-
79
-
80
-
81
-
82
-
83
-
84
-
85
-
86
-
87
-
88
-
89
-
90
-
91
-
92
-
93
-
94
-
95
-
96
-
97
-
98
-
99
-
100
-
101
-
102
-
103
-
104
-
105
-
106
-
107
-
108
-
109
-
110
-
111
-
112
-
113
-
114
-
115
-
116
-
117
-
118
-
119
-
120
-
121
-
122
-
123
-
124
-
125
-
126
-
127
-
128
-
129
-
130
-
131
-
132
-
133
-
134
-
135
-
136
-
137
-
138
-
139
-
140
-
141
-
142
-
143
-
144
-
145
-
146
-
147
-
148
-
149
-
150
-
151
-
152
-
153
-
154
-
155
-
156
-
157
-
158
-
159
-
160
-
161
-
162
-
163
-
164
-
165
-
166
-
167
-
168
-
169
-
170
-
171
-
172
-
173
-
174
-
175
-
176
-
177
-
 178
178 -
 179
179 -
 180
180 -
 181
181 -
 182
182 -
 183
183 -
 184
184 -
 185
185 -
 186
186 -
 187
187 -
 188
188 -
189
-
190
-
191
-
192
-
193
-
194
-
195
-
196
-
197
-
198
-
199
-
200
-
201
-
202
-
203
-
204
-
205
-
206
-
207
-
208
-
209
-
210
-
211
-
212
-
213
-
214
-
215
-
216
-
217
-
218
-
219
-
220
-
221
-
222
-
223
-
224
-
225
-
226
-
227
-
228
-
229
-
230
-
231
-
232
-
233
-
234
-
235
-
236
-
237
-
238
-
239
-
240
-
241
-
242
-
243
-
244
-
245
-
246
-
247
-
248
-
249
-
250
-
251
-
252
-
253
-
254
-
255
-
256
-
257
-
258
-
259
-
260
-
261
-
262
-
263
-
264
-
265
-
266
-
267
-
268
-
269
-
270
-
271
-
272
-
273
-
274
-
275
-
276
-
277
-
278
-
279
-
280
-
281
-
282
-
283
-
284
-
285
-
286
-
287
-
288
-
289
-
290
 |
 |
