1996 Nissan Quest Owner's Manual - Page 190
1996 Nissan Quest Manual
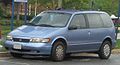
Page 190 highlights
AIR CLEANER HOUSING FILTER information'' section.) Adjust it as required. 4. Fit the new plugs, one at a time, into the spark plug socket and install them. Turn each plug several full turns by hand, then tighten with a spark plug socket to the correct torque. Do not overtighten. Spark plug tightening torque: 14 to 22 ft-lb (20 to 29 N m) 5. Holding the boot, re-connect each high tension cable to its proper spark plug by pushing it on until you feel a snap. DI1017M ADI0579 1. Disconnect the spark plug cables from the spark plugs. When disconnecting, always hold the boots, not the cables. 2. Remove the spark plugs with a spark plug socket. The plug socket has a rubber seal that holds the spark plug so it does not fall when it is pulled out. Make sure each spark plug is snugly fitted into the plug socket. 3. Check the gap on each new spark plug with a feeler gauge. (The spark plug gap is shown in the ''Technical and consumer 7-13 The filter should not be cleaned and reused. Replace it according to the maintenance intervals shown in the ''Maintenance schedule'' section. When replacing the filter, unclip the four clamps and remove the filter. Wipe the inside of the air cleaner housing and the cover with a damp cloth when replacing filter.
-
 1
1 -
2
-
3
-
4
-
5
-
6
-
7
-
8
-
9
-
10
-
11
-
12
-
13
-
14
-
15
-
16
-
17
-
18
-
19
-
20
-
21
-
22
-
23
-
24
-
25
-
26
-
27
-
28
-
29
-
30
-
31
-
32
-
33
-
34
-
35
-
36
-
37
-
38
-
39
-
40
-
41
-
42
-
43
-
44
-
45
-
46
-
47
-
48
-
49
-
50
-
51
-
52
-
53
-
54
-
55
-
56
-
57
-
58
-
59
-
60
-
61
-
62
-
63
-
64
-
65
-
66
-
67
-
68
-
69
-
70
-
71
-
72
-
73
-
74
-
75
-
76
-
77
-
78
-
79
-
80
-
81
-
82
-
83
-
84
-
85
-
86
-
87
-
88
-
89
-
90
-
91
-
92
-
93
-
94
-
95
-
96
-
97
-
98
-
99
-
100
-
101
-
102
-
103
-
104
-
105
-
106
-
107
-
108
-
109
-
110
-
111
-
112
-
113
-
114
-
115
-
116
-
117
-
118
-
119
-
120
-
121
-
122
-
123
-
124
-
125
-
126
-
127
-
128
-
129
-
130
-
131
-
132
-
133
-
134
-
135
-
136
-
137
-
138
-
139
-
140
-
141
-
142
-
143
-
144
-
145
-
146
-
147
-
148
-
149
-
150
-
151
-
152
-
153
-
154
-
155
-
156
-
157
-
158
-
159
-
160
-
161
-
162
-
163
-
164
-
165
-
166
-
167
-
168
-
169
-
170
-
171
-
172
-
173
-
174
-
175
-
176
-
177
-
178
-
179
-
180
-
181
-
182
-
183
-
184
-
 185
185 -
 186
186 -
 187
187 -
 188
188 -
 189
189 -
 190
190 -
 191
191 -
 192
192 -
 193
193 -
 194
194 -
 195
195 -
196
-
197
-
198
-
199
-
200
-
201
-
202
-
203
-
204
-
205
-
206
-
207
-
208
-
209
-
210
-
211
-
212
-
213
-
214
-
215
-
216
-
217
-
218
-
219
-
220
-
221
-
222
-
223
-
224
-
225
-
226
-
227
-
228
-
229
-
230
-
231
-
232
-
233
-
234
-
235
-
236
-
237
-
238
-
239
-
240
-
241
-
242
-
243
-
244
-
245
-
246
-
247
 |
 |
