Adobe 65029902 User Guide - Page 8
Install and con Apache and Tomcat, Enable Apache auto-con
 |
UPC - 883919170299
View all Adobe 65029902 manuals
Add to My Manuals
Save this manual to your list of manuals |
Page 8 highlights
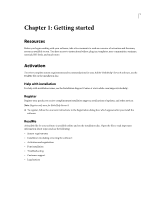
USING ROBOHELP SERVER 8 5 Getting started • Right-click the WebHelp Pro or FlashHelp Pro layout in the Single Source Layouts pod and select Properties. 2 In the WebHelp Pro Publish dialog box, click Next to go to the server selection screen. Click New to create a RoboHelp server destination to publish projects. 3 To publish to the default context, enter the server name in the machine-url:port format. RoboHelp HTML appends /robohelp/server to it. 4 To publish to a context other than robohelp, specify a complete URL in the format :port//server. For more information on creating contexts, see "Creating contexts or multiple websites" on page 12. 5 Click the Refresh button to refresh the list of areas from the server. If you do not select an area, the project is published at the default area. For more information on areas, see "Managing areas" on page 17. Install and configure Apache and Tomcat Install Apache 1 Download the Windows binary distribution (.msi file) from http://www.devlib.org/apache/httpd/binaries/win32/. 2 Run the MSI file downloaded. 3 (Only if some other server is using port 80) In \conf\httpd.conf file, change the port on which Apache listens for requests. Search for the directive Listen in the conf file and change the port number by changing this directive to . Download sample workers.properties Download sample workers.properties from http://cwiki.apache.org/GMOxDOC12/configure-apache-httpd-withjakarta-tomcat-connector-modjk.data/workers.properties, place it in the folder \conf, and modify it for the Apache HTTPD and Tomcat on that machine. Modify the following variables: • workers.tomcat_home: Set to the Tomcat installation directory. • workers.java_home: Set to the JRE path. Download the mod_jk module 1 Download the mod_jk module for Apache from http://tomcat.apache.org/download-connectors.cgi. This module exists as mod_jk-apache-2.2.4.so. 2 Place the module in the folder \module\. Modify the \conf\httpd.conf file Modify the \conf\httpd.conf file to add the mod_jk module as follows: LoadModule jk_module modules/mod_jk-apache-2.2.4.so Enable Apache auto-configure 1 In the server.xml for Tomcat (\conf\server.xml), enable Apache auto-configure. Tomcat automatically generates the files required for using mod_jk with an Apache HTTPS Web server.
-
 1
1 -
2
-
 3
3 -
 4
4 -
 5
5 -
 6
6 -
 7
7 -
 8
8 -
 9
9 -
 10
10 -
 11
11 -
 12
12 -
 13
13 -
14
-
15
-
16
-
17
-
18
-
19
-
20
-
21
-
22
-
23
-
24
-
25
-
26
 |
 |
