Asus RS700-E10-RS12U User Manual - Page 36
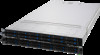
Replacing the air duct, Align the heatsink and CPU assembly to the CPU socket
 |
View all Asus RS700-E10-RS12U manuals
Add to My Manuals
Save this manual to your list of manuals |
Page 36 highlights
5. Align the heatsink and CPU assembly to the CPU socket, then place the heatsink on top of the CPU socket (A). Push the lock latches outwards on all four corners of the heatsink so that the heatsink and CPU assembly is secured to the CPU socket (B). • Ensure the triangle mark on the CPU is located in the same corner as the CPU socket. • The heatsink is symmetrical. 6. Do two (2) clockwise turns on each of the heatsink screws in the cross order pattern shown on the illustration until the heatsink screws are tightened and the heatsink is secured onto the motherboard. Intel® recommends a using a torque driver with a T-30 bit and a torque value of 8 lbf-in to prolong the longetivity of all PEEK nuts after the quality of the load post is corrected. 7. Replace the air duct. For more information, refer to the Replacing the air duct section. 2-10 Chapter 2: Hardware Information
-
 1
1 -
2
-
3
-
4
-
5
-
6
-
7
-
8
-
9
-
10
-
11
-
12
-
13
-
14
-
15
-
16
-
17
-
18
-
19
-
20
-
21
-
22
-
23
-
24
-
25
-
26
-
27
-
28
-
29
-
30
-
 31
31 -
 32
32 -
 33
33 -
 34
34 -
 35
35 -
 36
36 -
 37
37 -
 38
38 -
 39
39 -
 40
40 -
 41
41 -
42
-
43
-
44
-
45
-
46
-
47
-
48
-
49
-
50
-
51
-
52
-
53
-
54
-
55
-
56
-
57
-
58
-
59
-
60
-
61
-
62
-
63
-
64
-
65
-
66
-
67
-
68
-
69
-
70
-
71
-
72
-
73
-
74
-
75
-
76
-
77
-
78
-
79
-
80
-
81
-
82
-
83
-
84
-
85
-
86
-
87
-
88
-
89
-
90
-
91
-
92
-
93
-
94
-
95
-
96
-
97
-
98
-
99
-
100
-
101
-
102
-
103
-
104
-
105
-
106
-
107
-
108
-
109
-
110
-
111
-
112
-
113
-
114
-
115
-
116
-
117
-
118
-
119
-
120
-
121
-
122
-
123
-
124
-
125
-
126
-
127
-
128
-
129
-
130
-
131
-
132
-
133
-
134
-
135
-
136
-
137
-
138
-
139
-
140
-
141
-
142
-
143
-
144
-
145
-
146
-
147
-
148
-
149
-
150
-
151
-
152
-
153
-
154
-
155
-
156
-
157
-
158
-
159
-
160
-
161
-
162
-
163
-
164
-
165
-
166
-
167
-
168
-
169
-
170
-
171
-
172
-
173
-
174
-
175
-
176
-
177
-
178
-
179
-
180
-
181
-
182
-
183
-
184
-
185
-
186
-
187
-
188
-
189
-
190
-
191
-
192
-
193
-
194
-
195
-
196
-
197
-
198
-
199
-
200
-
201
-
202
-
203
-
204
-
205
-
206
-
207
-
208
-
209
-
210
-
211
-
212
 |
 |
