Asus RS700-E10-RS12U User Manual - Page 58
Installing an ethernet expansion card to the butterfly riser card bracket, PCIE_LAN1
 |
View all Asus RS700-E10-RS12U manuals
Add to My Manuals
Save this manual to your list of manuals |
Page 58 highlights
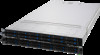
2.6.4 Installing an ethernet expansion card to the butterfly riser card bracket The pre-installed butterfly riser card bracket can support a 4-port Intel® I350-AM4 1G LAN controller expansion card or 2-port Intel® X710-AT2 Gigabit 10G LAN controller expansion card. Do not install the 4-port Intel® I350-AM4 1G LAN controller expansion card if you wish to install the external rear fan. To install a 4-port Intel® I350-AM4 1G LAN controller expansion card or 2-port Intel® X710AT2 Gigabit 10G LAN controller expansion card on the butterfly riser card bracket: 1. Follow step 1 of Installing an expansion card to the butterfly riser card bracket to remove the butterfly riser card bracket from the chassis. 2. Flip the butterfly riser card bracket over and insert the 4-port Intel® I350-AM4 1G LAN controller expansion card or 2-port Intel® X710-AT2 Gigabit 10G LAN controller expansion card to the PCIE_LAN1 slot (A) on the butterfly riser card bracket, then secure it using two (2) screws (B). 2-port Intel® X710-AT2 Gigabit 10G LAN controller expansion card 4-port Intel® I350-AM4 1G LAN controller expansion card 3. Follow step 4-5 of Installing an expansion card to the butterfly riser card bracket to install the butterfly riser card bracket to the chassis. 2-32 Chapter 2: Hardware Information
-
 1
1 -
2
-
3
-
4
-
5
-
6
-
7
-
8
-
9
-
10
-
11
-
12
-
13
-
14
-
15
-
16
-
17
-
18
-
19
-
20
-
21
-
22
-
23
-
24
-
25
-
26
-
27
-
28
-
29
-
30
-
31
-
32
-
33
-
34
-
35
-
36
-
37
-
38
-
39
-
40
-
41
-
42
-
43
-
44
-
45
-
46
-
47
-
48
-
49
-
50
-
51
-
52
-
 53
53 -
 54
54 -
 55
55 -
 56
56 -
 57
57 -
 58
58 -
 59
59 -
 60
60 -
 61
61 -
 62
62 -
 63
63 -
64
-
65
-
66
-
67
-
68
-
69
-
70
-
71
-
72
-
73
-
74
-
75
-
76
-
77
-
78
-
79
-
80
-
81
-
82
-
83
-
84
-
85
-
86
-
87
-
88
-
89
-
90
-
91
-
92
-
93
-
94
-
95
-
96
-
97
-
98
-
99
-
100
-
101
-
102
-
103
-
104
-
105
-
106
-
107
-
108
-
109
-
110
-
111
-
112
-
113
-
114
-
115
-
116
-
117
-
118
-
119
-
120
-
121
-
122
-
123
-
124
-
125
-
126
-
127
-
128
-
129
-
130
-
131
-
132
-
133
-
134
-
135
-
136
-
137
-
138
-
139
-
140
-
141
-
142
-
143
-
144
-
145
-
146
-
147
-
148
-
149
-
150
-
151
-
152
-
153
-
154
-
155
-
156
-
157
-
158
-
159
-
160
-
161
-
162
-
163
-
164
-
165
-
166
-
167
-
168
-
169
-
170
-
171
-
172
-
173
-
174
-
175
-
176
-
177
-
178
-
179
-
180
-
181
-
182
-
183
-
184
-
185
-
186
-
187
-
188
-
189
-
190
-
191
-
192
-
193
-
194
-
195
-
196
-
197
-
198
-
199
-
200
-
201
-
202
-
203
-
204
-
205
-
206
-
207
-
208
-
209
-
210
-
211
-
212
 |
 |
