Asus RS700-E10-RS12U User Manual - Page 69
x SATA storage device configuration and cabling, Backplane connector, Cable, Connect
 |
View all Asus RS700-E10-RS12U manuals
Add to My Manuals
Save this manual to your list of manuals |
Page 69 highlights
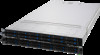
2.9.1 12 x SATA storage device configuration and cabling • The illustrations in this section are for reference only and may vary between models. • You may still support 4, 8 or 12 NVMe bays with this configuration, for more information please refer to the following sections: - 4 NVMe support: 4 x NVMe storage device configuration and cabling - 8 NVMe support: 8 x NVMe storage device configuration and cabling - 12 NVMe support: 12 x NVMe storage device configuration and cabling Backplane connector MSAS_HD1 MSAS_HD2 MSAS_HD3 Cable Mini-SAS HD (vertical) to Mini-SAS HD (vertical) Mini-SAS HD (vertical) to Mini-SAS HD (vertical) Mini-SAS HD (vertical) to Mini-SAS HD (vertical) Connect to ISSATA1 on motherboard ISATA1 on motherboard ISATA2 on motherboard 1. Install the storage devices into the supported bays. Refer to section Storage Devices for details on how to install storage devices. SATA SATA SATA SATA SATA SATA SATA SATA SATA SATA SATA SATA 2. Remove the six (6) screws of the rack screw on both sides of the chassis with a Phillips screwdriver (A), then remove the rack screws on both sides of the chassis (B). ASUS RS700-E10 Series 2-43
-
 1
1 -
2
-
3
-
4
-
5
-
6
-
7
-
8
-
9
-
10
-
11
-
12
-
13
-
14
-
15
-
16
-
17
-
18
-
19
-
20
-
21
-
22
-
23
-
24
-
25
-
26
-
27
-
28
-
29
-
30
-
31
-
32
-
33
-
34
-
35
-
36
-
37
-
38
-
39
-
40
-
41
-
42
-
43
-
44
-
45
-
46
-
47
-
48
-
49
-
50
-
51
-
52
-
53
-
54
-
55
-
56
-
57
-
58
-
59
-
60
-
61
-
62
-
63
-
 64
64 -
 65
65 -
 66
66 -
 67
67 -
 68
68 -
 69
69 -
 70
70 -
 71
71 -
 72
72 -
 73
73 -
 74
74 -
75
-
76
-
77
-
78
-
79
-
80
-
81
-
82
-
83
-
84
-
85
-
86
-
87
-
88
-
89
-
90
-
91
-
92
-
93
-
94
-
95
-
96
-
97
-
98
-
99
-
100
-
101
-
102
-
103
-
104
-
105
-
106
-
107
-
108
-
109
-
110
-
111
-
112
-
113
-
114
-
115
-
116
-
117
-
118
-
119
-
120
-
121
-
122
-
123
-
124
-
125
-
126
-
127
-
128
-
129
-
130
-
131
-
132
-
133
-
134
-
135
-
136
-
137
-
138
-
139
-
140
-
141
-
142
-
143
-
144
-
145
-
146
-
147
-
148
-
149
-
150
-
151
-
152
-
153
-
154
-
155
-
156
-
157
-
158
-
159
-
160
-
161
-
162
-
163
-
164
-
165
-
166
-
167
-
168
-
169
-
170
-
171
-
172
-
173
-
174
-
175
-
176
-
177
-
178
-
179
-
180
-
181
-
182
-
183
-
184
-
185
-
186
-
187
-
188
-
189
-
190
-
191
-
192
-
193
-
194
-
195
-
196
-
197
-
198
-
199
-
200
-
201
-
202
-
203
-
204
-
205
-
206
-
207
-
208
-
209
-
210
-
211
-
212
 |
 |
