Asus RS700-E10-RS12U User Manual - Page 86
screwdriver A, then remove the rack screws on both sides of the chassis B
 |
View all Asus RS700-E10-RS12U manuals
Add to My Manuals
Save this manual to your list of manuals |
Page 86 highlights
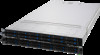
3. Remove the six (6) screws of the rack screw on both sides of the chassis with a Phillips screwdriver (A), then remove the rack screws on both sides of the chassis (B). 4. Remove the six (6) screws on both sides of the front cover with a Phillips screwdriver (A), then firmly hold the front cover and slide it towards the front panel until it is disengaged from the chassis (B). 2-60 Chapter 2: Hardware Information
-
 1
1 -
2
-
3
-
4
-
5
-
6
-
7
-
8
-
9
-
10
-
11
-
12
-
13
-
14
-
15
-
16
-
17
-
18
-
19
-
20
-
21
-
22
-
23
-
24
-
25
-
26
-
27
-
28
-
29
-
30
-
31
-
32
-
33
-
34
-
35
-
36
-
37
-
38
-
39
-
40
-
41
-
42
-
43
-
44
-
45
-
46
-
47
-
48
-
49
-
50
-
51
-
52
-
53
-
54
-
55
-
56
-
57
-
58
-
59
-
60
-
61
-
62
-
63
-
64
-
65
-
66
-
67
-
68
-
69
-
70
-
71
-
72
-
73
-
74
-
75
-
76
-
77
-
78
-
79
-
80
-
 81
81 -
 82
82 -
 83
83 -
 84
84 -
 85
85 -
 86
86 -
 87
87 -
 88
88 -
 89
89 -
 90
90 -
 91
91 -
92
-
93
-
94
-
95
-
96
-
97
-
98
-
99
-
100
-
101
-
102
-
103
-
104
-
105
-
106
-
107
-
108
-
109
-
110
-
111
-
112
-
113
-
114
-
115
-
116
-
117
-
118
-
119
-
120
-
121
-
122
-
123
-
124
-
125
-
126
-
127
-
128
-
129
-
130
-
131
-
132
-
133
-
134
-
135
-
136
-
137
-
138
-
139
-
140
-
141
-
142
-
143
-
144
-
145
-
146
-
147
-
148
-
149
-
150
-
151
-
152
-
153
-
154
-
155
-
156
-
157
-
158
-
159
-
160
-
161
-
162
-
163
-
164
-
165
-
166
-
167
-
168
-
169
-
170
-
171
-
172
-
173
-
174
-
175
-
176
-
177
-
178
-
179
-
180
-
181
-
182
-
183
-
184
-
185
-
186
-
187
-
188
-
189
-
190
-
191
-
192
-
193
-
194
-
195
-
196
-
197
-
198
-
199
-
200
-
201
-
202
-
203
-
204
-
205
-
206
-
207
-
208
-
209
-
210
-
211
-
212
 |
 |

Chapter 2: Hardware Information
2-60
4.
Remove the six (6) screws on both sides of the front cover with a Phillips screwdriver (A),
then firmly hold the front cover and slide it towards the front panel until it is disengaged
from the chassis (B).
3.
Remove the six (6) screws of the rack screw on both sides of the chassis with a Phillips
screwdriver (A), then remove the rack screws on both sides of the chassis (B).