Brother International EF4-B561 Service Manual - Page 26
I T--t
 |
View all Brother International EF4-B561 manuals
Add to My Manuals
Save this manual to your list of manuals |
Page 26 highlights
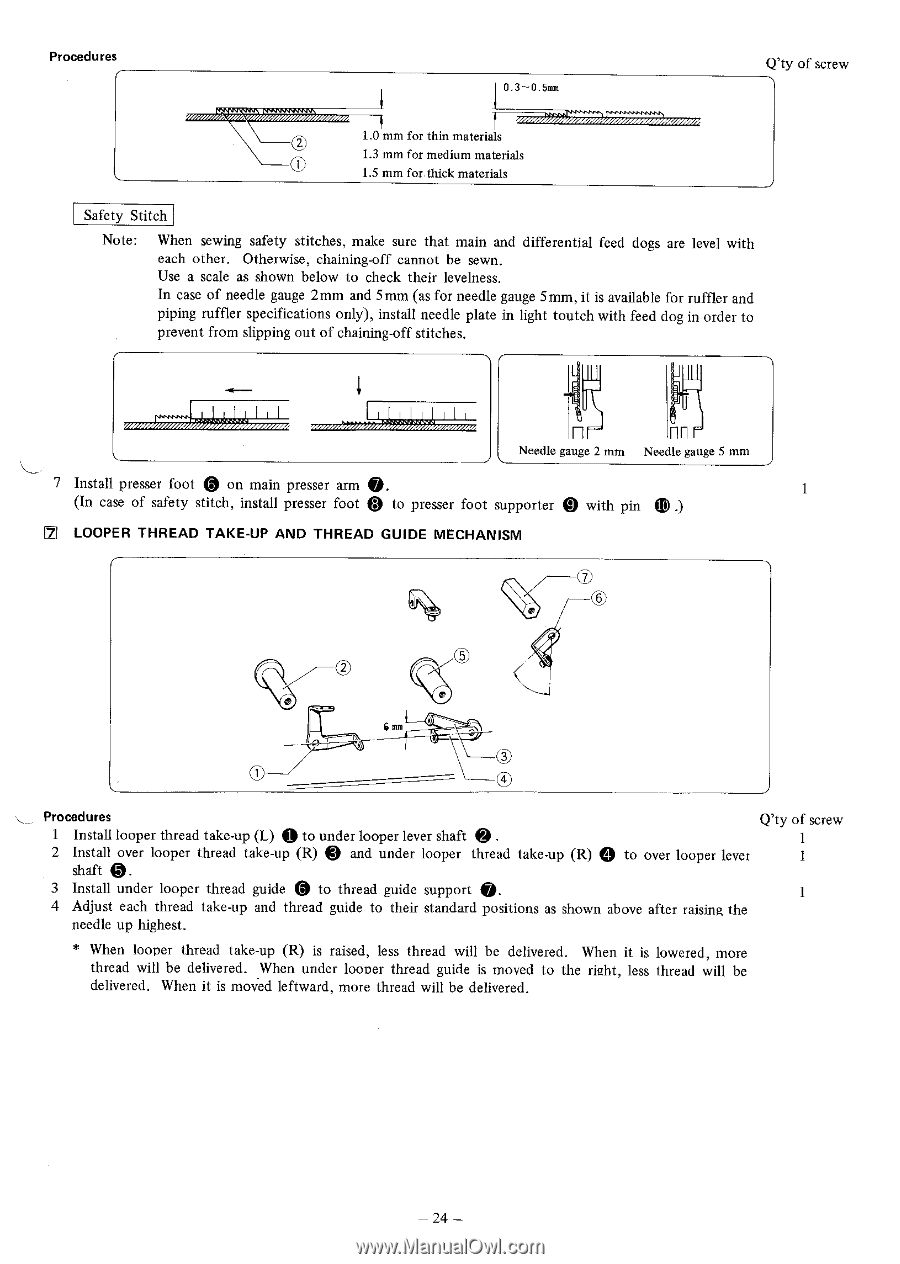
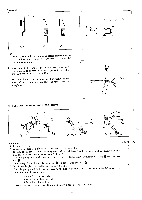
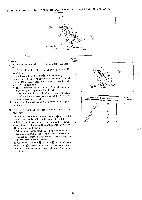
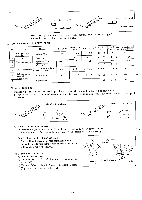
Procedures 0.3-0.5mm %Mx 1.0 mm for thin materials 1.3 mm for medium materials 1.5 mm for thick materials Q'ty of screw Safety Stitch Note: When sewing safety stitches, make sure that main and differential feed dogs are level with each other. Otherwise, chaining-off cannot be sewn. Use a scale as shown below to check their levelness. In case of needle gauge 2mm and 5mm (as for needle gauge 5mm, it is available for ruffler and piping ruffler specifications only), install needle plate in light toutch with feed dog in order to prevent from slipping out of chaining-off stitches. iii vonovivviirumntimimriuo //// nn Needle gauge 2 mm Needle gauge 5 mm 7 Instal presser foot 43 on main presser arm O. 0.) (In case of safety stitch, install presser foot Q to presser foot supporter c/ with pin LOOPER THREAD TAKE-UP AND THREAD GUIDE MECHANISM e 6 iorI T--ctr C49 Procedures Q'ty of screw Install looper thread take-up (L) Q to under looper lever shaft Q . 1 2 Install over looper thread take-up (R) ID and under looper thread take-up (R) Q to over looper lever 1 shaft O. 3 Install under looper thread guide to thread guide support O. 4 Adjust each thread take-up and thread guide to their standard positions as shown above after raising the needle up highest. * When looper thread take-up (R) is raised, less thread will be delivered. When it is lowered, more thread will be delivered. When under looper thread guide is moved to the right, less thread will be delivered. When it is moved leftward, more thread will be delivered. - 24 -
-
 1
1 -
2
-
3
-
4
-
5
-
6
-
7
-
8
-
9
-
10
-
11
-
12
-
13
-
14
-
15
-
16
-
17
-
18
-
19
-
20
-
 21
21 -
 22
22 -
 23
23 -
 24
24 -
 25
25 -
 26
26 -
 27
27 -
 28
28 -
 29
29 -
 30
30 -
 31
31 -
32
-
33
-
34
-
35
-
36
-
37
-
38
-
39
 |
 |