Canon 3000F PhotoStudio_manual.pdf
Canon 3000F - CanoScan Scanner Manual
 |
UPC - 013803028430
View all Canon 3000F manuals
Add to My Manuals
Save this manual to your list of manuals |
Canon 3000F manual content summary:
- Canon 3000F | PhotoStudio_manual.pdf - Page 1
Win 98/ME/2000/XP User's Manual 5.0 PhotoStudio 5.0 | User's Manual The most powerful photo editing tool for your home and office Windows 98/ME/2000/XP Introduction 1-1 - Canon 3000F | PhotoStudio_manual.pdf - Page 2
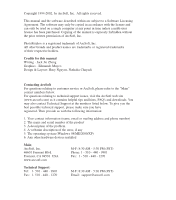
Unit 14, Shannon Industrial Estate Shanon, Co. Clare, Ireland Tel: +353 (0) 61-702087 Fax: +353 (0) 61-702001 Email: [email protected] Japan Japan Support Center M.D.S., Inc. IKE Building 3F 5-1-15 Sotokanda, Chiyoda-ku Tokyo 101-0021, Japan Tel: +81-3-3834-5256 Fax: +81-3-5816-4730 Website: www - Canon 3000F | PhotoStudio_manual.pdf - Page 3
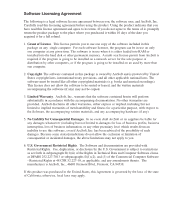
, promptly return the product package to the place where you purchased it within 10 days of the date you acquired it for a full refund. 1. Grant of License or if the program is going to be installed on an used by more than one computer. 2. Copyright. The software contained in this package is owned by - Canon 3000F | PhotoStudio_manual.pdf - Page 4
number) 2. The name and serial number of the product 3. A description of the problem 4. A verbatim description of the error, if any 5. The operating system (Windows 98/ME/2000/XP) 6. Any other hardware devices installed Main: ArcSoft, Inc. 46601 Fremont Blvd. Fremont, CA 94538 USA www.arcsoft.com - Canon 3000F | PhotoStudio_manual.pdf - Page 5
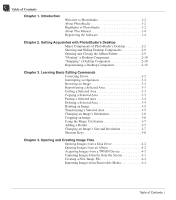
PhotoStudio 1-2 Highlights of PhotoStudio 1-2 About This Manual 1-4 Registering the Software 1-4 Chapter 2. Getting Acquainted with PhotoStudio's "Floating" a Desktop Component 2-10 "Snapping" a Desktop Component 2-10 Repositioning a Desktop Component 2-10 Chapter 3. Learning Basic Editing - Canon 3000F | PhotoStudio_manual.pdf - Page 6
5-4 Displaying Multiple Images 5-4 Opening a Duplicate Window 5-4 Chapter 6. Making Selections Selecting a Regularly- Color 6-3 Modifying a Selected Area 6-3 Chapter 7. Working with Colors Changing the Active and Alternate Colors 7-2 Using the Color Selection Dialog Box 7-2 Converting a Color - Canon 3000F | PhotoStudio_manual.pdf - Page 7
Hue and Saturation 9-3 Adjusting Tone 9-3 Equalizing Color Distribution 9-4 Using Threshold 9-4 Using Unsharp Mask 9-4 Chapter 10. Applying Special Effects Making a Panoramic Photo 10-2 Applying an Oil Painting Effect 10-2 Applying a Motion Blur Effect 10-2 PhotoStudio Special Effects and - Canon 3000F | PhotoStudio_manual.pdf - Page 8
C Table of Contents Chapter 15. Saving and Printing Images Saving a File with a New Name or Format 15-2 Saving Image Files for the Web 15-3 Printing Image Files 15-4 Chapter 16. E-mailing Images Sending Images as Email Attachments 16-1 iv Table of Contents - Canon 3000F | PhotoStudio_manual.pdf - Page 9
1 Chapter 1 Introduction Contents: 1. Welcome to PhotoStudio 1-2 2. About PhotoStudio 1-2 3. Highlights of PhotoStudio 1-2 4. About This Manual 1-4 5. Registering the Software 1-4 InIntrtroodduucctitoionn 1-1 - Canon 3000F | PhotoStudio_manual.pdf - Page 10
professional, or whether the software was purchased for home or business use, you've made the right choice! About PhotoStudio PhotoStudio is a powerful, easy-to-use, digital image editing program for PCs running Windows 98, ME, 2000 and XP. It enables full-color images to be acquired, managed - Canon 3000F | PhotoStudio_manual.pdf - Page 11
: • Make selections based on shape and color. • Cut, copy and paste selected areas Upload images into an album directly from digital cameras and scanners. • Batch-process multiple images using a saved macro merge layers. 7. The Macro command is a powerful feature that saves a complex series of Edit - Canon 3000F | PhotoStudio_manual.pdf - Page 12
for using PhotoStudio. It outlines software installation on PC's, along with instructions on how to use PhotoStudio's powerful tools and features. This manual has been written with the assumption that the user has a working knowledge of the Windows operating system and its conventions, including - Canon 3000F | PhotoStudio_manual.pdf - Page 13
of PhotoStudio's Desktop 2-2 2. Showing and Hiding Desktop Components 2-9 3. Opening and Closing the Album Palette 2-9 4. "Floating" a Desktop Component 2-10 5. "Snapping" a Desktop Component 2-10 6. Repositioning a Desktop Component 2-10 Getting Acquainted with PhotoStudio's Desktop 2-1 - Canon 3000F | PhotoStudio_manual.pdf - Page 14
edit image files. PhotoStudio can open several image files on the desktop at once with each image file displayed in its own image window. The major PhotoStudio desktop components include: • Main Menu • Quick Access Bar • Status Bar • Tools Palette • Layers Palette • Options Palette • Album Palette - Canon 3000F | PhotoStudio_manual.pdf - Page 15
Main Menu The Main Menu contains commonly used commands and options grouped under different titles: File, Edit, Select, Layer, Enhance, Effects, Convert, View, Window, and Help. Each menu group title has its own pulldown menu where specific commands and options are found. Some items in the pull-down - Canon 3000F | PhotoStudio_manual.pdf - Page 16
, Save As, Open Album, Add To Album, Capture, Acquire, Select Source, Print, Printer Setup, Send and Exit. Choosing a file name from the file list at the bottom or pasting them from the clipboard, or by filling them with other colors. The size, resolution, orientation, shape, and data type of an - Canon 3000F | PhotoStudio_manual.pdf - Page 17
bit Grayscale, To 24-bit RGB True Color, and To 48-bit RGB. Additional options are included in Separate To and Combine By. Images in the 48-bit bit RGB image while using a tool that is not supported Zoom Out, Fit In Window, Full Screen, Rulers, TWAIN interface to acquire images directly from a scanner - Canon 3000F | PhotoStudio_manual.pdf - Page 18
and ellipses. moves a selected area with its contents. makes polygonal and/or freeform selections. selects areas by color similarity. zooms in/out on images. navigates to areas of an image beyond the image window. removes "red-eye" from an image. adds a text layer to an image. simulates an ink pen - Canon 3000F | PhotoStudio_manual.pdf - Page 19
-eye Removal Tool Pen Tool Eraser Tool Smudge Tool Lighten/Darken Tool Bucket Fill Tool Stamp Tool Gradient Fill Tool Transform Tool Crop Tool Color Grid Active Swatch Alternate Swatch Move Tool Magic Wand Tool Pan Tool Text Tool Paintbrush Tool Spraypaint Tool Clone Tool Blur/Sharpen Tool Pattern - Canon 3000F | PhotoStudio_manual.pdf - Page 20
2 Getting Acquainted with PhotoStudio's Desktop The Options Palette The Options Palette serves as a supplement to the Tools Palette and provides fine-tuning options for the selected tool. Information and controls that appear in the Options Palette are directly related to the tool that is currently - Canon 3000F | PhotoStudio_manual.pdf - Page 21
Getting Acquainted with PhotoStudio's Desktop The Navigation Palette The Navigation Palette is a powerful tool for viewing images in PhotoStudio. Zoom in or out on an image or navigate to its different parts in just one window, focus on specific areas of an image for detailed pixel-by-pixel editing - Canon 3000F | PhotoStudio_manual.pdf - Page 22
desktop components: 1. Make sure the desktop component is in its "floating" state (See "Floating" a Desktop Component). 2. Drag it by its title bar to a new location. 2-10 Getting Acquainted with PhotoStudio's Desktop - Canon 3000F | PhotoStudio_manual.pdf - Page 23
Area 3-3 5. Cutting a Selected Area 3-3 6. Copying a Selected Area 3-3 7. Pasting a Selected Area 3-4 8. Deleting a Selected Area 3-4 9. Rotating an Image 3-5 10. Transforming a Selected Area 3-5 11. Changing an Image's Orientation 3-6 12. Cropping an Image 3-6 13. Using the Magic Cut - Canon 3000F | PhotoStudio_manual.pdf - Page 24
3 Learning Basic Editing Commands Correcting Errors PhotoStudio's Undo and Redo commands allow you to correct errors by "Undoing" or "Redoing" the last executed command or action. What's more, PhotoStudio's multiple Undo/Redo capability allows experimentation with painting tools and special effects - Canon 3000F | PhotoStudio_manual.pdf - Page 25
selected area within an image, drag it with the Move Tool. When moving a selected area, PhotoStudio will create a "floating" selection in the image window. To reposition a selection: 1. Click the Move Tool in the Tools Palette. 2. Click inside the selected area, then drag it to the desired position - Canon 3000F | PhotoStudio_manual.pdf - Page 26
3 Learning Basic Editing Commands • Press Ctrl + C. • Click Edit on the Main Menu, then choose Copy. Note: 1. When copying, consult the Layers Palette of the active image to make sure the Copy command is being applied to the correct layer (See Chapter 13: Working with Layers). 2. If no selection is - Canon 3000F | PhotoStudio_manual.pdf - Page 27
be tilted, use PhotoStudio's Rotate command to correct the problem. To rotate an image: 1. Click Edit on the rotation frame to rotate the image in the Preview Window. 3. Click OK to confirm, or press Cancel Transforming a Selected Area PhotoStudio's powerful Transform Tool transforms part of an - Canon 3000F | PhotoStudio_manual.pdf - Page 28
3 Learning Basic Editing Commands 3. When transforming an area, consult the Layers Palette of the active image to make sure that the Rotate command is being applied to the correct layer (See Chapter 13: Working with Layers). Changing an Image's Orientation PhotoStudio's Orientation option makes it - Canon 3000F | PhotoStudio_manual.pdf - Page 29
Menu, and then click Magic Cut. 2. Use the Pencil tool within the Magic Cut window to draw around the object you wish to cut out. Use the Eraser tool if you you advance to the next step, use the Brush tool within the Magic Cut window to "clean up" your cut-out. Use the tool along the edges to - Canon 3000F | PhotoStudio_manual.pdf - Page 30
a series of operations, repeatedly press Ctrl + Z. 08. To cut a selected area or the entire image, press Ctrl + X. 09. To copy a selected area, press Ctrl + C. 10. To paste a cut or copied area, press Ctrl + V. 11. To remove a selected area, press the Delete key. 12. To select the entire layer of an - Canon 3000F | PhotoStudio_manual.pdf - Page 31
names in the title bar. Existing files can be opened from disk drives and PhotoStudio albums, or acquired from TWAIN devices like digital cameras and scanners. Images can also be captured directly from the screen using PhotoStudio's Capture feature. Contents: 1. Opening Images from a Disk Drive - Canon 3000F | PhotoStudio_manual.pdf - Page 32
4 Opening and Creating Image Files Opening Images from a Disk Drive PhotoStudio is able to open images stored on a hard drive or any removable media such as floppy disks, CD-ROMs, and card readers. To open an image file from a disk drive: 1. Press Ctrl + O (Open), click the Open button on the Quick - Canon 3000F | PhotoStudio_manual.pdf - Page 33
Album Palette. Acquiring Images from a TWAIN Device PhotoStudio supports image acquisition from TWAIN devices such as digital cameras and scanners. When acquiring images from a TWAIN device, make sure the proper TWAIN driver is installed and that the TWAIN device is properly connected. To acquire - Canon 3000F | PhotoStudio_manual.pdf - Page 34
the New button on the Quick Access Bar create blank, untitled PhotoStudio image files. To create a new image: 1. Select an Alternate Color from the Color Grid to set the background color of the new image file. 2. Click the New button on the Quick Access Bar; or click File on the Main Menu, then - Canon 3000F | PhotoStudio_manual.pdf - Page 35
Modes 5-2 2. Zooming In and Out 5-3 3. Using the Pan Tool and Scroll Bars 5-3 4. Showing Rulers and Grids 5-3 5. Using the Navigation Palette 5-4 6. Displaying Multiple Images 5-4 7. Opening a Duplicate Window 5-4 Viewing Images 5-1 - Canon 3000F | PhotoStudio_manual.pdf - Page 36
mode: • Click View on the Main Menu, then choose Actual View from the drop-down menu. 2) Fit In Window - Automatically proportions the image file so it fits completely inside its image window. This option is useful for quickly viewing the entire image and for hiding the image scroll bars. Similar to - Canon 3000F | PhotoStudio_manual.pdf - Page 37
the scroll arrows or drag the scroll bar to navigate to the area of focus. Showing Rulers and Grids To align artwork in an image window, use the Rulers and Grids commands. PhotoStudio's Rulers and Grids enable the layout of multiple images precisely across the width or length of the image - Canon 3000F | PhotoStudio_manual.pdf - Page 38
active image in front. To display multiple images on the desktop: 1. Open all required images (See Chapter 4: Opening and Creating Files in PhotoStudio). 2. Click Window on the Main Menu. 3. From the drop-down menu, do one of the following: • Choose Tile to fit images into the desktop area. • Choose - Canon 3000F | PhotoStudio_manual.pdf - Page 39
a selection to be made in order to complete the operation. Contents: 1. Selecting a Regularly-shaped Area 6-2 2. Making a Freeform Selection 6-2 3. Making a Polygonal Selection 6-2 4. Selecting an Area by Color 6-3 5. Modifying a Selected Area 6-3 Making Selections 6-1 - Canon 3000F | PhotoStudio_manual.pdf - Page 40
6 Making Selections Selecting a Regularly-shaped Area Regularly shaped areas such as rectangles, squares, circles and ellipses are often selected for various image editing and retouching operations. To select a regularly-shaped area: 1. Click the Select Tool from the Tools Palette. 2. Open the - Canon 3000F | PhotoStudio_manual.pdf - Page 41
between the first and last anchor points unless the finish point is double-clicked. Selecting an Area by Color To select an area by color similarity, use the Magic Wand, which selects color-similar areas such as blue skies or white walls, and is convenient for performing enhancements to areas of - Canon 3000F | PhotoStudio_manual.pdf - Page 42
6 Making Selections • To enlarge a selection by a fixed amount of pixels, click Select on the Main Menu, then choose Expand from the drop-down menu. • To round the corners of an angular selection, click Select on the Main Menu, then choose Smooth from the drop-down menu. • To start a new selection, - Canon 3000F | PhotoStudio_manual.pdf - Page 43
learn how to select and change the active and alternate colors, and how to convert a color image into a grayscale image. Contents: 1. Changing the Active and Alternate Colors 7-2 2. Using the Color Selection Dialog Box 7-2 3. Converting a Color Image into a Grayscale Image . . . 7-3 Working with - Canon 3000F | PhotoStudio_manual.pdf - Page 44
Tool to match the active color to a color in the image. 2. Click on the Color Grid icon to select a color sample from the Color Grid. 3. Click on the Color Spectrum to select a color from the Color Spectrum. 4. Click on the Color Selection button to bring up the Color Selection dialog box. Use this - Canon 3000F | PhotoStudio_manual.pdf - Page 45
to make black and white print proofs, create an artistic effect, reduce file size, or make a duotone, etc. To convert a color image into a grayscale image: 1. Open the image (must be 24-bit). 2. Click Convert on the Main Menu, then choose To 8-bit Grayscale from the drop-down menu. Working with - Canon 3000F | PhotoStudio_manual.pdf - Page 46
7 Working with Colors 7-4 Working with Colors - Canon 3000F | PhotoStudio_manual.pdf - Page 47
Using the Eraser Tool 8-4 8. Using the Bucket Fill Tool 8-4 9. Using the Gradient Fill Tool 8-5 10. Using the Pattern Fill Tool 8-5 11. Using the Eyedropper Tool 8.5 12. Using the Stamp Tool 8-6 Removal Tool 8-7 17. Filling an Area with a Color 8-8 Using Painting and Retouching Tools 8-1 - Canon 3000F | PhotoStudio_manual.pdf - Page 48
when no longer needed. To create a brush: 1. Make black the active color. 2. Click the New button on the Quick Access Bar, or click File on menu. This brings up the New dialog box. 3. In the Data Format field, check 8-bit Gray. 4. In the Unit field, check Pixel. 5. For Image Size, type in 100 - Canon 3000F | PhotoStudio_manual.pdf - Page 49
the slider to set the transparency percentage. 5. Click and drag in the image to paint. Using the Spraypaint Tool The Spraypaint Tool applies gradual color tones to an image with an edge more diffused than those created with the Paintbrush Tool. To use the Spraypaint Tool: 1. Click on the Spraypaint - Canon 3000F | PhotoStudio_manual.pdf - Page 50
Using the Eraser Tool The Eraser Tool erases pixels from an image and replaces them with transparency for an unrestricted layer, or the alternate color for a restricted layer. To use the Eraser Tool: 1. Click the Eraser Tool in Tools Palette. 2. Open the Options Palette. 3. Drag the effect slider to - Canon 3000F | PhotoStudio_manual.pdf - Page 51
Fill Tool The Gradient Fill Tool fills an image or a selected area of an image with a gradual transition from the alternate color to the active color. To apply a color transition to an image 1. Choose the Gradient Fill Tool in the Tools Palette. 2. Open the Options Palette. 3. From the drop-down - Canon 3000F | PhotoStudio_manual.pdf - Page 52
pixels to be sampled. 5. Click in the part of the image to be sampled. Using the Stamp Tool The Stamp Tool paints in the active color with a predefined piece of clipart or other design. To use the Stamp Tool: 1. Click the Stamp Tool in the Tools Palette. 2. Open the Options Palette - Canon 3000F | PhotoStudio_manual.pdf - Page 53
8 Using Painting and Retouching Tools Using the Smudge Tool The Smudge Tool simulates the effect of a finger smearing wet paint. It picks up color pixels from the beginning of the stroke and moves them in the direction dragged. To use the Smudge Tool: 1. Click the Smudge Tool in the - Canon 3000F | PhotoStudio_manual.pdf - Page 54
Tool in the Tools Palette and the Fill Color command on the Main Menu. To fill a selection with a color: 1. Select the area. 2. Change the active color to the desired color. 3. Do one of the following: • Click Edit on the Main Menu, then choose Fill Color from the drop-down menu. • Press the Delete - Canon 3000F | PhotoStudio_manual.pdf - Page 55
to a selected image layer or to the entire image. Contents: 1. Using Auto Enhance 9-2 2. Adjusting Brightness and Contrast 9-2 3. Adjusting Hue and Saturation 9-3 4. Adjusting Tone 9-3 5. Equalizing Color Distribution 9-4 6. Using Threshold 9-4 7. Using Unsharp Mask 9-4 Enhancing Images 9-1 - Canon 3000F | PhotoStudio_manual.pdf - Page 56
Brightness slider to darken or brighten the image. 3. Drag the Contrast slider to increase or reduce the color contrast. 4. Click the plus or minus sign under the Before window to zoom in or out on the image in both windows. 5. View different parts of the image by dragging within the Before or After - Canon 3000F | PhotoStudio_manual.pdf - Page 57
dialog box. 2. Drag the Hue slider to change the image's color hue. 3. Drag the Saturation slider to adjust the image's color intensity. 4. Click the plus or minus sign under the Before window to zoom in or out on the image in both windows. 5. View different parts of the image by dragging within the - Canon 3000F | PhotoStudio_manual.pdf - Page 58
sharpening. 4. Drag the Threshold slider to set a value for the difference in color/grayness between adjacent pixels. 5. Click the plus or minus sign under the Before window to zoom in or out on the image in both windows. 6. View different parts of the image by dragging within the Before or After - Canon 3000F | PhotoStudio_manual.pdf - Page 59
same. For a clearer understanding of how each special enhancement and effect will alter the image, simply test each one. Contents: 1. Making a Panoramic Photo 10-2 2. Applying an Oil Painting Effect 10-2 3. Applying a Motion Blur Effect 10-2 4. PhotoStudio Special Effects & Enhancements Gallery - Canon 3000F | PhotoStudio_manual.pdf - Page 60
4. Preview the effect in the After window before applying it. 5. Click OK to apply the effect, or press Cancel to abort. Applying a Motion Blur Effect The Motion Blur effect turns photos into a blurry state, alleviating detail by softening transitions between colors. To apply the Motion Blur effect - Canon 3000F | PhotoStudio_manual.pdf - Page 61
10 Applying Special Effects PhotoStudio Special Effects and Enhancements Gallery The images displayed below are sample results of the various Fisheye Magic Mirror Melting Mosaic Oil Paint Ribbon Ripple Sketch Sphere Spiral Splash Wrinkle Whirlpool 3D Grid Applying Special Effects 10-3 - Canon 3000F | PhotoStudio_manual.pdf - Page 62
10 Applying Special Effects Enhancements Original Image Add Noise Average Blur Blur Heavily Blur Lightly Blur Logarithm Median Minimum Maximum Negative Sharpen Horizontally Sharpen Lightly Sharpen Vertically Sharpen Solarization Threshold Unsharp Mask 10-4 Applying Special Effects - Canon 3000F | PhotoStudio_manual.pdf - Page 63
11 Chapter 11 Adding Text to Images PhotoStudio's Text Tool creates editable text, using any installed font, in different styles and sizes, along with more sophisticated controls such as anti-aliasing and wrapping. Contents: 1. Creating a Text Layer 11-2 2. Editing Text 11-3 3. - Canon 3000F | PhotoStudio_manual.pdf - Page 64
layer will appear in the Layers Palette. 3. Choose the desired font, style and size. 4. Reposition newly added text by dragging it around in the image window. Note: 1) Check wrap to keep text within the border of the image. 2) Check new to start a new text layer. Text Edit Screen 11-2 Adding Text - Canon 3000F | PhotoStudio_manual.pdf - Page 65
layer containing the text in the Layers Palette. 2. In the Options Palette, change the font type, style and size. 3. To change the color of the text, choose a new color for the Active Swatch. 4. To add or edit the existing text, place the cursor, inside the text box of the Options Palette, where - Canon 3000F | PhotoStudio_manual.pdf - Page 66
11 Adding Text to Images 11-4 Adding Text to Images - Canon 3000F | PhotoStudio_manual.pdf - Page 67
12 Chapter 12 Working with Albums Creating an album is an easy way to access and organize photos. Images can be stored, displayed, retrieved, and organized, or dragged and dropped onto PhotoStudio's desktop. Contents: 1. Creating an Album 12-2 2. Using the Find Feature to Create an Album 12-2 - Canon 3000F | PhotoStudio_manual.pdf - Page 68
12 Working with Albums Creating an Album Creating an album is the first step for organizing photos using the Album Palette. To create a new album: 1. In the Album Palette, select New Album from the drop-down list. 2. Click the Add button. This brings up the Open dialog box. 3. In the Open dialog box - Canon 3000F | PhotoStudio_manual.pdf - Page 69
to be added. Then click the Open button. 4. To acquire an image from a digital camera or scanner directly into the Album, click the Acquire button in the Album Palette (See Acquiring Images from a TWAIN Device in Chapter 4). 5. To sort images, click the Sort button. Album thumbnails may be sorted by - Canon 3000F | PhotoStudio_manual.pdf - Page 70
12 Working with Albums 12-4 Working with Albums - Canon 3000F | PhotoStudio_manual.pdf - Page 71
13 Chapter 13 Working with Layers Think of a layered image as a file made of multiple photos stacked one atop the other. When viewing a multi-layered image file, the stacking order is viewed from above. Therefore, if a hole is cut in the top photo or if it's made partially transparent, the layer - Canon 3000F | PhotoStudio_manual.pdf - Page 72
off), click the Visible button. To turn the layer back on, click the Visible button again. 10. To limit the activity in certain elements on a layer, such as filling a text layer with a different color, click the Restricted button before using the Bucket Fill Tool on the Tools Palette. Otherwise, the - Canon 3000F | PhotoStudio_manual.pdf - Page 73
the thumbnail on the Layers Palette. 8. If the bottom layer (Layer 0) is hidden, cut or erased, a color or grid representing the current transparency background will be displayed in the image window. 9. If any other layer is hidden, cut or erased, the layer(s) below will be visible. Merging Layers - Canon 3000F | PhotoStudio_manual.pdf - Page 74
13 Working with Layers 1. On the Layers Palette, turn on the two layers to be merged. 2. Click Layer on the Main Menu, then choose Merge Down from the drop-down menu. To merge all "on" layers: 1. On the Layers Palette, turn on the layers to be merged (green light on). 2. Turn off the layers that - Canon 3000F | PhotoStudio_manual.pdf - Page 75
14 Chapter 14 Working with Macros A macro is a powerful, timesaving feature allowing a complex series of tasks to be saved as a single-click operation. This feature allows you to turn some Edit commands, all enhancements, - Canon 3000F | PhotoStudio_manual.pdf - Page 76
14 Working with Macros Making a Macro For photographs that are too dark, out of focus, or washed-out, or to apply the same commands, enhancements or effects to many images, record and use a macro. It not only saves time, but also allows images to be edited or retouched more consistently. To turn a - Canon 3000F | PhotoStudio_manual.pdf - Page 77
14 Working with Macros Applying a Macro to an Image Once multiple commands have been turned into a macro, it's easy to apply the same commands to other images with a single-click. To apply a macro to an image: 1. Open the image. 2. Click Edit on the Main Menu, then choose Play Macro from the drop- - Canon 3000F | PhotoStudio_manual.pdf - Page 78
14 Working with Macros 14-4 Working with Macros - Canon 3000F | PhotoStudio_manual.pdf - Page 79
15 Chapter 15 Saving and Printing Images This section provides information on how to save and print images in PhotoStudio. Contents: 1. Saving a File with a New Name or Format 15-2 2. Saving Image Files for the Web 15-3 3. Printing Image Files 15-4 Saving and Printing Images 15-1 - Canon 3000F | PhotoStudio_manual.pdf - Page 80
15 Saving and Printing Images Saving a File with a New Name or Format Once an image is modified and ready to save, the file can either be saved (overriding the previous file), or be saved as another version of the file. When using the Save As command, a file format must be selected for the newly - Canon 3000F | PhotoStudio_manual.pdf - Page 81
Printing Images Saving Image Files for the Web JPG is an image file format most commonly used for displaying images on the Web, and includes powerful compression that yields very small image files. Keep in mind that the more compressed the file, the more the image will degrade. To save an - Canon 3000F | PhotoStudio_manual.pdf - Page 82
-down menu. This brings up the Print dialog box. 2. Click the Print Setup button. This brings up the Print dialog box. Make sure that the printer is set up properly, and click OK once the print set-up is finished. 3. Click File on the Main Menu again, then choose Print from - Canon 3000F | PhotoStudio_manual.pdf - Page 83
box (if you haven't set up your mailbox). 3. In the Choose Profile dialog box, set all of the parameters and press OK. The E-mail program window (i.e., Microsoft Outlook) will appear with the image attached to and below the message area. 4. In the E-mail program
-
 1
1 -
 2
2 -
 3
3 -
 4
4 -
 5
5 -
 6
6 -
 7
7 -
8
-
9
-
10
-
11
-
12
-
13
-
14
-
15
-
16
-
17
-
18
-
19
-
20
-
21
-
22
-
23
-
24
-
25
-
26
-
27
-
28
-
29
-
30
-
31
-
32
-
33
-
34
-
35
-
36
-
37
-
38
-
39
-
40
-
41
-
42
-
43
-
44
-
45
-
46
-
47
-
48
-
49
-
50
-
51
-
52
-
53
-
54
-
55
-
56
-
57
-
58
-
59
-
60
-
61
-
62
-
63
-
64
-
65
-
66
-
67
-
68
-
69
-
70
-
71
-
72
-
73
-
74
-
75
-
76
-
77
-
78
-
79
-
80
-
81
-
82
-
83
 |
 |
The most powerful photo editing tool for your home and office
User’s Manual
PhotoStudio 5.0
|
User’s Manual
Win 98/ME/2000/XP
Windows 98/ME/2000/XP
5.0