Canon 3000F PhotoStudio_manual.pdf - Page 68
Creating an Album, Using the Find Feature to Create an Album
 |
UPC - 013803028430
View all Canon 3000F manuals
Add to My Manuals
Save this manual to your list of manuals |
Page 68 highlights
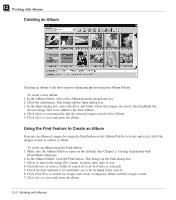
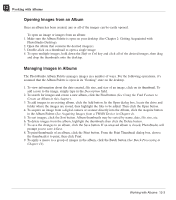
12 Working with Albums Creating an Album Creating an album is the first step for organizing photos using the Album Palette. To create a new album: 1. In the Album Palette, select New Album from the drop-down list. 2. Click the Add button. This brings up the Open dialog box. 3. In the Open dialog box, select the drive and folder where the images are stored, then highlight the desired image files to be added to the New Album. 4. Click Open to automatically add the selected images into the New Album. 5. Click Save to save and name the album. Using the Find Feature to Create an Album Generate an album of images by using the Find button on the Album Palette to locate and select all of the images stored on a drive or folder. To create an album using the Find button: 1. Make sure the Album Palette is open on the desktop (See Chapter 2: Getting Acquainted with PhotoStudio Desktop). 2. In the Album Palette, click the Find button. This brings up the Find dialog box. 3. Select or type in the image file's name, location, date, type or size. 4. Click Browse to select a folder to search (if Look In Folder is selected). 5. Check Include Subfolders (if subfolders are to be included in the search). 6. Click Find Now to search for images and create a temporary album with the images found. 7. Click Save to save and name the album. 12-2 Working with Albums
-
 1
1 -
2
-
3
-
4
-
5
-
6
-
7
-
8
-
9
-
10
-
11
-
12
-
13
-
14
-
15
-
16
-
17
-
18
-
19
-
20
-
21
-
22
-
23
-
24
-
25
-
26
-
27
-
28
-
29
-
30
-
31
-
32
-
33
-
34
-
35
-
36
-
37
-
38
-
39
-
40
-
41
-
42
-
43
-
44
-
45
-
46
-
47
-
48
-
49
-
50
-
51
-
52
-
53
-
54
-
55
-
56
-
57
-
58
-
59
-
60
-
61
-
62
-
 63
63 -
 64
64 -
 65
65 -
 66
66 -
 67
67 -
 68
68 -
 69
69 -
 70
70 -
 71
71 -
 72
72 -
 73
73 -
74
-
75
-
76
-
77
-
78
-
79
-
80
-
81
-
82
-
83
 |
 |
