Canon CINE-SERVO 17-120mm T2.95-3.9 EF User Manual - Page 42
Turn It On, 2. Mount The Hood On The Lens
 |
View all Canon CINE-SERVO 17-120mm T2.95-3.9 EF manuals
Add to My Manuals
Save this manual to your list of manuals |
Page 42 highlights
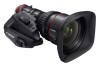
2 HOW TO MOUNT 4 When the lens is mounted, connect the cable from the drive unit to a power supply equipment such as camera or external power supply. Or if the camera can be powered from the PL mount, connect the cable from the drive unit to the connector below the lens mount * Connect the cable so that the arrow on the connector of the cable aligns with the arrow of the connector of the lens. NOTE When connecting and disconnecting the 12-pin cable, perform it after dismount the lens from the camera checking it by viewing. CAUTION Rated voltage: 12 VDC Normal operation range: 10 to 17 VDC If a battery or adapter is used, the output voltage may be higher than the rated voltage depending on the manufacturers and therefore the above voltages must be observed strictly. If a voltage outside the normal operation range is used, the drive unit may be damaged. 2-2. MOUNT THE HOOD ON THE LENS The lens cap is attached to the lens at the factory. Please remove the lens cap and attach the hood as instructed below. Index Lens Barrel Hood 1 Fit the hood on the front of the lens barrel. 2 Align the index on the hood and lens barrel. 3 Tighten the hood lock knob. 7x CN7x17 KAS S/E1 Hood Lock Knob 2-3. TURN IT ON Turn on the camera and power supply equipment on, and the power of the lens will be supplied. E4
-
 1
1 -
2
-
3
-
4
-
5
-
6
-
7
-
8
-
9
-
10
-
11
-
12
-
13
-
14
-
15
-
16
-
17
-
18
-
19
-
20
-
21
-
22
-
23
-
24
-
25
-
26
-
27
-
28
-
29
-
30
-
31
-
32
-
33
-
34
-
35
-
36
-
 37
37 -
 38
38 -
 39
39 -
 40
40 -
 41
41 -
 42
42 -
 43
43 -
 44
44 -
 45
45 -
 46
46 -
 47
47 -
48
-
49
-
50
-
51
-
52
-
53
-
54
-
55
-
56
-
57
-
58
-
59
-
60
-
61
-
62
-
63
-
64
-
65
-
66
-
67
-
68
-
69
-
70
-
71
-
72
-
73
-
74
-
75
-
76
-
77
-
78
-
79
-
80
-
81
-
82
-
83
-
84
-
85
-
86
-
87
-
88
-
89
-
90
-
91
-
92
-
93
-
94
-
95
-
96
-
97
-
98
-
99
-
100
-
101
-
102
-
103
-
104
-
105
-
106
-
107
-
108
-
109
-
110
-
111
-
112
-
113
-
114
-
115
-
116
-
117
-
118
-
119
-
120
-
121
-
122
 |
 |
