Canon MF7280 PCL Driver Guide
Canon MF7280 - ImageCLASS B/W Laser Manual
 |
UPC - 013803056129
View all Canon MF7280 manuals
Add to My Manuals
Save this manual to your list of manuals |
Canon MF7280 manual content summary:
- Canon MF7280 | PCL Driver Guide - Page 1
PCL Driver Guide PCL5c/PCL5e Driver Ver. 6.97 PCL6 Driver Ver. 4.97 Please read this guide before operating this equipment. After you finish reading this guide, store it in a safe place for future reference. ENG - Canon MF7280 | PCL Driver Guide - Page 2
- Canon MF7280 | PCL Driver Guide - Page 3
0 Ot¯ PCL Driver Guide - Canon MF7280 | PCL Driver Guide - Page 4
- Canon MF7280 | PCL Driver Guide - Page 5
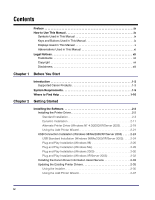
Getting Started Chapter 3 Basic Print Options Chapter 4 Special Print Options Chapter 5 Appendix Includes information about additional software used with the PCL5c, PCL5e, or PCL6 printer driver, and the index. Considerable effort has been made to ensure that this manual is free of inaccuracies and - Canon MF7280 | PCL Driver Guide - Page 6
in This Manual xi Legal Notices xii Trademarks xii Copyright xii Disclaimers xiii Chapter 1 Before You Start Introduction 1-2 Supported Canon Products 1-3 System Requirements 1-9 Where to Find Help 1-10 Chapter 2 Getting Started Installing the Software 2-2 Installing the Printer Driver - Canon MF7280 | PCL Driver Guide - Page 7
2-41 Uninstalling the Printer Driver 2-43 Setting Up the Printer Configuration 2-45 Configuring Automatically 2-45 Configuring Manually 2-48 Configuring the Device Function Settings 2-50 Configuring the Controller Version 2-50 Configuring the Device Functions 2-53 Printing a Document 2-55 - Canon MF7280 | PCL Driver Guide - Page 8
Using a Form File on Device 4-8 Creating a Form File 4-9 Printing with an Overlay Using a Form File Stored in the Printer 4-12 Printing with an Overlay Using a NetSpot Resource Downloader Form File 4-16 Specifying the Print Quality 4-20 What Is an Objective 4-20 Selecting and Editing an - Canon MF7280 | PCL Driver Guide - Page 9
Print Job 4-39 Job Accounting Feature 4-41 Job Accounting Overview 4-41 Specifying the ID and Password 4-42 Printing with Job Accounting (Windows 98/Me 4-44 Printing Installing the Printer Driver 5-4 When Installing the Canon Driver Information Assist Service 5-4 PCL Driver Functions List - Canon MF7280 | PCL Driver Guide - Page 10
Index 5-19 viii - Canon MF7280 | PCL Driver Guide - Page 11
store it in a safe place for future reference. How to Use This Manual Symbols Used in This Manual The following symbols are used in this manual to explain procedures, restrictions, handling precautions, and instructions that should be observed for safety. IMPORTANT NOTE . Indicates operational - Canon MF7280 | PCL Driver Guide - Page 12
Screen shots of computer operation screens used in this manual may differ from the ones you actually see, depending on the operating system and which they should be clicked or pressed. 5 In the first dialog box of the Printer Driver Setup Wizard, click [Next]. Click this button for operation. x - Canon MF7280 | PCL Driver Guide - Page 13
Abbreviations Used in This Manual In this manual, product names and model names are abbreviated as follows: Microsoft® Windows® 98 operating system: Windows 98 Microsoft® Windows® Millennium Edition operating system: Windows Me Microsoft® - Canon MF7280 | PCL Driver Guide - Page 14
Legal Notices Trademarks Canon, the Canon logo, imageRUNNER, imageCLASS, imagePASS, iR, LASER CLASS, and NetSpot are trademarks of Canon Inc. Adobe, of their respective owners. Copyright Copyright 2005 by Canon Inc. All rights reserved. No part of this publication may be reproduced or transmitted in - Canon MF7280 | PCL Driver Guide - Page 15
WITHOUT LIMITATION, THEREOF, WARRANTIES AS TO MARKETABILITY, MERCHANTABILITY, FITNESS FOR A PARTICULAR PURPOSE OF USE OR AGAINST INFRINGEMENT OF ANY PATENT. CANON INC. SHALL NOT BE LIABLE FOR ANY DIRECT, INCIDENTAL, OR CONSEQUENTIAL DAMAGES OF ANY NATURE, OR LOSSES OR EXPENSES RESULTING FROM THE - Canon MF7280 | PCL Driver Guide - Page 16
xiv - Canon MF7280 | PCL Driver Guide - Page 17
the system environments required for using the PCL5c, PCL5e, and PCL6 printer drivers. It also describes where to find help and information regarding the installation and use of these drivers. Introduction 1-2 Supported Canon Products 1-3 System Requirements 1-9 Where to Find Help 1-10 1-1 - Canon MF7280 | PCL Driver Guide - Page 18
2003 to print from any Windows application and make full use of their Canon printers. (Although the machines supported by these printer drivers have multiple functions, they will be referred to as "printers" in this guide.) Canon provides you with three types of printer drivers: Adobe Systems - Canon MF7280 | PCL Driver Guide - Page 19
Supported Canon Products The PCL printer driver is available for the following Canon Products. Refer to the following tables to select the driver name that corresponds to your printer. ■ PCL5c printer driver version 6.97 Printer Name 1 Driver Name Before You Start Color imageRUNNER C2000 series - Canon MF7280 | PCL Driver Guide - Page 20
■ PCL5e printer driver version 6.97 Printer Name Driver Name imageRUNNER 105 Canon iR105 PCL5e imagePASS-M1 (iR105-M1) Canon iR105-M1 PCL5e imagePASS-M2 (iR105-M2) Canon iR105-M2 PCL5e 1 imageRUNNER 105+ Canon iR105PLUS PCL5e Before You Start imagePASS-M3 (iR105+ -M3) Canon iR105PLUS- - Canon MF7280 | PCL Driver Guide - Page 21
imagePASS-M2 (iR8500-M2) Canon iR8500-M2 PCL5e imageRUNNER 9070 Canon iR9070 PCL5e imagePASS-M3 (iR9070-M3) Canon iR9070-M3 PCL5e imageCLASS 2300 Canon iC2300 PCL5e LASER CLASS 700 series Canon LC700 PCL5e LBP-2000 Canon LBP-2000 PCL5e MF7280 Canon MF7200 series PCL5e Introduction 1-5 - Canon MF7280 | PCL Driver Guide - Page 22
■ PCL6 printer driver version 4.97 Printer Name Driver Name imageRUNNER 105 Canon iR105 PCL6 imagePASS-M1 (iR105-M1) Canon iR105-M1 PCL6 imagePASS-M2 (iR105-M2) Canon iR105-M2 PCL6 1 imageRUNNER 105+ Canon iR105PLUS PCL6 Before You Start imagePASS-M3 (iR105+ -M3) Canon iR105PLUS-M3 - Canon MF7280 | PCL Driver Guide - Page 23
M2 (iR8500-M2) Canon iR8500-M2 PCL6 imageRUNNER 9070 Canon iR9070 PCL6 imagePASS-M3 (iR9070-M3) Canon iR9070-M3 PCL6 imageCLASS 2300 Canon iC2300 PCL6 LASER CLASS 700 series Canon LC700 PCL6 LBP-2000 Canon LBP-2000 PCL6 MF7280 Canon MF7200 series PCL6 Three driver versions are provided - Canon MF7280 | PCL Driver Guide - Page 24
IMPORTANT In this guide, these printer names are hereafter referred to as the following: - imagePASS-C1 (Color iR C5870U: imageRUNNER C5870 - imageRUNNER C6870U: imageRUNNER C6870 - imageRUNNER 400/330 with Network Multi-PDL Printer Board-P1 and R1: imageRUNNER 400/330-P1/R1 1-8 Introduction - Canon MF7280 | PCL Driver Guide - Page 25
System Requirements The printer drivers can be used in the following system environments: 1 Before You Start ■ 2003 ■ With a Server-Based Computing Environment • Compatible Windows Terminal Server (Service) - Microsoft Windows NT 4.0 Terminal Server Edition - Microsoft Windows 2000 Server - Canon MF7280 | PCL Driver Guide - Page 26
PCL6 printer drivers. You can also click [ ] (Help) in the upper right corner of most dialog boxes, and then click a specific item in the dialog box for help with that item. See the Online Help for the detailed information on specifying PCL options. ■ Canon Authorized Dealers or Service Providers - Canon MF7280 | PCL Driver Guide - Page 27
instructions for installing the PCL5c, PCL5e, and PCL6 printer drivers, setting the system configuration, and printing a document. Installing the Software 2-2 Installing the Printer Driver 2-2 USB Connection Installation (Windows 98/Me/2000/XP/Server 2003 2-24 Installing the Canon Driver - Canon MF7280 | PCL Driver Guide - Page 28
Started This section describes instructions for installing the printer driver and the Canon Driver Information Assist Service, and for uninstalling the printer driver. 2 Installing the Printer Driver Before using the printer, you must install the PCL5c, PCL5e, or PCL6 printer drivers for it. For - Canon MF7280 | PCL Driver Guide - Page 29
Service Pack 6.0 or later must be installed. • If you use the Installer, you can also update existing drivers simultaneously installing a new driver, or update existing drivers without installing a new driver. Canon machines whose printer drivers can be updated are listed under "Supported Canon - Canon MF7280 | PCL Driver Guide - Page 30
Started 5 In the first dialog box of the PCL Printer Driver Setup Wizard, click [Next]. 2 The [License Agreement] dialog box is displayed. 6 Read the license agreement carefully. If you agree to the terms ➞ click [Yes]. 7 Select [Manually Set Port to Install] ➞ click [Next]. 2-4 Installing the - Canon MF7280 | PCL Driver Guide - Page 31
box is displayed, click [Yes] or [No]. - If you select [Yes], Windows Firewall will be configured to unblock the connection for Canon Driver Information Assist Service, so that you can set up the printer configuration automatically or use the Job Accounting feature. - If you select [No], you cannot - Canon MF7280 | PCL Driver Guide - Page 32
installed without having to add a new one. To do this, see "Updating the Existing Printer Drivers," on p. 2-35. If you want to install the Canon Driver Information Assist Service together with the printer driver, also select [Canon Driver Information Assist Service]. 2-6 Installing the Software - Canon MF7280 | PCL Driver Guide - Page 33
box is displayed, click [Yes] or [No]. - If you select [Yes], Windows Firewall will be configured to unblock the connection 2 for Canon Driver Information Assist Service, so that you can set up the printer configuration automatically or use the Job Accounting feature. - If you select [No], you - Canon MF7280 | PCL Driver Guide - Page 34
You can also add a printer driver to [Printer List for Driver Installation] by double-clicking the printer driver under [Printer List]. • To delete a printer driver that you do not want to install from [Printer List for Driver Installation], select the appropriate printer driver ➞ click [Remove]. 10 - Canon MF7280 | PCL Driver Guide - Page 35
Getting Started 11 Select a port. 2 NOTE If more than one printer driver is selected, this dialog box will reappear to enable selection of different ports for other printer drivers. ● If you want to set a standard port: ❑ Select the printer port you want to use from [Port]. ● If you want to set a - Canon MF7280 | PCL Driver Guide - Page 36
add in the dialog box displayed ➞ click [OK]. The dialog box that is displayed varies according to the port being added. 12 Enter a printer name in [Printer Name] if necessary ➞ select [Set as Default] if you want to set the printer as the default printer ➞ click [Next]. 2-10 Installing the Software - Canon MF7280 | PCL Driver Guide - Page 37
in Windows NT 4.0/2000/XP/Server 2003, select [Use as Shared Printer]. For instructions on how to specify detailed settings for a shared printer, see steps 2 to 4 of "Alternate Printer Driver (Windows NT 4.0/2000/XP/Server 2003)," on p. 2-18. • If you have selected [Network] in the [Add Port] dialog - Canon MF7280 | PCL Driver Guide - Page 38
] ➞ [us_eng]. Getting Started 4 Double-click the [Setup.exe] icon to start the installation process. 5 In the first dialog box of the PCL Printer Driver Setup Wizard, click [Next]. The [License Agreement] dialog box is displayed. 6 Read the license agreement carefully. If you agree to the terms - Canon MF7280 | PCL Driver Guide - Page 39
box is displayed, click [Yes] or [No]. - If you select [Yes], Windows Firewall will be configured to unblock the connection for Canon Driver Information Assist Service, so that you can set up the printer configuration automatically or use the Job Accounting feature. - If you select [No], you cannot - Canon MF7280 | PCL Driver Guide - Page 40
Getting Started 8 Select [PCL5e/5c Printer Driver] or [PCL6 Printer Driver] ➞ click [Next]. 2 NOTE Depending on the printer you are using, this dialog box is not displayed. In this case, proceed to step 9. 9 Click [Next]. 2-14 Installing the Software - Canon MF7280 | PCL Driver Guide - Page 41
the Canon Driver Information Assist Service together with the printer driver, also select [Canon Driver Information Assist Service]. NOTE • If you are using a shared printer in the Print Server (Point and Print) environment, it is necessary to install the Canon Driver Information Assist Service in - Canon MF7280 | PCL Driver Guide - Page 42
click [Select All]. The printer driver(s) you selected is added to [Printer List for Driver Installation]. NOTE • You can also add a printer driver to [Printer List for Driver Installation] by double-clicking the printer driver under [Printer List]. • To delete a printer driver that you do not want - Canon MF7280 | PCL Driver Guide - Page 43
want to change the printer name, or set the printer as the default printer, select [Set Printer Information] ➞ click [Next]. 2 If you do not want to change these settings, click [Next] ➞ skip to step 14. 13 Enter a printer name in [Printer Name], or select [Set as Default] ➞ click [Next]. Installing - Canon MF7280 | PCL Driver Guide - Page 44
, you can install an alternate printer driver. Installing an alternate printer driver enables you to install a printer driver on a client PC via a network. To specify settings for the shared printer, follow the procedure below. 1 Start the Installer ➞ follow the instructions in the dialog boxes. See - Canon MF7280 | PCL Driver Guide - Page 45
Getting Started 2 Select [Use as Shared Printer] ➞ enter a share name. 2 If you want to set the operating system on which the driver will run, click [Drivers to Add]. 3 Select the operating system from [Drivers to Add]. Installing the Software 2-19 - Canon MF7280 | PCL Driver Guide - Page 46
[Next]. 2 5 Follow the instructions in the dialog or message boxes to complete the installation. See steps 13 and 14 of "Standard Installation," on p. 2-3. IMPORTANT To use the printer driver on the client PC, double-click the shared printer icon for the alternate printer driver on the server PC - Canon MF7280 | PCL Driver Guide - Page 47
[Control Panel] ➞ [Printers and Other Hardware] ➞ [Printers and Faxes]. Getting Started 2 In the [Printers] folder, double-click the [Add Printer] icon to start the Add Printer Wizard ➞ follow the instructions on the screen to continue the installation. 3 Insert the Printer Driver Software CD-ROM - Canon MF7280 | PCL Driver Guide - Page 48
you want to install ➞ click [OK]. 2 Getting Started You can select the driver from the following folders on the CD-ROM: • PCL5c/PCL5e OS Windows 98/Me: Windows NT 4.0: Windows 2000/XP/Server 2003: Path \PCL\us_eng\win98_me\ - Canon MF7280 | PCL Driver Guide - Page 49
Getting Started 5 Select your printer model from [Printers] ➞ click [Next]. 2 6 Follow the instructions on the screen to continue ➞ click [Finish] to start copying the files. The printer icon is displayed in the [Printers] folder. The driver is now installed. Installing the Software 2-23 - Canon MF7280 | PCL Driver Guide - Page 50
2300, LASER CLASS 700 series, LBP-2000, or MF7280, you can print in a USB environment. USB Standard Installation (Windows 98/Me/2000/XP/Server 2003) IMPORTANT • Before installing a printer driver through a USB connection, turn the printer OFF. Turn the power back ON only if the instruction to do - Canon MF7280 | PCL Driver Guide - Page 51
Getting Started 2 Select [Install with USB Connection] ➞ click [Next]. 2 3 Select either [PCL5e/5c Printer Driver] or [PCL6 Printer Driver] ➞ click [Next]. NOTE Depending on the printer you are using, this dialog box is not displayed. In this case, proceed to step 4. 4 Click [Yes] in the message - Canon MF7280 | PCL Driver Guide - Page 52
is now installed. Plug and Play Installation (Windows 98) 1 Connect the cable from the printer's USB port to the PC's USB port, and then turn the printer ON. 2 Start Windows, and then insert the Printer Driver Software CD-ROM into the CD-ROM drive. The Add New Hardware Wizard starts. 3 In the first - Canon MF7280 | PCL Driver Guide - Page 53
screen ➞ click [Finish] after the files are copied. The USB driver is now installed. Continue with the installation to install the printer driver. 7 Follow the instructions on the screen ➞ select [Search for the best driver for your device. (Recommended)] ➞ click [Next]. Installing the Software 2-27 - Canon MF7280 | PCL Driver Guide - Page 54
-ROM: PCL5c/PCL5e: \PCL\us_eng\win98_me\pcl5e_5c PCL6: \PCL\us_eng\win98_me\pcl6 Getting Started 2 9 Follow the instructions on the screen ➞ click [Finish] after the files are copied. The printer driver is now installed. Plug and Play Installation (Windows Me) 1 Connect the cable from the - Canon MF7280 | PCL Driver Guide - Page 55
box ➞ click [OK]. 2 Getting Started 5 Follow the instructions on the screen ➞ click [Finish] after the files are copied. The USB driver is now installed. Continue with the installation to install the printer driver. 6 In the [Select Other Driver] dialog box, select the folder containing the - Canon MF7280 | PCL Driver Guide - Page 56
Getting Started Plug and Play Installation (Windows 2000) 1 Connect the cable from the printer's USB port to the PC's USB port, and then turn the printer ON. 2 Start Windows, and then insert the Printer Driver Software CD-ROM into the CD-ROM drive. 2 The Found New Hardware Wizard starts. 3 In the - Canon MF7280 | PCL Driver Guide - Page 57
You can select the driver from the following folders on the CD-ROM: PCL5c/PCL5e: \PCL\us_eng\win2k_xp\pcl5e_5c PCL6: \PCL\us_eng\win2k_xp\pcl6 7 Follow the instructions on the screen ➞ click [Finish] after the files are copied. The USB driver and the printer driver are now installed. Installing - Canon MF7280 | PCL Driver Guide - Page 58
Getting Started Plug and Play Installation (Windows XP/Server 2003) 1 Connect the cable from the printer's USB port to the PC's USB port, and then turn the printer ON. 2 Start Windows, and then insert the Printer Driver Software CD-ROM into the CD-ROM drive. 2 The Found New Hardware Wizard starts. - Canon MF7280 | PCL Driver Guide - Page 59
Getting Started Installing the Canon Driver Information Assist Service After installing the printer driver, you can set up the printer configuration automatically and use the Job Accounting feature. If you are using a shared printer in the Print Server (Point and Print) environment, it is necessary - Canon MF7280 | PCL Driver Guide - Page 60
Getting Started 6 Read the license agreement carefully. If you agree to the terms ➞ click [Yes]. 7 Select [Manually Set Port to Install] ➞ click [Next]. 2 8 Select [Canon Driver Information Assist Service] ➞ click [Next]. 2-34 Installing the Software - Canon MF7280 | PCL Driver Guide - Page 61
prompting you to do so. The Canon Driver Information Assist Service is now installed. Updating the Existing Printer Drivers IMPORTANT Canon machines whose printer drivers can be updated using this version of the driver are listed under "Supported Canon Products," on p. 1-3. Using the Installer If - Canon MF7280 | PCL Driver Guide - Page 62
[Start]. 4 After the files are copied, click [Exit] to finish the installation. Restart your computer when a message is displayed prompting you to do so. The printer drivers already installed are now updated. 2-36 Installing the Software - Canon MF7280 | PCL Driver Guide - Page 63
IMPORTANT To use the updated alternate printer driver on the client PC, first uninstall the current printer driver ➞ double-click the shared printer icon for the updated alternate printer driver on the server PC. Using the Add Printer Wizard 1 Insert the Printer Driver Software CD-ROM into the CD- - Canon MF7280 | PCL Driver Guide - Page 64
]. 6 Click [Have Disk] to specify the driver path on the CD-ROM ➞ follow the instructions on the screen. For Windows NT 4.0, proceed to step 7. For Windows 98/Me/2000/XP/Server 2003, skip to step 8. For Windows 98/Me/2000/XP/Server 2003, the printer driver is updated. 2-38 Installing the Software - Canon MF7280 | PCL Driver Guide - Page 65
printer in the Print Server (Point and Print) environment, it is necessary to install the Canon Driver Information Assist Service in the server PC in order to use the Job Accounting feature. For instructions on how to install the Canon Driver Information Assist Service, see "Installing the Canon - Canon MF7280 | PCL Driver Guide - Page 66
2003) If you use a shared printer on a network, and an alternate printer driver is installed on the server, the alternate printer driver is updated simultaneously when you install a new driver with the Installer. To update the alternate printer driver manually without using the Installer, follow - Canon MF7280 | PCL Driver Guide - Page 67
• If you are using Windows XP Home Edition, on the [Start] menu, click [Control Panel] ➞ [Printers and Other Hardware] ➞ [Printers and Faxes]. 2 Click the [Server Properties] on the [File] menu to open the [Print Server Properties] dialog box ➞ click the [Drivers] tab. Installing the Software 2-41 - Canon MF7280 | PCL Driver Guide - Page 68
on the CD-ROM ➞ click [OK]. The alternate printer driver is updated. IMPORTANT To use the updated printer driver on the client PC, first uninstall the current printer driver ➞ double-click the shared printer icon for the updated alternate printer driver on the server PC. 2-42 Installing the Software - Canon MF7280 | PCL Driver Guide - Page 69
that you use the Uninstaller to uninstall an unnecessary driver. 1 On the [Start] menu, point to [Programs] ➞ [Canon Printer Uninstaller] ➞ click [PCL Printer Driver Uninstaller]. 2 2 In the [Delete Printer] dialog box, select the printer driver you want to delete. 3 Click [Delete]. 4 Click [Yes] to - Canon MF7280 | PCL Driver Guide - Page 70
Getting Started 5 Click [Exit] in the [Delete Printer] dialog box. 2 NOTE You can also start the Uninstaller from the Printer Driver Software CD-ROM. To do so, double-click the [Uninstal.exe] icon in the following folder: \PCL\us_eng\misc. 2-44 Installing the Software - Canon MF7280 | PCL Driver Guide - Page 71
are using a shared printer in the Print Server (Point and Print) environment, it is necessary to install the Canon Driver Information Assist Service in the server PC in order to set up the printer configuration automatically. (See "Installing the Canon Driver Information Assist Service," on p. 2-33 - Canon MF7280 | PCL Driver Guide - Page 72
the [Start] menu, click [Printers and Faxes]. • If you are using Windows XP Home Edition, on the [Start] menu, click [Control Panel] ➞ [Printers and Other Hardware] ➞ [Printers and Faxes]. 2 2 In the [Printers] folder, right-click the printer icon for your printer ➞ click [Properties]. 2-46 Setting - Canon MF7280 | PCL Driver Guide - Page 73
Getting Started 3 In the printer properties dialog box, click the [Configuration] tab (Windows 98/Me) or [Device Settings] tab (Windows NT ). 5 Click [Yes] in the message box. 6 Click [OK]. If no information is detected, proceed to "Configuring Manually." Setting Up the Printer Configuration 2-47 - Canon MF7280 | PCL Driver Guide - Page 74
set up the configuration automatically, specify the options manually in the [Configuration] sheet (Windows 98/Me) or [Device Settings] sheet (Windows NT 4.0/2000/XP/Server 2003). Getting Started 2 1 On the [Start] menu, point to [Settings] ➞ click [Printers]. NOTE • If you are using Windows XP - Canon MF7280 | PCL Driver Guide - Page 75
Getting Started 3 In the printer properties dialog box, click the [Configuration] tab (Windows 98/Me) or [Device Settings] tab (Windows NT 4.0/ 2000/XP/Server 2003) is displayed. 2 4 Specify the paper source, output, and other options installed in the printer manually. 5 Click [OK]. Setting Up the - Canon MF7280 | PCL Driver Guide - Page 76
controller version must be configured in order to use the supported functions. 1 Print the Configuration Page. ❑ On the printer control panel, press (Additional Functions). ❑ Press [Report Settings] ➞ [Printer] under . ❑ Press [PCL] ➞ [Configuration Page] ➞ [Yes]. NOTE • The procedure - Canon MF7280 | PCL Driver Guide - Page 77
Printers and Other Hardware] ➞ [Printers and Faxes]. 4 In the [Printers] folder, right-click the printer icon for your 2 printer ➞ click [Properties]. Getting Started 5 In the printer Controller Function ID and Function Version are not printed on the Configuration Page, select [None] from [ - Canon MF7280 | PCL Driver Guide - Page 78
Getting Started 8 Select the functions you want to use. 2 NOTE Depending on the corresponding function settings and controller version of your printer, some functions may not be available. 9 Click [OK]. The [Device Function Settings] dialog box closes. 10 Click [OK]. The functions you selected in - Canon MF7280 | PCL Driver Guide - Page 79
imageRUNNER 9070-M3, you can enable the device functions manually, according to your needs. To perform this operation, the corresponding function settings must be enabled on the printer. 2 1 On the [Start] menu, point to [Settings] ➞ click [Printers]. NOTE • If you are using Windows XP Professional - Canon MF7280 | PCL Driver Guide - Page 80
Getting Started 7 Click [OK]. The functions you selected in step 5 become available in the printer properties dialog box. 2 2-54 Configuring the Device Function Settings - Canon MF7280 | PCL Driver Guide - Page 81
software, with the document open, select [Print] to print your document. 2 In the [Print] dialog box, select your printer from [Name] ➞ click [Properties]. The printer properties dialog box opens. 3 Specify the various print settings in the printer properties dialog box. To switch between sheets - Canon MF7280 | PCL Driver Guide - Page 82
Getting Started 2 2-56 Printing a Document - Canon MF7280 | PCL Driver Guide - Page 83
instructions for specifying the various basic settings for printing a document. Note that, depending on your printer model, some print options may be unavailable. Accessing the Printer Scaling a Document Manually 3-14 Printing Multiple Pages on One Sheet 3-16 Two-Sided Printing 3-18 Specifying - Canon MF7280 | PCL Driver Guide - Page 84
Basic Print Options 3. Basic Print Options Creating Tabs 3-50 Printing on Custom Paper 3-53 Registering Custom Paper 3-53 Printing on Custom Paper 3-55 Printing on Local Standard Paper 3-56 Printing a Banner Page with a Print Job (Windows 98/Me/2000/XP/Server 2003). . . . . 3-59 3 3-2 - Canon MF7280 | PCL Driver Guide - Page 85
settings are available for the current print job. If you access the printer properties dialog box from the [Printers] folder, you can set up the printer configuration or specify the default printer driver settings for every print job. Accessing the Printer Properties Dialog Box from Application - Canon MF7280 | PCL Driver Guide - Page 86
Print Options 2 Select your printer name from the drop-down list box ➞ click [Properties]. 3 Accessing the Printer Properties Dialog Box from the Printers Folder 1 On the [Start] menu, point to [Settings] ➞ click [Printers]. 2 In the [Printers] folder, right-click the printer icon for your printer - Canon MF7280 | PCL Driver Guide - Page 87
dialog box, you can specify the printer driver settings and set up the printer configuration. NOTE If you are using Windows NT 4.0, the "printing preferences" dialog box refers to the "document defaults" dialog box. 3 Accessing the Printer Properties Dialog Box from Application Software If - Canon MF7280 | PCL Driver Guide - Page 88
Preferences Dialog Box from the Printers Folder If you access the printing preferences dialog box from the [Printers] folder, you can specify the default printer driver settings for every print job. NOTE To access the printing preferences dialog box from the [Printers] folder, you need to be - Canon MF7280 | PCL Driver Guide - Page 89
using Windows XP Home Edition, on the [Start] menu, click [Control Panel] ➞ [Printers and Other Hardware] ➞ [Printers and Faxes]. 2 In the [Printers] folder, right-click the printer icon for your printer ➞ click [Properties]. Basic Print Options Accessing the Printer Properties Dialog Box 3-7 - Canon MF7280 | PCL Driver Guide - Page 90
Is a Profile? 3 Various printer driver settings are saved as profiles. You can also save printer driver settings that you frequently use as profiles. If you select a profile, the document is printed with the saved settings. Basic Print Options Selecting a Profile for Printing If you select - Canon MF7280 | PCL Driver Guide - Page 91
in the [Profile] sheet in the printer properties dialog box. 1 From the printer properties dialog box, specify the printer 3 driver settings for the customized profile in the [Page Setup], [Finishing], [Paper Source], and [Quality] sheets. Basic Print Options 2 Click [ ] (Add Profile) or - Canon MF7280 | PCL Driver Guide - Page 92
and Faxes]. • If you are using Windows XP Home Edition, on the [Start] menu, click [Control Panel] ➞ [Printers and Other Hardware] ➞ [Printers and Faxes]. Basic Print Options 2 In the [Printers] folder, right-click the printer icon for your printer ➞ click [Properties]. 3-10 Using Profiles for - Canon MF7280 | PCL Driver Guide - Page 93
Basic Print Options 3 In the printer properties dialog box, click the [Profile] tab. The [Profile] sheet is displayed. 3 Using Profiles for Printing 3-11 - Canon MF7280 | PCL Driver Guide - Page 94
Basic Print Options 4 Click [Add] or [Edit]. The [Add/Edit Profile] dialog box opens. 3 5 Specify the settings for the profile in the [Page [Quality] sheets. 6 Display the [Attribution] sheet. 7 Specify the name, icon, and a comment of the profile ➞ click [OK]. 3-12 Using Profiles for Printing - Canon MF7280 | PCL Driver Guide - Page 95
document to scale it automatically, or specify the scaling value manually. Scaling a Document Automatically 3 1 From the printer properties dialog box, display the [Page Setup] sheet. 2 Select the page size from [Page Size]. If this driver setting is inaccessible from the application software, click - Canon MF7280 | PCL Driver Guide - Page 96
[Output Size]. NOTE If the value is less than 25% or more than 400%, the document is printed without scaling on the paper specified in [Output Size]. Scaling a Document Manually 3 1 From the printer properties dialog box, display the [Page Setup] sheet. 2 Select the page size from [Page Size]. If - Canon MF7280 | PCL Driver Guide - Page 97
Basic Print Options 4 Select [Manual Scaling] ➞ specify the desired scaling value from 25% to 400%. 5 Click [OK]. 3 Scaling a Document 3-15 - Canon MF7280 | PCL Driver Guide - Page 98
on One Sheet Multiple pages can be printed on one sheet of paper. The number of document pages which can be printed on one sheet of paper is 2, 4, 6, 8, 9, or 16. 3 1 From the printer properties dialog box, display the [Page Setup] sheet. Basic Print Options 2 Select the required page layout - Canon MF7280 | PCL Driver Guide - Page 99
Basic Print Options 3 Select the required page order layout from [Page Order]. 3 4 Click [OK]. Printing Multiple Pages on One Sheet 3-17 - Canon MF7280 | PCL Driver Guide - Page 100
/1600, imageRUNNER 2010F, imageCLASS 2300, and LBP-2000. 3 • For the Color imageRUNNER C2000 series, imageRUNNER 2016, imageRUNNER 2020, and MF7280, two-sided printing is available only when a Duplexing Unit or a Duplex Unit is attached to the printer. 1 From the printer properties dialog box - Canon MF7280 | PCL Driver Guide - Page 101
from [Binding Location]. If the [Binding Location] option is selected, the document and margins are positioned correctly on the pages for two-sided printing. 4 If you want to set the gutter width, click [Gutter] to open the [Gutter Settings] dialog box ➞ specify the value in [Gutter] ➞ click - Canon MF7280 | PCL Driver Guide - Page 102
for proper spooling to ensure that all sets of the documents are printed out. • When a collate option is available in the [Print] dialog box of the application software, the Collate option setting of the printer driver has priority, regardless of the same setting in the application software. However - Canon MF7280 | PCL Driver Guide - Page 103
Basic Print Options 1 From the printer properties dialog box, display the [Page Setup] sheet. 3 2 Specify the number of copies to print in [Copies]. Specifying the Finishing Options 3-21 - Canon MF7280 | PCL Driver Guide - Page 104
Basic Print Options 3 Click the [Finishing] tab. 3 4 Select a finishing option, such as [Collate], [Group], [Staple & Collate & Collect] or [Staple & Group], proceed to step 6. NOTE Depending on the printer you are using, the staple position cannot be specified. 3-22 Specifying the Finishing Options - Canon MF7280 | PCL Driver Guide - Page 105
printer. 7 Click [OK] in the [Finishing] sheet. 3 Basic Print Options Booklet Printing Booklet Printing enables you to print 3530, LASER CLASS 700 series, and MF7280, Booklet Printing is not available Printing is not available for the imageRUNNER 2000/1600, imageRUNNER 2010F, imageCLASS 2300 - Canon MF7280 | PCL Driver Guide - Page 106
publication. • Saddle stitch printing is available only if a saddle finisher is attached to the printer. • Saddle stitch printing is not available for the imageRUNNER 2016, imageRUNNER 2020, imageRUNNER 2230, imageRUNNER 2830, imageRUNNER 3530, LASER CLASS 700 series, and MF7280. 3-24 Specifying the - Canon MF7280 | PCL Driver Guide - Page 107
Others] under [Paper Selection] in the [Paper Source] sheet ➞ specify the paper source for the cover page and body pages of the document. (See "Printing the Cover and Body Pages of a Booklet from Different Paper Sources (Windows 98/Me/2000/XP/Server 2003)," on p. 3-35.) Using Creep Correction for - Canon MF7280 | PCL Driver Guide - Page 108
Basic Print Options 1 From the printer properties dialog box, click the [Finishing] tab. 3 2 Select [Booklet Printing] from [Print Style]. 3-26 Specifying the Finishing Options - Canon MF7280 | PCL Driver Guide - Page 109
box opens. 3 4 If you are using Windows 98/Me/2000/XP/Server 2003, select [In Device] for [Booklet Printing Process]. 5 Select [Use Creep (Displacement) Correction] ➞ set how the printing position shift amount is to be adjusted under [Displacement Correction Method] ➞ click [OK]. 6 Click [OK] in the - Canon MF7280 | PCL Driver Guide - Page 110
. NOTE Printing with mixed paper sizes is not available for the Color imageRUNNER C2000 series, imageRUNNER 2000/1600, imageRUNNER 2010F, imageRUNNER 400/330, imageRUNNER 400/330-P1/R1, imageRUNNER 600/550/60, imageCLASS 2300, LASER CLASS 700 series, and LBP-2000. 3 1 From the printer properties - Canon MF7280 | PCL Driver Guide - Page 111
Basic Print Options 3 Click the [Finishing] tab ➞ select [Print with Mixed Paper Sizes/Orientations]. 3 4 Click [Details]. The [Detailed Settings] dialog box opens. Specifying the Finishing Options 3-29 - Canon MF7280 | PCL Driver Guide - Page 112
Setup] sheet is displayed in the drop-down list box. 6 Select the pattern of the print orientation and binding location for the combined paper sizes under [Paper Alignment]. Basic Print Options 3 7 Specify the gutter width in [Gutter]. 8 Click [OK]. The [Detailed Settings] dialog box closes - Canon MF7280 | PCL Driver Guide - Page 113
one paper source or to print the pages from different paper sources. 3 NOTE For printers other than the Color imageRUNNER C2000 series, imageRUNNER 2000/ 1600, imageRUNNER 2010F, imageRUNNER 400/330, imageRUNNER 400/330-P1/R1, imageRUNNER 600/550/60, imageCLASS 2300, LASER CLASS 700 series, and LBP - Canon MF7280 | PCL Driver Guide - Page 114
Basic Print Options Printing All the Pages from the Same Paper Source 1 From the printer properties dialog box, click the [Paper Source] tab. 2 Select [Same Paper for All Pages] from [Paper Selection]. 3 3 Select the paper source required from [Paper Source]. 4 - Canon MF7280 | PCL Driver Guide - Page 115
Basic Print Options Printing the First, Body, and Last Pages from Different Paper Sources 1 From the printer properties dialog box, click the [Paper Source] tab. 2 Select [Different for First, Others, and Last] from [Paper Selection]. 3 3 Select the paper sources required for the - Canon MF7280 | PCL Driver Guide - Page 116
Basic Print Options Printing the First, Second, Body, and Last Pages from Different Paper Sources 1 From the printer properties dialog box, click the [Paper Source] tab. 2 Select [Different for First, Second, Others, and Last] from [Paper Selection]. 3 3 Select the paper sources required for - Canon MF7280 | PCL Driver Guide - Page 117
Printing the Cover and Body Pages of a Booklet from Different Paper Sources (Windows 98/Me/2000/XP/Server 2003) 1 From the printer properties dialog box, click the [Finishing] tab. 2 Select [Booklet Printing] from [Print Style]. 3 Basic Print Options Specifying the Paper Source 3-35 - Canon MF7280 | PCL Driver Guide - Page 118
Basic Print Options 3 Click the [Paper Source] tab ➞ select [Different for Cover and Others] from [Paper Selection]. 3 4 Select the paper sources required for the cover and body pages from [Cover Page] and [Other Pages]. 5 Click [OK]. 3-36 Specifying the Paper Source - Canon MF7280 | PCL Driver Guide - Page 119
Basic Print Options Printing on Transparencies NOTE This option is not available for the imageRUNNER 2016, imageRUNNER 2020, and MF7280. 1 From the printer properties dialog box, click the [Paper Source] tab. 3 2 Select [Transparency Interleaving] from [Paper Selection]. 3 Select the paper source - Canon MF7280 | PCL Driver Guide - Page 120
you need to specify the printer controller version. (See "Configuring the Device Function Settings," on p. 2-50.) Basic Print Options Adding Front or Back 400/330-P1/R1, imageRUNNER 600/550/60, imageCLASS 2300, LASER CLASS 700 series, LBP-2000, and MF7280. • If [Group] or [Rotate] is selected - Canon MF7280 | PCL Driver Guide - Page 121
Basic Print Options 2 Specify the paper source or paper type for the body pages of the document. ● If you want to use the same type of paper - Canon MF7280 | PCL Driver Guide - Page 122
Basic Print Options ● If you want to insert sheets into body pages for separation: ❑ Select [Inserting Sheet] from [Paper Selection]. ❑ Select the paper source from [Original Paper - Canon MF7280 | PCL Driver Guide - Page 123
5 Select the side of paper to print on from [Print on]. 6 Select the paper source for front and back covers from [Paper Source]. 7 Click [OK]. The [Front/Back Cover Settings] dialog box closes. 8 Click [OK]. 3 Basic Print Options Using Cover or Sheet Insertion Options 3-41 - Canon MF7280 | PCL Driver Guide - Page 124
2016, imageRUNNER 2020, imageRUNNER 400/330, imageRUNNER 400/330-P1/R1, imageRUNNER 600/550/60, imageCLASS 2300, LASER CLASS 700 series, LBP-2000, and MF7280. Basic Print Options • Depending on the printer and operating system you are using, up to 20 or 100 inserted sheets or chapter pages can - Canon MF7280 | PCL Driver Guide - Page 125
Basic Print Options 2 Select [Inserting Sheet] from [Paper Selection]. 3 3 Select the paper source or paper type for the body pages of the document from [Original Paper Source] or [Original Paper Type]. Using Cover or Sheet Insertion Options 3-43 - Canon MF7280 | PCL Driver Guide - Page 126
Sheet] or [Chapter Page] for [Sheet for Insertion] to specify the type of inserted sheets. 6 Select the side of paper to print on from [Print on]. NOTE Chapter pages can be printed only on the front side of the page. Blank sheets cannot be inserted as chapter pages. 7 Select the paper source for - Canon MF7280 | PCL Driver Guide - Page 127
range for the insertion position is from pages 2 to 999. 10 Click [OK]. The [Inserting Sheet Settings] dialog box closes. 3 11 Click [OK]. Basic Print Options NOTE For example, making the following settings for a nine page document results in the output shown below: - Front cover page is - Canon MF7280 | PCL Driver Guide - Page 128
(Windows 98/Me/2000/XP/Server 2003) You can print on the tab part of tab paper. You can also insert tab paper into . However, depending on the controller version of the printer you are using, this option may not be available. • Depending on the printer and operating system you are using, up to 20 - Canon MF7280 | PCL Driver Guide - Page 129
Basic Print Options 2 Select [Inserting Sheet] from [Paper Selection]. 3 3 Select the paper source or paper type for the body pages of the document from [Original Paper Source] or [Original Paper Type]. Using Cover or Sheet Insertion Options 3-47 - Canon MF7280 | PCL Driver Guide - Page 130
Basic Print Options 4 Click [Inserting Sheet Settings]. The [Inserting Sheet Settings] dialog box opens. 3 5 Select [Tab Paper] from [Sheet for Insertion]. NOTE For the imageRUNNER C5800, imageRUNNER - Canon MF7280 | PCL Driver Guide - Page 131
is applied after clicking [Done]. • The available range for the insertion position is from pages 1 to 999. 9 Specify the width to shift the image to be printed on the tab part of the paper in [Shifting Width]. 3 NOTE You can change the unit used to specify the shift width (millimeters or inches). 10 - Canon MF7280 | PCL Driver Guide - Page 132
8500-M1, imageRUNNER 8500-M2, imageRUNNER 9070, and imageRUNNER 9070-M3. Basic Print Options • If [Group] or [Rotate] is selected for [Finishing] in the controller version of the printer. • Before creating tab paper, open the printer properties dialog box from the [Printers] folder ➞ click [Form - Canon MF7280 | PCL Driver Guide - Page 133
[Tab Paper] from [Paper Type]. 3 3 Click [Tab Position]. The [Tab Position Settings] dialog box opens. 4 Specify the width to shift the image to be printed on the tab part of the paper in [Shifting Width]. NOTE You can change the unit used to specify the shift width (millimeters or inches). Using - Canon MF7280 | PCL Driver Guide - Page 134
Basic Print Options 5 Click [OK]. The [Tab Position Settings] dialog box closes. 6 Click [OK]. 3 3-52 Using Cover or Sheet Insertion Options - Canon MF7280 | PCL Driver Guide - Page 135
the [Start] menu, click [Control Panel] ➞ [Printers and Other Hardware] ➞ [Printers and Faxes]. 2 In the [Printers] folder, right-click the printer icon for your printer ➞ click [Properties] (Windows 98/Me), [Document Default] (Windows NT 4.0), or [Printing Preferences] (Windows 2000/XP/Server 2003 - Canon MF7280 | PCL Driver Guide - Page 136
Basic Print Options 3 In the printer properties dialog box, click the [Page Setup] tab ➞ click [Custom Paper Size]. 3 4 Enter a custom paper name in [Name of Custom and width of the paper size in portrait orientation, where the height should be longer than the width. 3-54 Printing on Custom Paper - Canon MF7280 | PCL Driver Guide - Page 137
on the computer you are using. • For Windows 98/Me, you can register a maximum of 50 custom paper sizes. Printing on Custom Paper 3 Basic Print Options 1 From the printer properties dialog box, click the [Page Setup] tab. 2 Select the custom paper name you specified from [Page Size] and - Canon MF7280 | PCL Driver Guide - Page 138
paper. NOTE For the size and type of local standard paper supported by the printer you are using, see "Local Standard Paper Sizes List," on p. 5-10. Basic Print Options 1 On the [Start] menu, point to [Settings] ➞ click [Printers]. NOTE • If you are using Windows XP Professional/Server 2003, on - Canon MF7280 | PCL Driver Guide - Page 139
Basic Print Options 3 In the printer properties dialog box, click the [Configuration] tab (Windows 98/Me) or [Device Settings] tab (Windows NT 4.0/2000/XP/Server 2003) ➞ [Form to Tray Assignment]. 3 Printing on Custom Paper 3-57 - Canon MF7280 | PCL Driver Guide - Page 140
Basic Print Options 4 From [Paper Source Information], select the paper source in which the local standard paper is loaded ➞ select [Local Standard] from [Paper Size]. 3 5 Click [OK] in the [Form to Tray Assignment] dialog box. 6 Click [OK] in the printer properties dialog box. 3-58 Printing on - Canon MF7280 | PCL Driver Guide - Page 141
6020/5020, imageRUNNER 6020i/5020i, imageRUNNER 6570/5570, imageRUNNER 7105/7095/7086, imageRUNNER 7200, imageRUNNER 8070, imageRUNNER 85, imageRUNNER 85+, imageRUNNER 8500, imageRUNNER 9070, and MF7280. Printing a Banner Page with a Print Job (Windows 98/Me/2000/XP/Server 2003) 3-59 - Canon MF7280 | PCL Driver Guide - Page 142
Basic Print Options 1 From the printer properties dialog box, click the [Finishing] tab. 3 2 Click [Finishing Details]. The [Finishing Details] dialog box opens. 3 Select [Auto] for [Print Banner Page]. 3-60 Printing a Banner Page with a Print Job (Windows 98/Me/2000/XP/Server 2003) - Canon MF7280 | PCL Driver Guide - Page 143
page ➞ click [OK]. NOTE Paper types that support banner page printing are Plain Paper, Recycled Paper, and Color Paper. 6 Click [OK] in the [Finishing] sheet. 3 Basic Print Options NOTE • A banner page will not be printed if [Booklet Printing] with the [Saddle Stitch] option is selected, if - Canon MF7280 | PCL Driver Guide - Page 144
Basic Print Options 3 3-62 Printing a Banner Page with a Print Job (Windows 98/Me/2000/XP/Server 2003) - Canon MF7280 | PCL Driver Guide - Page 145
a Document as an Image Form 4-31 Secured Printing 4-34 Editing Multiple Print Documents Together (Windows 98/Me/2000/XP/Server 2003) . . 4-37 Promoting a Print Job 4-39 Job Accounting Feature 4-41 Job Accounting Overview 4-41 Specifying the ID and Password 4-42 Printing with Job Accounting - Canon MF7280 | PCL Driver Guide - Page 146
. • To use form files downloaded with the Canon NetSpot Resource Downloader, you need to install the NetSpot Resource Downloader Printer Driver Add-on Module. For instructions on how to use Canon NetSpot Resource Downloader, see the NetSpot Resource Downloader User's Guide. 4-2 Overlay Printing - Canon MF7280 | PCL Driver Guide - Page 147
a Form File If forms created in application software are stored in your computer as form files, you can use the forms for Overlay Printing. To store a form file in your computer, follow the procedure below. 1 Prepare a document in the application software. 2 In the application software, select - Canon MF7280 | PCL Driver Guide - Page 148
330, imageRUNNER 400/330-P1/R1, imageRUNNER 3530, imageRUNNER 5070, imageRUNNER 600/550/ 60, imageRUNNER 6000/5000, imageRUNNER 6570/5570, imageCLASS 2300, LASER CLASS 700 series, LBP-2000, and MF7280: ❑ Select [Create a Form File] under [Processing Method]. Special Print Options 4-4 Overlay - Canon MF7280 | PCL Driver Guide - Page 149
Special Print Options ● For printers other than the above: ❑ Select [Create a Form File] under [Processing Method] ➞ select [Stored in Host]. 4 8 Click [Browse] ➞ specify the file name ➞ click [Save]. 9 Enter a title, - Canon MF7280 | PCL Driver Guide - Page 150
file stored in your computer, follow the procedure below. 1 In the application software, select [Print]. 2 Click [Properties] in the [Print] dialog box. 3 Display the [Page Setup] sheet. 4 Special Print Options 4 Click [Page Options]. The [Page Options] dialog box opens. 5 Click the [Overlay] tab - Canon MF7280 | PCL Driver Guide - Page 151
Color imageRUNNER C2000 series, imageRUNNER 2016, imageRUNNER 2020, imageCLASS 2300, LASER CLASS 700 series, and MF7280: ❑ Select [Use Overlay Printing] under [Processing Method]. 4 ● For printers other than the above: ❑ Select [Use Overlay Printing] under [Processing Method] ➞ select [Form File on - Canon MF7280 | PCL Driver Guide - Page 152
. • To use form files downloaded with the Canon NetSpot Resource Downloader, you need to install NetSpot Resource Downloader Printer Driver Add-on Module. For instructions on how to use the Canon NetSpot Resource Downloader, see the NetSpot Resource Downloader User's Guide. • To use the imageRUNNER - Canon MF7280 | PCL Driver Guide - Page 153
4530, imageRUNNER 600/550/60, imageRUNNER 6000/5000, imageCLASS 2300, LASER CLASS 700 series, LBP-2000, and MF7280. • Depending on the controller version of the printer you are using, this option may not be 4 available. Special Print Options 1 In the application software, prepare a document - Canon MF7280 | PCL Driver Guide - Page 154
Special Print Options 3 Display the [Page Setup] sheet. 4 4 Click [Page Options]. The [Page Options] dialog box opens. 4-10 Overlay Printing - Canon MF7280 | PCL Driver Guide - Page 155
[Processing Method] ➞ select [Stored in Device]. 4 6 Enter a file name in [File Name] ➞ click [OK]. 7 Click [OK] in the [Page Setup] sheet. 8 Click [OK] in the [Print] dialog box. The document is now stored as a form file in the printer. The form file does not print out at creation. Overlay - Canon MF7280 | PCL Driver Guide - Page 156
6000/5000, imageCLASS 2300, LASER CLASS 700 series, LBP-2000, and MF7280. • Depending on the controller version of the printer you are using, this option may not be available. Special Print Options 1 In the application software, select [Print]. 2 Click [Properties] in the [Print] dialog box - Canon MF7280 | PCL Driver Guide - Page 157
Special Print Options 3 Display the [Page Setup] sheet. 4 4 Click [Page Options]. The [Page Options] dialog box opens. Overlay Printing 4-13 - Canon MF7280 | PCL Driver Guide - Page 158
Options 5 Click the [Overlay] tab ➞ select [Use Overlay Printing with] under [Processing Method] ➞ select [Form File (Image data) on Device]. 4 6 Specify the form file name. ● If you acquire the printer status successfully: ❑ When the [File List] appears, select a form file. ● If you cannot acquire - Canon MF7280 | PCL Driver Guide - Page 159
Print Options 7 For 2-sided printing, select which pages of the document are to be overlaid with a form file from [Apply to] ➞ click [OK]. 4 8 Click [OK] in the [Page Setup] sheet. 9 Click [OK] in the [Print] dialog box. The document is printed with the selected form file overlaid. Overlay Printing - Canon MF7280 | PCL Driver Guide - Page 160
installing the Canon NetSpot Resource Downloader Printer Driver Add-on Module. 4 NOTE This option is not available for the Color imageRUNNER C2000 series, imageRUNNER 2016, imageRUNNER 2020, imageCLASS 2300, LASER CLASS 700 series, and MF7280. 1 In the application software, select [Print]. 2 Click - Canon MF7280 | PCL Driver Guide - Page 161
Special Print Options 3 Display the [Page Setup] sheet. 4 4 Click [Page Options]. The [Page Options] dialog box opens. 5 Click the [Overlay] tab. Overlay Printing 4-17 - Canon MF7280 | PCL Driver Guide - Page 162
, imageRUNNER 2830, imageRUNNER 400/330, imageRUNNER 400/330-P1/R1, imageRUNNER 3530, imageRUNNER 600/550/60, imageRUNNER 6000/5000, and LBP-2000: 4 ❑ Select [Use Overlay Printing] under [Processing Method] ➞ select [Form File on Device]. Special - Canon MF7280 | PCL Driver Guide - Page 163
than the above: ❑ Select [Use Overlay Printing with] under [Processing Method] ➞ select [Form File (PDL data) on Device]. 4 7 Click [Browse] ➞ select the form file name in the [Browse] dialog box ➞ click [Save]. NOTE The form files downloaded to the printer are displayed in the [Browse] dialog box - Canon MF7280 | PCL Driver Guide - Page 164
following Objectives are stored in the printer driver: • General Special Print Options • Text • Text/Table • Publications • Graphics • Photos • Designs [CAD] • CAD • Toner Saver (available if the printer is equipped with the toner reduction feature) NOTE The available objectives differ - Canon MF7280 | PCL Driver Guide - Page 165
and Editing an Objective You can select the Objective most suitable for your type of print job. You can also edit the settings of an Objective. Selecting an Objective 1 From the printer properties dialog box, click the [Quality] tab. 4 2 Click the required Objective from [Objective]. NOTE An - Canon MF7280 | PCL Driver Guide - Page 166
Special Print Options Editing the Objective Settings 1 From the printer properties dialog box, click the [Quality] tab. 4 2 Select the [Objective] whose settings you want to change. 4-22 Specifying the Print Quality - Canon MF7280 | PCL Driver Guide - Page 167
Special Print Options 3 Click [Details]. The [Detailed Settings] dialog box opens. 4 NOTE The dialog box differs depending on the printer model you are using. 4 Specify the new settings ➞ click [OK]. 5 Click [OK] in the [Quality] sheet. Specifying the Print Quality 4-23 - Canon MF7280 | PCL Driver Guide - Page 168
, imageRUNNER 2016, imageRUNNER 2020, imageCLASS 2300, LASER CLASS 700 series, and MF7280.) Special Print Options Getting User Inbox or Mail (Windows NT 4.0/2000/XP/Server 2003). For instructions on how to get the device status, see "Setting Up the Printer Configuration," on p. 2-45. 3 Click [ - Canon MF7280 | PCL Driver Guide - Page 169
Special Print Options For Printers Other Than the Above 1 Click [Get Device Status] in the [Configuration] sheet (Windows 98/Me) or the [Device Settings] sheet (Windows NT 4.0/2000/XP/Server 2003). For instructions on how to get the device status, see "Setting Up the Printer Configuration," on p. - Canon MF7280 | PCL Driver Guide - Page 170
Specifying the Box Number for Every Print Job in Advance If you specify a box number of a User Inbox or Mail Box in the [Store Destination] dialog box beforehand, every document will be sent to the specified User Inbox or Mail Box. 1 From the printer properties dialog box, select [Store] from - Canon MF7280 | PCL Driver Guide - Page 171
Special Print Options The [Store Destination] dialog box opens. 4 NOTE • If you to save the data with the same name as the document: ❑ Select [Use File Name]. NOTE Depending on the printer you are using, you can send data to multiple mail boxes simultaneously. 4 Click [OK] in the [Store Destination] - Canon MF7280 | PCL Driver Guide - Page 172
that you can specify a box number for each print job. 1 On the [Start] menu, point to [Settings] ➞ click [Printers]. 2 In the [Printers] folder, right-click the printer icon for your printer ➞ click [Properties]. 4 3 In the printer properties dialog box, click the [Configuration] tab (Windows - Canon MF7280 | PCL Driver Guide - Page 173
in the [Print] dialog box ➞ select [Store] from [Output Method] in the [Page Setup], [Finishing], [Paper Source], or [Quality] sheets. 4 NOTE If [Store] has already been selected from [Output Method], skip to step 9. 7 Click [No] in the message box. 8 Click [OK] in the printer properties dialog box - Canon MF7280 | PCL Driver Guide - Page 174
send to the User Inbox or Mail Box ➞ specify a box number. See step 3 of "Specifying the Box Number for Every Print Job in Advance," on p. 4-26. NOTE Depending on the printer you are using, you can send data to multiple mail boxes simultaneously. 11 Click [OK] in the [Store Destination] dialog box - Canon MF7280 | PCL Driver Guide - Page 175
is registered as an Image Form. • This option is available only for the imageRUNNER 600/550/60. 1 From the printer properties dialog box, select [Store] from [Output Method] in the [Page Setup], [Finishing], [Paper 4 Source], or [Quality] sheets. Special Print - Canon MF7280 | PCL Driver Guide - Page 176
Special Print Options 2 Click [Yes] in the message box. The [Store Destination] dialog box opens. 4 NOTE • If you close the [Store Destination] dialog box before you complete - Canon MF7280 | PCL Driver Guide - Page 177
Special Print Options 3 Specify the document name for the data to register as an image form➞ select [Image Form Memory] from [Store Destination]. ● If you want to Destination] dialog box. 4 5 Click [OK] in the printer properties dialog box. Sending Document Data to a User Inbox or Mail Box 4-33 - Canon MF7280 | PCL Driver Guide - Page 178
Printing Secured Printing saves a print job in the printer with a certain password and outputs it later only if the correct password is verified. This feature is useful when printing imageCLASS 2300, LASER CLASS 700 series, and MF7280. 1 From the printer properties dialog box, select [Secured Print - Canon MF7280 | PCL Driver Guide - Page 179
] dialog box ➞ enter the user name and password for the current print job. 4 4 Click [OK] in the [Secured Print Settings] dialog box. 5 Click [OK] to close the printer properties dialog box ➞ click [OK] in the [Print] dialog box. The [Confirm Password] dialog box opens. 6 Confirm the document name - Canon MF7280 | PCL Driver Guide - Page 180
Special Print Options 7 On the printer's control panel or Remote UI, select the print job you want to print ➞ enter the password. The print job is output only if the correct password is entered. 4 4-36 Secured Printing - Canon MF7280 | PCL Driver Guide - Page 181
Documents Together (Windows 98/Me/2000/XP/Server 2003) You can edit and print two or more documents created using different application software as a single document. 1 From the printer properties dialog box, select [Edit and Preview] from [Output Method] in the [Page Setup], [Finishing], [Paper - Canon MF7280 | PCL Driver Guide - Page 182
starts instead of outputting printed pages. 4 4 Repeat steps 1 to 3 for the other documents. You can use Canon PageComposer to combine or change the order of two or more documents. For details about using Canon PageComposer, see the Canon PageComposer Help. NOTE If the printer properties dialog box - Canon MF7280 | PCL Driver Guide - Page 183
imageRUNNER 6570/5570, imageRUNNER 7105/7095/7086, imageRUNNER 8070, imageRUNNER 85+, and imageRUNNER 9070. Special Print Options 1 From the printer properties dialog box, select [Promote Print] from [Output Method] in the [Page Setup], [Finishing], [Paper Source], or [Quality] sheets. Promoting - Canon MF7280 | PCL Driver Guide - Page 184
Special Print Options 2 Click [OK] in the message box to switch to the Promote Print mode. 3 Click [OK] to close the printer properties dialog box ➞ click [OK] in the [Print] dialog box. 4 4-40 Promoting a Print Job - Canon MF7280 | PCL Driver Guide - Page 185
or user. 4 A document will be printed only if the specified ID and password are verified as valid. Special Print Options IMPORTANT • If you are using a shared printer in the Print Server (Point and Print) environment, it is necessary to install the Canon Driver Information Assist Service in the - Canon MF7280 | PCL Driver Guide - Page 186
Options Specifying the ID and Password In order to print documents using the Job Accounting feature, follow the procedure below to specify the ID and password 1 On the [Start] menu, point to [Settings] ➞ click [Printers]. NOTE • If you are using Windows XP Professional/Server 2003, on the [Start - Canon MF7280 | PCL Driver Guide - Page 187
[Job Accounting] is selected, or manually select [Job Accounting]. 4 5 Click [Settings] to open the [ID/Password Settings] dialog box ➞ enter the ID and password. NOTE • The ID and password can be changed when printing a document only if [Confirm ID/Password when Printing] is selected in the [ID - Canon MF7280 | PCL Driver Guide - Page 188
[OK] to close the printer properties dialog box ➞ click [OK] in the [Print] dialog box. 5 If the [Confirm ID/Password] dialog box opens, enter the ID and the password ➞ click [OK]. The document is printed with the specified ID and password. NOTE • The [Confirm ID/Password] dialog box opens only if - Canon MF7280 | PCL Driver Guide - Page 189
. 4 Click [OK] to close the printer properties dialog box ➞ click [OK] in the [Print] dialog box. The document is printed with the specified ID and password. With Allow Password Setting Not Selected The password for Job Accounting is not specified in the [ID/Password Settings] dialog box. 1 In the - Canon MF7280 | PCL Driver Guide - Page 190
Options 4 Click [OK] to close the printer properties dialog box ➞ click [OK] in the [Print] dialog box. 5 In the [Confirm ID/Password] dialog box, enter the password ➞ change the ID if necessary. NOTE You can leave the password blank. 6 Click [OK]. The document is printed with the specified ID and - Canon MF7280 | PCL Driver Guide - Page 191
specify the color intensity (for color printers), brightness, and contrast settings affecting a printed document. Use the grid on the right part of the sheet to make an adjustment. A default original image and an adjusted preview image are displayed on the left part of the sheet. Use them to check - Canon MF7280 | PCL Driver Guide - Page 192
Special Print Options Color Printing You can specify the detailed color settings manually. For manual color settings, follow the procedure -D1. 4 1 From the printer properties dialog box, click the [Quality] tab. 2 Select [Color] from [Color Mode] ➞ select [Manual Color Settings]. 3 Click [Color - Canon MF7280 | PCL Driver Guide - Page 193
Special Print Options 4 Display the [Color Adjustment] sheet. 4 5 Adjust the color intensity, brightness, and contrast. For detailed information about the [Color Adjustment] sheet, see the Online Help. Specifying the Color and Grayscale Settings 4-49 - Canon MF7280 | PCL Driver Guide - Page 194
Special Print Options 6 Click the [Matching] tab. 4 7 Specify the matching mode, the matching method, and the monitor profile. For detailed information about the [Matching] sheet, see the - Canon MF7280 | PCL Driver Guide - Page 195
click the [Quality] tab. 2 Display the [Color Adjustment] or [Grayscale Adjustment] sheet for manual grayscale setting. ● For color printers: ❑ Select [Black and White] from [Color Mode] ➞ select [Manual Color Settings]. 4 Special Print Options Specifying the Color and Grayscale Settings 4-51 - Canon MF7280 | PCL Driver Guide - Page 196
Special Print Options ❑ Click [Color Settings]. The [Color Settings] dialog box is displayed. 4 ● For black-and-white printers: ❑ Select [Manual Grayscale Settings]. 4-52 Specifying the Color and Grayscale Settings - Canon MF7280 | PCL Driver Guide - Page 197
Special Print Options ❑ Click [Grayscale Settings]. The [Grayscale Settings] dialog box is displayed. 4 3 Adjust the brightness and contrast. For detailed information about the [Color Adjustment] and [Grayscale - Canon MF7280 | PCL Driver Guide - Page 198
Special Print Options 4 Click the [Matching] tab. 4 5 Specify the matching mode, the matching method, and the monitor profile. For detailed information about the [Matching] sheet, see the - Canon MF7280 | PCL Driver Guide - Page 199
5-3 Operational Requirements and Restrictions in the Microsoft Cluster Server Environment 5-4 When Installing the Printer Driver 5-4 When Installing the Canon Driver Information Assist Service 5-4 PCL Driver Functions List 5-8 Local Standard Paper Sizes List 5-10 Glossary 5-16 Index 5-19 - Canon MF7280 | PCL Driver Guide - Page 200
device. If you cannot set up the printer configuration automatically or use the Job Accounting feature properly when you are using SMB (Server Message Block) or NDPS (Novell Distributed Print Services), you need to specify the port using the Canon Port Setting Tool. 5 1 In Windows Explorer, double - Canon MF7280 | PCL Driver Guide - Page 201
monitors job status and devices connected to the network. NOTE • For instructions on how to install and use the Device Status Extension, see the README.TXT file located in the following folders on the Printer Driver Software CD-ROM: - \DSE\english\win2000 - \DSE\english\winxp 5 - \DSE\english - Canon MF7280 | PCL Driver Guide - Page 202
the print cluster resources (Printer Spooler, IP Address, Network Name, and Physical Disk) in the Cluster Administrator. 1 Install the Canon Driver Information Assist Service in each node using the Installer. NOTE For instructions on how to install the Canon Driver Information Assist Service, see - Canon MF7280 | PCL Driver Guide - Page 203
description of the new resource. 5 Appendix 6 Select [Generic Service] for [Resource type] ➞ select the same group as the print cluster resources for [Group] ➞ click [Next]. NOTE If the group which includes the print cluster resources (Printer Spooler, IP Address, Network Name, and Physical Disk - Canon MF7280 | PCL Driver Guide - Page 204
to [Possible owners]. 5 8 Click [Next]. 9 Leave [Dependencies] blank in the next dialog box ➞ click [Next]. 10 Enter in [Service name] ➞ click [Next]. Appendix 5-6 Operational Requirements and Restrictions in the Microsoft Cluster Server Environment - Canon MF7280 | PCL Driver Guide - Page 205
11 Make sure that [Registry Replication] is not selected ➞ click [Finish]. The resource is created, and the Canon Driver Information Assist Service is registered as a cluster object. 5 Appendix Operational Requirements and Restrictions in the Microsoft Cluster Server 5-7 Environment - Canon MF7280 | PCL Driver Guide - Page 206
functions for the Canon PCL printer driver vary depending on the version of Windows you are using and the type of your driver (PCL5c, and Preview Appendix [Page Setup] sheet Poster Printing Layout Options [Finishing] sheet Output of Booklet Printing Prints a document on paper the same size set - Canon MF7280 | PCL Driver Guide - Page 207
Only PCL5e Banding Only PCL5e [Quality] sheet Print Color and Grayscale Sample Clip Font Character Use ICM Only PCL5c Allow Password [Device Setting *2 Settings/ Get 2000/XP/Server 2003, the output of booklet printing is the same as that for Windows NT 4.0. *2: It is - Canon MF7280 | PCL Driver Guide - Page 208
List To Use Local Standard Paper, you need to register the paper size that you will be using as a custom paper size beforehand. For the sizes of Local Standard Papers available for your printer, see below: Color imageRUNNER C2620, Color imageRUNNER C2620-C1, Color imageRUNNER C2620-C2, Color - Canon MF7280 | PCL Driver Guide - Page 209
imageRUNNER 105, imageRUNNER 105+, imageRUNNER 105+ -M3, imageRUNNER 7200, imageRUNNER 8070, imageRUNNER 8070-M3, imageRUNNER 85, imageRUNNER 85+, imageRUNNER 85+ -M3, imageRUNNER 8500, imageRUNNER 9070, and imageRUNNER 9070-M3: Paper Name Oficio Ecuadorian Oficio Mexican Oficio Argentine Oficio - Canon MF7280 | PCL Driver Guide - Page 210
imageRUNNER 2000/1600, imageRUNNER 2010F, imageRUNNER 3300/2800/ 2200, imageRUNNER 3300i, imageRUNNER 3320G, imageRUNNER 3320i/ 2220i, imageRUNNER 3320N/2220N, imageRUNNER 5000i, imageRUNNER 6000/5000, imageRUNNER 6000/5000-L1, imageRUNNER 6020/5020, imageRUNNER 6020i/5020i, imageRUNNER 6020/5020-M2 - Canon MF7280 | PCL Driver Guide - Page 211
2230, imageRUNNER 2830, imageRUNNER 2870/2270, imageRUNNER 2870G/2270G, imageRUNNER 3530, imageRUNNER 4570/ 3570, imageRUNNER 4570G/3570G, and MF7280: Paper Name Oficio Ecuadorian Oficio Bolivian Oficio Mexican Oficio Argentine Oficio Folio Argentine Letter Government Letter Government Legal - Canon MF7280 | PCL Driver Guide - Page 212
imageRUNNER 5070 and imageRUNNER 6570/5570: Paper Name Oficio Ecuadorian Oficio Bolivian Oficio Mexican Oficio Argentine Oficio Folio Argentine Letter Government Letter Argentine Legal Government Legal 5 Australian Foolscap Appendix Foolscap Korean Government Legal Chinese K8 - Canon MF7280 | PCL Driver Guide - Page 213
imageRUNNER 7105/7095/7086 and imageRUNNER 7105/7095/7086-S1: Paper Name Oficio Ecuadorian Oficio Mexican Oficio Argentine Oficio Folio Argentine Letter Government Letter Argentine Legal Government Legal Australian Foolscap Foolscap Korean Government Legal Chinese K8 Chinese K16 Width (mm) Height - Canon MF7280 | PCL Driver Guide - Page 214
printer in the Print Server (Point and Print) environment, it is necessary to install the Canon Driver Information Assist Service in the server PC in order to set up the printer up printers. G Gamma Correction An adjustment to the overall brightness of a scanner, monitor, or printer. On your Canon - Canon MF7280 | PCL Driver Guide - Page 215
-GL/2 is supported by your Canon machine. L Log on Entering a user name and password as a means of user authentication to start a computer session or access to a service. N 5 NDPS Novell Distributed Print Services. A printing system developed by Novell, for managing printers in a network environment - Canon MF7280 | PCL Driver Guide - Page 216
driver installed in Windows and its network address. The Port Setting Tool is useful when the printer driver network which utilizes the same network address as other parts of the network, but is distinguished by a II Ultra Fast Rendering II. A printing algorithm for realizing high speed rendering. - Canon MF7280 | PCL Driver Guide - Page 217
Canon Driver Information Assist Service, 2-7, 2-15, 2-33, 2-45, 4-41, 5-4, 5-16 Accessing printer properties dialog box Canon NetSpot Resource Downloader, 4-2, 4-8 From application software (Windows 98/Me), Canon printing preferences dialog box Color printing, 4-48 Appendix From printers - Canon MF7280 | PCL Driver Guide - Page 218
existing printer drivers, 2-35 USB Connection Installation , 2-24 Interleaf Sheets, 3-37 Introduction, 1-2 Supported Canon products, 1-3 J Job Accounting, 2-7, 2-15, 2-33, 4-41, 4-44, 4-45 Job Accounting feature, 4-45 Overview, 4-41 Printing with Job Accounting, 4-44, 4-45 Specifying ID and password - Canon MF7280 | PCL Driver Guide - Page 219
Canon Driver Information Selecting objective, 4-21 Assist Service, 5-4 What is objective?, 4-20 When installing printer driver, 5-4 Printer configuration, 2-33, 3-3, 3-7 Other Pages, 3-33, 3-34, 3-36 Printer properties dialog box, 3-3, 3-7 Output Option, 3-20 Printing banner page with print - Canon MF7280 | PCL Driver Guide - Page 220
, 3-13 Uninstaller, 2-43 Manually, 3-14 Updating alternate printer driver, 2-40 Second Page, 3-34 Windows 2000/XP/Server 2003, 2-41 Secured printing, 4-34 Windows NT 4.0, 3-20, 3-22 User Inbox, 4-24, 4-25 Staple position, 3-22 Subnet, 5-18 Supported Canon products, 1-3 5-22 Index - Canon MF7280 | PCL Driver Guide - Page 221
Appendix W Where to find Help, 1-10 Canon authorized dealers, 1-10 Online Help, 1-10, 4-49, 4-50, 4-53, 5-2 README. TXT file, 1-10 5 Index 5-23 - Canon MF7280 | PCL Driver Guide - Page 222
Appendix 5 5-24 Index - Canon MF7280 | PCL Driver Guide - Page 223
- Canon MF7280 | PCL Driver Guide - Page 224
6390 Dixie Road Mississauga, Ontario L5T 1P7, Canada CANON EUROPA N.V. Bovenkerkerweg 59-61 1185 XB Amstelveen, The Netherlands CANON FRANCE S.A.S. 17, quai du Président Paul Doumer 92414 Courbevoie Cedex, France CANON COMMUNICATION & IMAGE FRANCE S.A.S. (Pour les utilisateurs de l'imprimante laser
-
 1
1 -
 2
2 -
 3
3 -
 4
4 -
 5
5 -
 6
6 -
 7
7 -
8
-
9
-
10
-
11
-
12
-
13
-
14
-
15
-
16
-
17
-
18
-
19
-
20
-
21
-
22
-
23
-
24
-
25
-
26
-
27
-
28
-
29
-
30
-
31
-
32
-
33
-
34
-
35
-
36
-
37
-
38
-
39
-
40
-
41
-
42
-
43
-
44
-
45
-
46
-
47
-
48
-
49
-
50
-
51
-
52
-
53
-
54
-
55
-
56
-
57
-
58
-
59
-
60
-
61
-
62
-
63
-
64
-
65
-
66
-
67
-
68
-
69
-
70
-
71
-
72
-
73
-
74
-
75
-
76
-
77
-
78
-
79
-
80
-
81
-
82
-
83
-
84
-
85
-
86
-
87
-
88
-
89
-
90
-
91
-
92
-
93
-
94
-
95
-
96
-
97
-
98
-
99
-
100
-
101
-
102
-
103
-
104
-
105
-
106
-
107
-
108
-
109
-
110
-
111
-
112
-
113
-
114
-
115
-
116
-
117
-
118
-
119
-
120
-
121
-
122
-
123
-
124
-
125
-
126
-
127
-
128
-
129
-
130
-
131
-
132
-
133
-
134
-
135
-
136
-
137
-
138
-
139
-
140
-
141
-
142
-
143
-
144
-
145
-
146
-
147
-
148
-
149
-
150
-
151
-
152
-
153
-
154
-
155
-
156
-
157
-
158
-
159
-
160
-
161
-
162
-
163
-
164
-
165
-
166
-
167
-
168
-
169
-
170
-
171
-
172
-
173
-
174
-
175
-
176
-
177
-
178
-
179
-
180
-
181
-
182
-
183
-
184
-
185
-
186
-
187
-
188
-
189
-
190
-
191
-
192
-
193
-
194
-
195
-
196
-
197
-
198
-
199
-
200
-
201
-
202
-
203
-
204
-
205
-
206
-
207
-
208
-
209
-
210
-
211
-
212
-
213
-
214
-
215
-
216
-
217
-
218
-
219
-
220
-
221
-
222
-
223
-
224
 |
 |
ENG
Please read this guide before operating this equipment.
After you finish reading this guide, store it in a safe place for future reference.
PCL Driver Guide
PCL5c/PCL5e Driver Ver. 6.97
PCL6 Driver Ver. 4.97