Canon PowerShot S100 Digital ELPH Software Starter Guide DC SD - Page 79
Starting the Plug-In Module, Loading Images from the Camera
 |
View all Canon PowerShot S100 Digital ELPH manuals
Add to My Manuals
Save this manual to your list of manuals |
Page 79 highlights
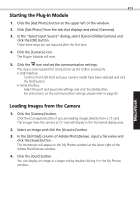
Windows 79 Starting the Plug-In Module 1. Click the [Get Photo] button at the upper left of the window. 2. Click [Get Photo] from the tab that displays and select [Cameras]. 3. In the "Select Input Source" dialog, select [Canon Didital Camera] and click the [OK] button. These three steps are not required after the first time. 4. Click the [Camera] icon. The Plug-In Module will start. 5. Click the icon and set the communication settings. This step is only required for connections via the USB or serial ports. • USB Interface Confirm that [USB Port] and your camera model have been selected and click the [Set] button. • Serial Interface Select the port and baud rate settings and click the [Set] button. For instructions on the communication settings, please refer to page 82. Loading Images from the Camera 1. Click the [Camera] button. Click the [Computer] button if you are loading images directly from a CF card. The images from the camera or CF card will display in the thumbnail display area. 2. Select an image and click the [Acquire] button. 3. In the [Untitled] column of Adobe PhotoDeluxe, input a file name and click the [Save] button. The thumbnails will appear in the My Photos window at the lower right of the Adobe PhotoDeluxe window. 4. Click the [Quit] button. You can display an image at a larger size by double-clicking it in the My Photos window. Macintosh
-
 1
1 -
2
-
3
-
4
-
5
-
6
-
7
-
8
-
9
-
10
-
11
-
12
-
13
-
14
-
15
-
16
-
17
-
18
-
19
-
20
-
21
-
22
-
23
-
24
-
25
-
26
-
27
-
28
-
29
-
30
-
31
-
32
-
33
-
34
-
35
-
36
-
37
-
38
-
39
-
40
-
41
-
42
-
43
-
44
-
45
-
46
-
47
-
48
-
49
-
50
-
51
-
52
-
53
-
54
-
55
-
56
-
57
-
58
-
59
-
60
-
61
-
62
-
63
-
64
-
65
-
66
-
67
-
68
-
69
-
70
-
71
-
72
-
73
-
 74
74 -
 75
75 -
 76
76 -
 77
77 -
 78
78 -
 79
79 -
 80
80 -
 81
81 -
 82
82 -
 83
83 -
 84
84
 |
 |
