Canon VIXIA HF R10 VIXIA HF R10/HF R11/HF R100 Instruction Manual - Page 29
Playback
 |
View all Canon VIXIA HF R10 manuals
Add to My Manuals
Save this manual to your list of manuals |
Page 29 highlights
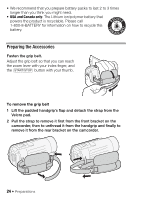
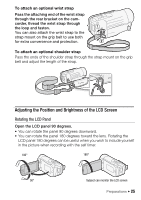
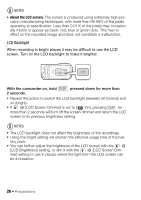
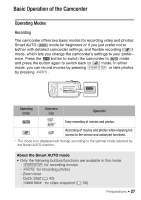
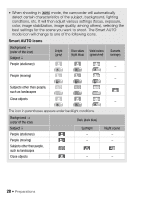
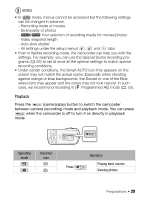
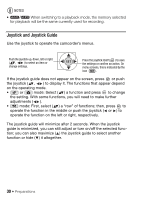
NOTES • In mode, menus cannot be accessed but the following settings can be changed in advance. - Recording mode of movies - Size/quality of photos - / Your selection of recording media for movies/photos - Video snapshot length - Auto slow shutter - All settings under the setup menu's , and tabs. • Even in flexible recording mode, the camcorder can help you with the settings. For example, you can use the Special Scene recording pro- grams ( 55) to set at once all the optimal settings to match special recording conditions. • Under certain conditions, the Smart AUTO icon that appears on the screen may not match the actual scene. Especially when shooting against orange or blue backgrounds, the Sunset or one of the Blue skies icons may appear and the colors may not look natural. In such case, we recommend recording in [ Programmed AE] mode ( 55). Playback Press the (camera/play) button to switch the camcorder between camera (recording) mode and playback mode. You can press when the camcorder is off to turn it on directly in playback mode. Operating mode Onscreen icon Press Operation Playing back movies. Viewing photos. Preparations Š 29
-
 1
1 -
2
-
3
-
4
-
5
-
6
-
7
-
8
-
9
-
10
-
11
-
12
-
13
-
14
-
15
-
16
-
17
-
18
-
19
-
20
-
21
-
22
-
23
-
 24
24 -
 25
25 -
 26
26 -
 27
27 -
 28
28 -
 29
29 -
 30
30 -
 31
31 -
 32
32 -
 33
33 -
 34
34 -
35
-
36
-
37
-
38
-
39
-
40
-
41
-
42
-
43
-
44
-
45
-
46
-
47
-
48
-
49
-
50
-
51
-
52
-
53
-
54
-
55
-
56
-
57
-
58
-
59
-
60
-
61
-
62
-
63
-
64
-
65
-
66
-
67
-
68
-
69
-
70
-
71
-
72
-
73
-
74
-
75
-
76
-
77
-
78
-
79
-
80
-
81
-
82
-
83
-
84
-
85
-
86
-
87
-
88
-
89
-
90
-
91
-
92
-
93
-
94
-
95
-
96
-
97
-
98
-
99
-
100
-
101
-
102
-
103
-
104
-
105
-
106
-
107
-
108
-
109
-
110
-
111
-
112
-
113
-
114
-
115
-
116
-
117
-
118
-
119
-
120
-
121
-
122
-
123
-
124
-
125
-
126
-
127
-
128
-
129
-
130
-
131
-
132
-
133
-
134
-
135
-
136
-
137
-
138
-
139
-
140
-
141
-
142
-
143
-
144
-
145
-
146
-
147
-
148
-
149
-
150
-
151
-
152
-
153
-
154
-
155
-
156
-
157
-
158
-
159
-
160
-
161
-
162
-
163
-
164
-
165
-
166
-
167
-
168
-
169
-
170
-
171
-
172
-
173
-
174
-
175
-
176
-
177
-
178
-
179
-
180
-
181
-
182
-
183
-
184
 |
 |