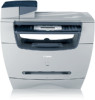
Canon imageCLASS MF5550 imageCLASS MF5500 Series Basic Guide
Canon imageCLASS MF5550 Manual
 |
View all Canon imageCLASS MF5550 manuals
Add to My Manuals
Save this manual to your list of manuals |
Canon imageCLASS MF5550 manual content summary:
- Canon imageCLASS MF5550 | imageCLASS MF5500 Series Basic Guide - Page 1
Basic Guide Series - Canon imageCLASS MF5550 | imageCLASS MF5500 Series Basic Guide - Page 2
imageCLASS MF5500 Series Basic Guide - Canon imageCLASS MF5550 | imageCLASS MF5500 Series Basic Guide - Page 3
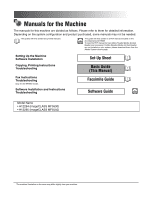
, Printing Instructions Troubleshooting Basic Guide (This Manual) Fax Instructions Troubleshooting Only for the MF5550 model. Software Installation and Instructions Troubleshooting Facsimile Guide Software Guide CD-ROM Model Name • H12294 (imageCLASS MF5530) • H12295 (imageCLASS MF5550) The - Canon imageCLASS MF5550 | imageCLASS MF5500 Series Basic Guide - Page 4
Is Organized Chapter 1 Introduction Chapter 2 Paper Handling Chapter 3 Document Handling Chapter 4 Printing from Your Computer Chapter 5 Copying Chapter 6 Scanning Chapter 7 System Monitor Chapter 8 Maintenance Chapter 9 Troubleshooting Chapter 10 Machine Settings Chapter 11 Appendix Includes the - Canon imageCLASS MF5550 | imageCLASS MF5500 Series Basic Guide - Page 5
and the Use of Images . . . xiii Important Safety Instructions xiv Installation xiv Power Supply xv Handling xvi Maintenance and Inspections xvii Consumables xix Other Warnings xix Chapter 1 Introduction Customer Support 1-1 Main Components of the Machine 1-2 Operation Panel 1-5 Standby - Canon imageCLASS MF5550 | imageCLASS MF5500 Series Basic Guide - Page 6
2-17 Face Up Paper Output Area 2-18 Chapter 3 Document Handling Document Requirements 3-1 Problem Documents 3-2 Scanned Area of a Document 3-2 Setting Up Documents 3-3 Placing a Document on the Platen Glass 3-3 Positioning Documents 3-3 Loading Documents in the ADF 3-4 The Paper Path of the - Canon imageCLASS MF5550 | imageCLASS MF5500 Series Basic Guide - Page 7
5-9 Special Features 5-10 Collate Copy 5-10 When Loading Documents in the ADF 5-10 When Placing a Document on the Platen Glass 5-11 Chapter 6 Scanning Before Used Cartridges 8-7 The Clean Earth Campaign 8-8 THE CANON CARTRIDGE RECYCLING PROGRAM 8-8 U.S.A. PROGRAM 8-9 Packaging 8-9 - Canon imageCLASS MF5550 | imageCLASS MF5500 Series Basic Guide - Page 8
9 Troubleshooting Clearing Jams 9-1 Removing Jammed Paper from Inside the Machine 9-1 Removing Jammed Paper from the ADF 9-7 LCD Messages 9-9 Paper Feeding Problems 9-12 Copying Problems 9-15 Print Quality Problems 9-16 Printing Problems 9-18 Scanning Problems 9-19 General Problems 9-20 - Canon imageCLASS MF5550 | imageCLASS MF5500 Series Basic Guide - Page 9
Preface Thank you for purchasing the Canon imageCLASS MF5500 Series. Please read this manual thoroughly before operating the machine in order to familiarize yourself with its capabilities, and to make the most of its many functions. After reading this manual, store it in a safe place for future - Canon imageCLASS MF5550 | imageCLASS MF5500 Series Basic Guide - Page 10
otherwise mentioned, illustrations used in this manual are those taken when no optional equipment is attached to the imageCLASS MF5550. The model imageCLASS MF5550 is used for illustration purposes in this manual. When there is any difference between MF5530 and MF5550, it is clearly indicated in the - Canon imageCLASS MF5550 | imageCLASS MF5500 Series Basic Guide - Page 11
in Subpart B of Part 15 of the FCC Rules. Do not make any changes or modifications to the equipment unless otherwise specified in this manual. If such changes or modifications should be made, you could be required to stop operation of the equipment. Canon U.S.A. Inc. One Canon Plaza, Lake Success - Canon imageCLASS MF5550 | imageCLASS MF5500 Series Basic Guide - Page 12
Use of controls, adjustments or performance of procedures other than those specified in this manual may result in hazardous radiation exposure. International Energy Star Program As an ENERGY STAR® Partner, Canon USA, Inc. has determined that this product meets the ENERGY STAR® guidelines for energy - Canon imageCLASS MF5550 | imageCLASS MF5500 Series Basic Guide - Page 13
Trademarks Canon, the Canon logo, and imageCLASS are trademarks of Canon Inc. Other product and company names herein may be the trademarks of their respective owners. Copyright Copyright 2003 by Canon Inc. All rights reserved. No part of this publication may be reproduced or transmitted in any form - Canon imageCLASS MF5550 | imageCLASS MF5500 Series Basic Guide - Page 14
or civil liability. A non-exhaustive list of these documents is set forth below. This list is intended to be a guide only. If you are uncertain about the legality ficates of Title Travelers Checks Food Stamps Passports Immigration Papers Internal Revenue Stamps (canceled or uncanceled) Bonds or - Canon imageCLASS MF5550 | imageCLASS MF5500 Series Basic Guide - Page 15
cord from the power outlet. Then, contact Canon Authorized Service Facilities or the Canon Customer Care Center. - Necklaces and other metal objects - Cups, vases, flowerpots, and other containers filled with water or liquids CAUTION Do not install the machine in unstable locations, such as unsteady - Canon imageCLASS MF5550 | imageCLASS MF5500 Series Basic Guide - Page 16
Do not install the machine in the following locations: - A damp or dusty location - A location near cord may result in a fire or electrical shock. If an extension cord must be used, however, use one rated for voltages of 120 V AC and over, untie the cord binding, and insert the power plug completely - Canon imageCLASS MF5550 | imageCLASS MF5500 Series Basic Guide - Page 17
the instructions in the guides included with your machine. Adjust only those controls that are covered by the instructions in the guides since the power cord from the power outlet. Then, contact Canon Authorized Service Facilities or the Canon Customer Care Center. Continued use of the machine in - Canon imageCLASS MF5550 | imageCLASS MF5500 Series Basic Guide - Page 18
fire or electrical shock. Do not drop paper clips, staples, or other metal objects inside . Then, contact Canon Authorized Service Facilities or the Canon Customer Care Center. laser beam cannot escape from the machine during any phase of user operation. Read the following remarks and instructions - Canon imageCLASS MF5550 | imageCLASS MF5500 Series Basic Guide - Page 19
them immediately with cold water and immediately consult a physician. When loading paper or removing jammed documents or paper, take care not to cut your hands on the edges of the documents or paper. When removing a used toner cartridge from the machine, remove the cartridge carefully to prevent the - Canon imageCLASS MF5550 | imageCLASS MF5500 Series Basic Guide - Page 20
the toner remaining inside the cartridges to ignite, resulting in burns or a fire. Do not store toner cartridges or copy paper in places exposed to open flames, as this may cause the toner or paper to and consult a physician. CAUTION Follow all warnings and instructions marked on the machine. xix - Canon imageCLASS MF5550 | imageCLASS MF5500 Series Basic Guide - Page 21
xx - Canon imageCLASS MF5550 | imageCLASS MF5500 Series Basic Guide - Page 22
explains how to set the energy saver function. Customer Support Your machine is designed with the latest technology to provide trouble-free operation. If you encounter a problem with the machine's operation, try to solve it by using the information in Chapter 9, "Troubleshooting." If you cannot - Canon imageCLASS MF5550 | imageCLASS MF5500 Series Basic Guide - Page 23
tray Documents come out here. d Slide guide Adjust to the width of documents. e Operation panel Controls the machine. f Output tray Outputs printouts. g Front cover Open it when you install the cartridge, or remove jammed paper. h Multi-purpose feeder Used when printing paper one by one manually - Canon imageCLASS MF5550 | imageCLASS MF5500 Series Basic Guide - Page 24
Introduction a 1 b a Platen glass cover Open it when you place documents on the platen glass for copying or scanning. b Platen glass Place documents. Main Components of the Machine 1-3 - Canon imageCLASS MF5550 | imageCLASS MF5500 Series Basic Guide - Page 25
c External device jack Connect an external device. (Only for the MF5550 model.) e f d Face up cover Open it when you output paper face up, or remove jammed paper. e Power socket Connect the power cord. f Extension cover Protects paper supply in the cassette from dirt and dust. 1-4 Main Components - Canon imageCLASS MF5550 | imageCLASS MF5500 Series Basic Guide - Page 26
Menu Start Stop/Reset Set Enlarge / Reduce Exposure Image Quality Collate Energy Saver 1 GHI 4 PQRS 7 ABC DEF 23 JKL MNO 56 TUV WXYZ 89 SYMBOLS 0 jk l m n o pq r a Alarm indicator Flashes red when the machine has a problem such as a paper jam. (The error message is displayed in - Canon imageCLASS MF5550 | imageCLASS MF5500 Series Basic Guide - Page 27
Start key Starts copying. 1 n Stop/Reset key Cancels copying and other operations, and returns to the standby display. o Set key Determines the contents you set or register. Introduction ■ MF5530 p Collate Sorts copies in order of pages. q Image Quality key Adjusts the quality of printout - Canon imageCLASS MF5550 | imageCLASS MF5500 Series Basic Guide - Page 28
display in the Copy or Scan mode is as follows: ■ Copy Mode Copy ratio Paper size Exposure ■ Scan Mode Image quality Copy quantity NOTE When the machine is plugged in Fax mode appears only with the MF5550 model. (See Chapter 1, "Introduction," in the Facsimile Guide.) Standby Display 1-7 - Canon imageCLASS MF5550 | imageCLASS MF5500 Series Basic Guide - Page 29
or when the collate copy or other functions are operating - When paper jams occur - When an error code appears and the Alarm indicator flashes - When no paper is loaded in the cassette or multi-purpose feeder - When is displayed *Only for the MF5550 model. The machine will be restored - Canon imageCLASS MF5550 | imageCLASS MF5500 Series Basic Guide - Page 30
Restoring from the Energy Saver Mode Manually 1 Press [Energy Saver]. The Energy Saver key goes off and the machine enters the standby mode. NOTE 1 The machine can be restored from the energy - Canon imageCLASS MF5550 | imageCLASS MF5500 Series Basic Guide - Page 31
Introduction 1 1-10 Energy Saver Mode - Canon imageCLASS MF5550 | imageCLASS MF5500 Series Basic Guide - Page 32
can use with this machine, how to load them, and where to print out the documents. Print Media Requirements For high-quality copies, we recommend using paper and transparencies recommended by Canon. Some types of paper available at office supply stores may not be suitable for this machine. If you - Canon imageCLASS MF5550 | imageCLASS MF5500 Series Basic Guide - Page 33
copy on the reverse side.) Paper which has been printed on using a thermal transfer printer (Do not copy on 2 the Paper Handling ■ Acceptable Paper Paper Size Paper Weight Paper Type Cassette/Multi-Purpose Feeder LTR, LGL, EXECUTIVE, A4, B5 Envelope: COM10, MONARCH, DL, ISO-C5 Free Size (Multi - Canon imageCLASS MF5550 | imageCLASS MF5500 Series Basic Guide - Page 34
print quality and the entire area where the machine can technically print from your computer. Printing area (light shade): Canon recommends that you print within this area. ■ Paper MAX. 13/64" (5 mm) MAX. 13/64" (5 mm) 2 MAX. 13/64" (5 mm) Feeding direction MAX. 13/64" (5 mm) ■ Envelope - Canon imageCLASS MF5550 | imageCLASS MF5500 Series Basic Guide - Page 35
This section describes how to load paper in the cassette and the multi-purpose feeder. 2 CAUTION When loading paper, take care not to cut your hands on the edges of the paper. Paper Handling NOTE The paper in the multi-purpose feeder is fed prior to the paper in the cassette. The cassette holds - Canon imageCLASS MF5550 | imageCLASS MF5500 Series Basic Guide - Page 36
Handling 3 Pinch and slide the length slide guide to fit the size of the paper stack you want to load. 2 IMPORTANT If the slide guides are not adjusted correctly for the size of the paper, the quality of your printouts may be adversely affected. 4 Load the paper stack in the cassette with the print - Canon imageCLASS MF5550 | imageCLASS MF5500 Series Basic Guide - Page 37
slide the width slide guides to fit the paper stack. 2 Paper Handling Make sure the paper stack does not exceed the load limit mark. Hooks Load limit mark Hook Hook 6 Insert the cassette into the machine. NOTE If you do not completely insert the cassette into the machine, paper jams may occur - Canon imageCLASS MF5550 | imageCLASS MF5500 Series Basic Guide - Page 38
[ ] to select ➞ press [Set]. ❑ Press [ ] or [ ] to select ➞ press [Set] ➞ [ ] or [ ] to select ➞ press [Set]. ❑ Press [ ] or [ ] to select the appropriate paper size (LTR, LGL, EXECUTIV, A4, B5, ENVELOPE, or FREE SIZE) ➞ press [Set]. IMPORTANT Do not - Canon imageCLASS MF5550 | imageCLASS MF5500 Series Basic Guide - Page 39
Paper Handling 2 Remove any curling from the envelopes by holding the edges diagonally and bending them gently. 2 3 Run a pen or other rounded object along more than 13/64" (5 mm). Flap 4 Tap the edges on a flat surface to even the envelopes. 5 Pull out the cassette completely. 2-8 Loading Paper - Canon imageCLASS MF5550 | imageCLASS MF5500 Series Basic Guide - Page 40
Paper Handling 6 Pinch and slide the length slide guide to fit the size of the envelopes you want to load. 2 IMPORTANT If the slide guides are not adjusted correctly for the size of the envelopes, the quality of your printouts may be adversely affected. 7 Load the envelopes in the cassette - Canon imageCLASS MF5550 | imageCLASS MF5500 Series Basic Guide - Page 41
slide the width slide guides to fit the envelopes. Paper Handling 2 Make sure the envelopes do not exceed the load limit mark. Hooks Load limit mark Hook Hook 9 Insert the cassette into the machine. NOTE If you do not completely insert the cassette into the machine, paper jams may occur. 2-10 - Canon imageCLASS MF5550 | imageCLASS MF5500 Series Basic Guide - Page 42
want to copy or print on the different paper which is in the cassette. Load paper one by one in the multi-purpose feeder. NOTE The paper in the multi-purpose feeder is fed prior to the paper in the cassette. 1 Slide the slide guides to fit the size of the paper you want to load. IMPORTANT If the - Canon imageCLASS MF5550 | imageCLASS MF5500 Series Basic Guide - Page 43
➞ press [Set] ➞ [ ] or [ ] to select ➞ press [Set]. ❑ Press [ ] or [ ] to select the appropriate paper size (LTR, LGL, EXECUTIV, A4, B5, ENVELOPE, or FREE SIZE) ➞ press [Set]. NOTE Select [ENVELOPE] for envelopes. For details on loading an envelope in the multi-purpose - Canon imageCLASS MF5550 | imageCLASS MF5500 Series Basic Guide - Page 44
print an envelope one by one. IMPORTANT The recommended envelopes are COM10, MONARCH, DL, and ISO-C5. Using other envelopes may affect the quality of the printout. NOTE The envelope in the multi-purpose feeder is fed prior to the paper in the cassette. 2 1 Slide the slide guides to fit the size - Canon imageCLASS MF5550 | imageCLASS MF5500 Series Basic Guide - Page 45
press [ ] or [ ] to select the envelope type (COM10, MONARCH, DL, or ISO-C5) ➞ press [Set]. NOTE 2 You can select instead of as the paper size. When is selected, you can specify vertical and horizontal sizes of the envelope in the following ranges: - - Canon imageCLASS MF5550 | imageCLASS MF5500 Series Basic Guide - Page 46
in the cassette or in the multi-purpose feeder are as shown below. Document 2 Paper Cassette Multipurpose feeder Copy When you place a document on the platen glass, the orientation of the document and the orientation of the paper in the cassette or in the multi-purpose feeder are as shown below - Canon imageCLASS MF5550 | imageCLASS MF5500 Series Basic Guide - Page 47
purpose by opening or closing the 2 face up cover. Open the face up cover for face up paper output, or close the face up cover and pull out the output tray for face down paper output. Paper Handling IMPORTANT Do not open or close the face up cover while copying and printing. 2-16 Selecting - Canon imageCLASS MF5550 | imageCLASS MF5500 Series Basic Guide - Page 48
face up face down 1 sheet 10 sheets Labels face up 1 sheet Envelopes face up face down 1 sheet 10 sheets Face Down Paper Output Area The paper is delivered with the printed side down on the output tray. Paper is stacked in printed order. Close the face up cover, and pull out the output - Canon imageCLASS MF5550 | imageCLASS MF5500 Series Basic Guide - Page 49
labels which tend to curl, because the paper is delivered straight through out of the machine. Open the face up cover. Remove the delivered paper one by one. 2 IMPORTANT Do not pull the paper forcibly. This machine has no face up output tray. Remove the delivered paper with your hand. Do not place - Canon imageCLASS MF5550 | imageCLASS MF5500 Series Basic Guide - Page 50
Platen Glass ADF Plain paper Thick documents Photographs Small documents (e.g., index cards) Special types of paper (e.g., tracing paper*1, transparencies*1, etc.) Book Plain paper (multiple page documents of the same size, thickness, and weight or one page documents) Max. 8 1/2" ¥ 11 3/4" (216 - Canon imageCLASS MF5550 | imageCLASS MF5500 Series Basic Guide - Page 51
, place a piece of plain white paper behind the document. *2 21 lb (80 g/m2) paper NOTE When making copies of a small size document, the copy speed may be slightly slower than usual. Problem Documents 3 Make sure any glue, ink, or correction fluid on the document is completely dry before placing - Canon imageCLASS MF5550 | imageCLASS MF5500 Series Basic Guide - Page 52
your document conforms to a standard paper size (e.g., LTR or A4), align the document between the appropriate paper size marks. If you do not know the size of your document, or if your document does not match any of the paper size marks, align the center of your document with the ➞ mark. Setting Up - Canon imageCLASS MF5550 | imageCLASS MF5500 Series Basic Guide - Page 53
place an LTR-size document on the platen glass. 3 Loading Documents in the ADF NOTE Make sure there is no document on the platen glass. 1 Fan the edges that will feed into the machine first, then tap the edges of multiple page documents on a flat surface to even the stack. 3-4 Setting Up Documents - Canon imageCLASS MF5550 | imageCLASS MF5500 Series Basic Guide - Page 54
2 Slide the slide guides to the width of the document. 3 Load the documents face up in the ADF. 3 Document Handling NOTE For multiple page documents, the pages are fed one by one from the top of the stack (from the first page). Wait until all pages of your document have been scanned before - Canon imageCLASS MF5550 | imageCLASS MF5500 Series Basic Guide - Page 55
scans documents 3 from the first page. Scanning unit 3 NOTE When documents are loaded in the ADF, the scanning unit moves to the position shown above and stays there. When documents are not loaded in the ADF, the scanning unit moves to scan it. Document Handling 3-6 Setting Up Documents - Canon imageCLASS MF5550 | imageCLASS MF5500 Series Basic Guide - Page 56
explains how to print the documents from your computer using the printer driver included in the CD-ROM. Before Printing Before printing, software must be installed in your computer. If not, please see "Install the software and connect the machine to your computer," in the Set-Up Sheet or Chapter - Canon imageCLASS MF5550 | imageCLASS MF5500 Series Basic Guide - Page 57
and Other Hardware] ➞ [Printers and Faxes]. ● On Windows 98/Me/2000: ❑ Click [Start] on the Windows task bar, select [Settings] ➞ [Printers]. 4 2 Click the corresponding printer driver icon. 3 From the [File] menu, click [Set as Default Printer] (Windows 98/ Me: [Set as Default]). Printing from - Canon imageCLASS MF5550 | imageCLASS MF5500 Series Basic Guide - Page 58
. The screen shot shown is from Windows XP. 1 Open the application from which you will print the document. 2 Select the command to print. 4 In most cases, click [Print] in the [File] menu. The [Print] dialog box appears. Printing from Your Computer 3 From the [Select Printer] list box or the [Name - Canon imageCLASS MF5550 | imageCLASS MF5500 Series Basic Guide - Page 59
Panel] ➞ [Printers and Other Hardware] ➞ [Printers and Faxes]. ● On Windows 98/Me/2000: ❑ Click [Start] on the Windows task bar, select [Settings] ➞ [Printers]. 2 Double-click the corresponding printer driver icon. 3 Right click the print job ➞ click [Cancel Printing]. 4-4 Printing Documents - Canon imageCLASS MF5550 | imageCLASS MF5500 Series Basic Guide - Page 60
More Information For detailed information on all printing features, see Chapter 2, "Printing," in the Software Guide. 4 Printing from Your Computer More Information 4-5 - Canon imageCLASS MF5550 | imageCLASS MF5500 Series Basic Guide - Page 61
4 Printing from Your Computer 4-6 More Information - Canon imageCLASS MF5550 | imageCLASS MF5500 Series Basic Guide - Page 62
image quality, and enlarge or reduce the copy sizes. It also describes the special copy features. Documents You Can Copy For information on the types of documents you can copy, their requirements, and details on setting up documents, see Chapter 3, "Document Handling." Documents You Can Copy 5-1 - Canon imageCLASS MF5550 | imageCLASS MF5500 Series Basic Guide - Page 63
on p. 3-3. 2 Press [COPY]. 5 3 Use the numeric keys to enter the number of copies. You can set up to 99 copies. Copying 4 Adjust any necessary settings for your document. Press [Image Quality] to select the scanning resolution. (See "Adjusting the Image Quality (Resolution)," on p. 5-8.) Press - Canon imageCLASS MF5550 | imageCLASS MF5500 Series Basic Guide - Page 64
, wait about 1 minute before making copies. The paper in the multi-purpose feeder is fed prior to the paper in the cassette. The settings changed in the Menu do not return automatically to the settings you set previously. Change to the previous settings again if necessary. When making copies of - Canon imageCLASS MF5550 | imageCLASS MF5500 Series Basic Guide - Page 65
correctly. 1 Press [Menu]. 2 Press [ ] or [ ] to select ➞ press [Set]. 3 Press [ ] or [ ] to select ➞ press [Set]. 4 Press [ ] or [ ] to select ➞ press [Set]. 5-4 Specifying the Paper Size and Type (Common for Cassette and Multi-Purpose Feeder) - Canon imageCLASS MF5550 | imageCLASS MF5500 Series Basic Guide - Page 66
the appropriate paper type ➞ press [Set]. Ex: P A P E R S E T T I N G S 2.PAPER TYPE You can select from the following paper types: - Plain paper (17 lb to 24 lb (64 g/m2 to 90 g/m2)): - Heavy paper (25 lb to 34 lb (91 g/m2 to 128 g/m2)): , *1 - Transparency - Canon imageCLASS MF5550 | imageCLASS MF5500 Series Basic Guide - Page 67
Ratios NOTE You cannot enlarge or reduce the copy size when using the ADF. Place a document on the platen glass. 5 1 Press [Enlarge/Reduce]. Copying 2 Press [ ] or [ ] to select ➞ press [Set]. 3 Press [ ] or [ ] to select the copy ratio. You can select from the following: - - Canon imageCLASS MF5550 | imageCLASS MF5500 Series Basic Guide - Page 68
of "Menu Descriptions," on p. 10-4. To reset the copy ratio, press [Enlarge/Reduce] ➞ [ ] or [ ] to select ➞ press [Set]. Enlarging ADF. Place a document on the platen glass. 1 Press [Enlarge/Reduce]. 5 2 Press [ ] or [ ] to select ➞ press [Set]. 3 Use the - Canon imageCLASS MF5550 | imageCLASS MF5500 Series Basic Guide - Page 69
[Image Quality]. Copying 2 Press [ ] or [ ] to select the image quality. 5 You can select from the following: - for text-only documents - for photographs - for documents with text and photographs 3 Press [Set]. Ex: 1 0 0 % 01 L T R PHOTO 5-8 Improving Copied Image - Canon imageCLASS MF5550 | imageCLASS MF5500 Series Basic Guide - Page 70
(Density) You can adjust the copy exposure automatically or manually according to how light or dark your document is. 1 Press [Exposure]. 2 Press [ ] or [ ] to select the exposure mode. ● Adjusting manually: ❑ Select ➞ press [Set]. ❑ Press [ ] or [ ] to adjust the exposure ➞ press - Canon imageCLASS MF5550 | imageCLASS MF5500 Series Basic Guide - Page 71
to sort copies in page order. It is convenient when you make multiple copies of multiple page documents. Copy 1 Copy 2 Copy 3 5 Copying 1 2 3 4 Set 3 sets of copies 1 2 3 4 1 2 3 4 1 2 3 4 When Loading Documents in the ADF 1 Load documents face up in the ADF. For details on how to load - Canon imageCLASS MF5550 | imageCLASS MF5500 Series Basic Guide - Page 72
out in order. NOTE When scanning multiple page documents, and may appear in the LCD, and the document being scanned stops in the ADF. Press [Set] to make the document come out automatically. In this case, reduce the documents to be scanned. Or, change the image quality - Canon imageCLASS MF5550 | imageCLASS MF5500 Series Basic Guide - Page 73
Copying 7 Press [Set]. The machine begins printing out. NOTE When scanning multiple page documents, and may appear in the LCD and scanning is canceled. In this case, reduce the documents to be scanned. Or, change the image quality mode to . 5 5-12 Special - Canon imageCLASS MF5550 | imageCLASS MF5500 Series Basic Guide - Page 74
machine to your computer," in the Set-Up Sheet or Chapter 1, "Installation," in the Software Guide. Check if the scanner driver is installed in your computer by following this procedure. 1 Open the [Scanners and Cameras] folder (Windows 98/Me/2000: the [Scanners and Cameras Properties] dialog box - Canon imageCLASS MF5550 | imageCLASS MF5500 Series Basic Guide - Page 75
face down on the platen glass. For details on how to place documents, see "Setting Up Documents," on p. 3-3. NOTE You cannot use the ADF for scanning when using [SCAN]. 2 Press [SCAN]. 3 Follow the instructions on the screen of your computer to complete the scanning. Scanning 6-2 Scanning - Canon imageCLASS MF5550 | imageCLASS MF5500 Series Basic Guide - Page 76
More Information For detailed information on all scanning features, see Chapter 3, "Scanning," in the Software Guide. 6 Scanning More Information 6-3 - Canon imageCLASS MF5550 | imageCLASS MF5500 Series Basic Guide - Page 77
6 Scanning 6-4 More Information - Canon imageCLASS MF5550 | imageCLASS MF5500 Series Basic Guide - Page 78
firming and Deleting a Print Job You can confirm and delete the current print job only. 1 Press [Status Monitor]. 2 Press [ ] or [ ] to select ➞ press [Set]. NOTE If there is no job, is displayed. Checking the Status of Print and Fax Jobs 7-1 - Canon imageCLASS MF5550 | imageCLASS MF5500 Series Basic Guide - Page 79
firming and Deleting a Fax TX Job 1 Press [Status Monitor]. 2 Press [ ] or [ ] to select ➞ press [Set]. NOTE If there is no job, is displayed. If there is only one fax job, go to step 4. System Monitor 7 3 Press [ ] or [ ] to confirm the fax/telephone number. NOTE - Canon imageCLASS MF5550 | imageCLASS MF5500 Series Basic Guide - Page 80
Confirming and Deleting a Fax RX Job 1 Press [Status Monitor]. 2 Press [ ] or [ ] to select ➞ press [Set]. NOTE If there is no job, is displayed. If there is only one fax job, go to step 4. 3 Press [ ] or [ ] to confirm the fax/telephone number. 4 If you want to - Canon imageCLASS MF5550 | imageCLASS MF5500 Series Basic Guide - Page 81
7 System Monitor 7-4 Checking the Status of Print and Fax Jobs - Canon imageCLASS MF5550 | imageCLASS MF5500 Series Basic Guide - Page 82
how to clean the machine, replace the toner cartridge, and repack and transport the machine. MF5550 model, print any received faxes stored in the memory before disconnecting the power cord, since the documents in the memory are lost when the power cord is disconnected. Do not use tissue paper, paper - Canon imageCLASS MF5550 | imageCLASS MF5500 Series Basic Guide - Page 83
water or diluted dishwashing detergent solution. Maintenance Cleaning the Scanning Area 8 Wipe the scanning area (shaded area) with a clean, soft, lint-free cloth moistened with water, then wipe with a clean, soft, dry, lint-free cloth. Platen glass cover 8-2 Periodic Cleaning Platen glass - Canon imageCLASS MF5550 | imageCLASS MF5500 Series Basic Guide - Page 84
lines may appear in copies when the ADF is used to feed documents. This is caused by paste, ink, correction fluid, or to clean at the locations where the black lines are appearing on copies. If you have trouble getting the glass clean, wipe with a cloth moistened with water or a mild neutral - Canon imageCLASS MF5550 | imageCLASS MF5500 Series Basic Guide - Page 85
them immediately with cold water. Washing with warm water will set the toner, and make it 8 impossible to remove the toner stains. 1 Remove the cartridge from the machine. Always hold the cartridge so that the side with the written instructions faces up. Do not forcefully move or push the drum - Canon imageCLASS MF5550 | imageCLASS MF5500 Series Basic Guide - Page 86
light bands are still present: ❑ Replace the cartridge with a new one. For details on how to replace the cartridge, see "Replacing the Cartridge part on the exposure setting, room temperature, and humidity. If you print a large number of documents which contain heavy print or many photographs, toner - Canon imageCLASS MF5550 | imageCLASS MF5500 Series Basic Guide - Page 87
move or push the drum protective shutter in any way. 8 Instructions Drum protective shutter Storage Precautions WARNING Do not store cartridges or copy paper in places exposed to open flames, as this may cause the toner or copy paper to ignite, resulting in burns or a fire. CAUTION Keep cartridges - Canon imageCLASS MF5550 | imageCLASS MF5500 Series Basic Guide - Page 88
8 Place the cartridge in its protective bag so that the side with the written instructions faces up. Then, place the cartridge into its shipping box. Be sure to store the cartridge in a dark location. Recycling Used Cartridges Canon has instituted a worldwide recycling program for cartridges called " - Canon imageCLASS MF5550 | imageCLASS MF5500 Series Basic Guide - Page 89
an array of resources. Maintenance Becoming a part of this worthwhile program is easy. When your cartridge is of no further use, simply follow the instructions detailed for U.S. or Canadian residents. We appreciate your support of The Canon Cartridge Recycling Program. 8 Working together we - Canon imageCLASS MF5550 | imageCLASS MF5500 Series Basic Guide - Page 90
We encourage you to use this option as a more efficient way to ship cartridges. Place as many cartridges as possible into one box. 8 Carefully seal the box with tape; or Call 1-800-OK-CANON to receive your free eight cartridge collection box. Maintenance When to Replace the Cartridge 8-9 - Canon imageCLASS MF5550 | imageCLASS MF5500 Series Basic Guide - Page 91
) Maximum girth (length + 2 ¥ width + 2 ¥ height) = 130" (3,302 mm) If your shipment exceeds the above limits, please call 1-800-OK-CANON for special shipping information. Maintenance Please Note: Do not send defective cartridges for replacement. 8 Defective cartridges under warranty should be - Canon imageCLASS MF5550 | imageCLASS MF5500 Series Basic Guide - Page 92
returning label. For Alaska and Hawaii Canon set up alternative mail service with the U.S. Postal Service. Please call 1-800-OK-CANON to receive U.S. Postal Service merchandise returning label. ■ Option A: UPS Pick-up Give the shipment to your UPS driver when you receive your next regular delivery - Canon imageCLASS MF5550 | imageCLASS MF5500 Series Basic Guide - Page 93
) 8 We encourage you to use this option as a more efficient way to ship cartridges. Call 1-800-667-2666 to receive your free Canon collection box kit. The collection box can accommodate eight individual cartridge boxes. Place your eight individually packaged boxes of empty cartridges into the - Canon imageCLASS MF5550 | imageCLASS MF5500 Series Basic Guide - Page 94
of Canada. This donation is utilized in Canada. For further information about The Clean Earth Campaign in Canada, please call or write to Canon. 1-800-667-2666 Canon Canada Inc. Corporate Customer Relations 6390 Dixie Road Mississauga, ON L5T 1P7 8 Maintenance When to Replace the Cartridge 8-13 - Canon imageCLASS MF5550 | imageCLASS MF5500 Series Basic Guide - Page 95
, take care not to allow the toner on the jammed paper to come into contact with your hands or clothing. If they become dirty, wash them immediately with cold water. Washing with warm water will set the toner, and make it impossible to remove the toner stains. 1 Open the front cover. 8 2 Remove - Canon imageCLASS MF5550 | imageCLASS MF5500 Series Basic Guide - Page 96
bag. You may need it later when you remove the cartridge from the machine. 4 Rock the cartridge five or six times to distribute the toner evenly. Instructions 8 5 Place the cartridge on a flat and stable surface. Grip the sealing tape tab and snap it in the direction as shown below. Make sure - Canon imageCLASS MF5550 | imageCLASS MF5500 Series Basic Guide - Page 97
Maintenance 6 While grasping the cartridge with one hand, firmly and slowly pull the sealing tape tab with the other hand to remove the sealing tape completely. Throw the tape away. IMPORTANT To - Canon imageCLASS MF5550 | imageCLASS MF5500 Series Basic Guide - Page 98
projections on both sides of the cartridge to the guides in the machine and gently slide the cartridge into the machine as far as it will go. Maintenance 8 9 Close the front cover. NOTE If the LCD displays and alternately, reset the machine by opening the - Canon imageCLASS MF5550 | imageCLASS MF5500 Series Basic Guide - Page 99
the machine is connected to a telephone or your computer, remove the telephone line or printer cable. Maintenance 3 Open the front cover. 4 Grip the end of the cartridge, and the machine. 9 Push in the output tray, and close the document feeder tray. 8-18 Repacking and Transporting Your Machine - Canon imageCLASS MF5550 | imageCLASS MF5500 Series Basic Guide - Page 100
Carrying the Machine by the Sides Pull out the cassette completely, and remove the extension cover. Push in the output tray, and close the document feeder tray. Grip the handles on both sides of the machine and lift it carefully, as shown in the illustration above. CAUTION When carrying the machine, - Canon imageCLASS MF5550 | imageCLASS MF5500 Series Basic Guide - Page 101
Maintenance Transporting the Machine by Car Pack the machine, using the original packing material and box. Place the machine on a level, stable surface. IMPORTANT Do not leave the machine inside a car for a long period of time; the temperature can become very high or low. Avoid rough roads; - Canon imageCLASS MF5550 | imageCLASS MF5500 Series Basic Guide - Page 102
Troubleshooting 9 CHAPTER This chapter describes the problems you might encounter when using the machine and their remedies. It also explains what to do if you cannot solve the problem by yourself. Clearing Jams This section describes how to remove jammed paper. Removing Jammed Paper from Inside - Canon imageCLASS MF5550 | imageCLASS MF5500 Series Basic Guide - Page 103
multi-purpose feeder. 2 Pull out the cassette completely. 3 Hold both sides of the jammed paper and pull it out from the machine. 9 4 Insert the cassette to the machine. 5 Open the front cover. If there is the paper stack left in the cassette or on the output tray, remove it first. Troubleshooting - Canon imageCLASS MF5550 | imageCLASS MF5500 Series Basic Guide - Page 104
paper, do not touch the transfer roller (shaded part) as its surface is very delicate and susceptible to finger oil and scratches, which may lead to print deterioration. To avoid possible damage to the printer, it with a thick cloth to prevent exposure to light. Troubleshooting Clearing Jams 9-3 - Canon imageCLASS MF5550 | imageCLASS MF5500 Series Basic Guide - Page 105
gently pull it out. 8 Roll the leading end of the paper outwards so that the printed surface is on the inside of the roll, then gently pull the rolled up paper out of the machine. Troubleshooting 9 If the leading edge of the paper is visible but has not entered the 9 imaging area, pull the - Canon imageCLASS MF5550 | imageCLASS MF5500 Series Basic Guide - Page 106
forward from the cassette. It may cause a machine malfunction. Do not pull the jammed paper upward; the toner on the paper will stain the printer and cause a permanent reduction in print quality. 10 Open the face up cover and push down the green paper release levers on both sides of the face up - Canon imageCLASS MF5550 | imageCLASS MF5500 Series Basic Guide - Page 107
and close the face up cover. IMPORTANT 9 Be sure to push the paper release levers back to their original position. If the levers are left pushed down, the paper jam error will not be resolved. Never push down the paper release levers while printing. This could result in damage to the fixing - Canon imageCLASS MF5550 | imageCLASS MF5500 Series Basic Guide - Page 108
>, or and alternately. NOTE Do not open the platen glass cover until the jammed paper is removed. Doing so will result in damaging the document and the paper. 9 1 Open the ADF and gently remove the jammed paper from the ADF. Troubleshooting Clearing Jams 9-7 - Canon imageCLASS MF5550 | imageCLASS MF5500 Series Basic Guide - Page 109
not to be caught by the slide guides. Open the ADF and gently remove the jammed paper from the ADF. 3 Open the ADF and gently remove the jammed paper from the document output tray. Troubleshooting NOTE 9 After removing jammed paper, even edges of the document before loading it in the ADF again - Canon imageCLASS MF5550 | imageCLASS MF5500 Series Basic Guide - Page 110
functions, see Chapter 7, "Troubleshooting," in the Facsimile Guide. CHECK PRINTER Cause Remedy A problem has occurred in the printer. Reset the machine by opening the front cover and then closing it. If the message persists, unplug the machine from the power supply and contact Canon Authorized - Canon imageCLASS MF5550 | imageCLASS MF5500 Series Basic Guide - Page 111
-size paper in the cassette or multi-purpose feeder. (See "Loading Paper," on p. 2-4.) Troubleshooting MEMORY FULL PRESS SET KEY Cause The machine's memory is full because the collate copy function was set when a large document is loaded. 9 Remedy Divide the document and copy each part separately - Canon imageCLASS MF5550 | imageCLASS MF5500 Series Basic Guide - Page 112
paper size. SYSTEM ERROR Exxx* Cause Remedy An error of some kind has occurred in the machine. Unplug the machine from the power supply and wait approximately 3 minutes to 5 minutes, then plug it in again. If this does not solve the problem, unplug the machine and contact Canon Authorized Service - Canon imageCLASS MF5550 | imageCLASS MF5500 Series Basic Guide - Page 113
tilted or inserted at an angle. Troubleshooting Paper feeds skewed. (Printing is skewed.) Q Is paper loaded correctly? 9 A Make sure the paper stack in the cassette or the paper in the multi-purpose feeder is loaded properly, and that the slide guides are adjusted correctly. (See "Loading - Canon imageCLASS MF5550 | imageCLASS MF5500 Series Basic Guide - Page 114
Canon. 9 Paper feeds curled. Q Is the proper paper loaded? A Load proper paper in the cassette or multi-purpose feeder. (See Chapter 2, "Paper Handling.") A Select in in of the Menu. (See "Specifying the Paper Type," on p. 5-4.) Troubleshooting - Canon imageCLASS MF5550 | imageCLASS MF5500 Series Basic Guide - Page 115
tray free of obstructions? Troubleshooting A Do not place the delivered paper back on the output tray. (See "Face Down Paper Output Area," on p. 2-17.) A Do not place objects other than paper on the output tray. (See "Face Down Paper Output Area," on p. 2-17.) Q Is the machine installed - Canon imageCLASS MF5550 | imageCLASS MF5500 Series Basic Guide - Page 116
Troubleshooting Copying Problems The machine will not make a copy. Q Is the cartridge installed correctly? A Make sure the cartridge is installed correctly. (See "Install the cartridge," in the Set-Up Sheet.) Q Is the sealing tape removed from the cartridge? A Remove the sealing tape from - Canon imageCLASS MF5550 | imageCLASS MF5500 Series Basic Guide - Page 117
that the paper you are using is supported by the specifications of the machine. (See "Print Media Requirements," on p. 2-1.) Q Is the cartridge installed correctly? A Make sure the cartridge is installed correctly. (See "Install the cartridge," in the Set-Up Sheet.) Q Is any toner left in - Canon imageCLASS MF5550 | imageCLASS MF5500 Series Basic Guide - Page 118
the Paper Type," on p. 5-4.) 9 The edges of copies are dirty when you make copies. Q Is the paper size set correctly? A Specify the appropriate paper size in in of the Menu. (See "Specifying the Paper Type," on p. 5-4.) Troubleshooting Print Quality Problems - Canon imageCLASS MF5550 | imageCLASS MF5500 Series Basic Guide - Page 119
unplug the machine, and contact Canon Authorized Service Facilities or the Canon Customer Care Center. Troubleshooting Printout does not match paper size. Q Is the paper stack loaded and aligned correctly in the cassette, or is paper loaded in the multi-purpose feeder correctly? A Make sure - Canon imageCLASS MF5550 | imageCLASS MF5500 Series Basic Guide - Page 120
Troubleshooting Scanning Problems The machine will not scan a document. Q Did you connect the power cord to the machine just now? A Wait for a while. After connecting the power cord, the machine cannot scan documents immediately. Q Is the document loaded correctly? A Remove the document, - Canon imageCLASS MF5550 | imageCLASS MF5500 Series Basic Guide - Page 121
Connect the power cord," in the Set-Up Sheet.) Nothing appears in the LCD. Q Is the power cord plugged in securely? Troubleshooting A Check that the power cord is , unplug the machine and contact Canon Authorized Service Facilities or the Canon Customer Care Center. 9-20 General Problems - Canon imageCLASS MF5550 | imageCLASS MF5500 Series Basic Guide - Page 122
Troubleshooting If You Cannot Solve the Problem If you have a problem with your machine and you cannot solve it by referring to the information in this chapter, contact Canon Authorized Service Facilities or the Canon Customer Care Center. CAUTION If the machine makes strange noises, emits smoke or - Canon imageCLASS MF5550 | imageCLASS MF5500 Series Basic Guide - Page 123
Troubleshooting 9 9-22 If You Cannot Solve the Problem - Canon imageCLASS MF5550 | imageCLASS MF5500 Series Basic Guide - Page 124
for your reference. NOTE To specify or register the settings of the fax function, see Chapter 8, "Machine Settings," in the Facsimile Guide. (Only for the MF5550 model.) Accessing the Machine Settings Follow this procedure to change a setting: 1 Press [Menu]. 2 Press [ ] or [ ] to select the menu - Canon imageCLASS MF5550 | imageCLASS MF5500 Series Basic Guide - Page 125
NOTE For details on submenus, see "Menu Descriptions," on p. 10-3. After selecting the item or value with [ ] or [ ], press [Set] to enter the setting. If you press [Stop/Reset] before [Set] is pressed, the item you have selected will not be registered. Press [Stop/Reset] to exit from the Menu. If - Canon imageCLASS MF5550 | imageCLASS MF5500 Series Basic Guide - Page 126
PAPER TYPE TONER SAVER MODE ON OFF SYSTEM SETTINGS 1. DATE/TIME SETTING* 1. DATE/TIME SETTING 2. DATE SETUP 2. DEFAULT SETTINGS COPY SCAN FAX* Descriptions Sets the paper size and paper type. Selects the paper size. LTR, LGL, EXECUTIV, A4, B5, ENVELOPE (COM10, MONARCH, DL, ISO-C5), FREE function - Canon imageCLASS MF5550 | imageCLASS MF5500 Series Basic Guide - Page 127
Name 3. AUTO CLEAR ON OFF 4. ENERGY SVR TIME ON OFF * Only for the MF5550 model. COPY SETTINGS Name SHARPNESS PAPER SIZE GROUP 10 INCH A AB STANDARD COPY QTY Descriptions Sets the auto clear function. If the machine remains idle for a set amount of time, the display returns to the standby mode - Canon imageCLASS MF5550 | imageCLASS MF5500 Series Basic Guide - Page 128
%) Sets the auto sort function. The auto sort function is turned on. The auto sort function is turned off. (The factory default setting is in bold face.) NOTE For details on , see Chapter 8, "Machine Settings," in the Facsimile Guide. (Only for the MF5550 model.) Machine Settings 10 - Canon imageCLASS MF5550 | imageCLASS MF5500 Series Basic Guide - Page 129
Machine Settings 10 10-6 Menu Descriptions - Canon imageCLASS MF5550 | imageCLASS MF5500 Series Basic Guide - Page 130
System Toner Projection System Canon's RAPID Fusing System™ Approx. 600 dpi ¥ 600 dpi 256 Up to LGL size Sheets, books, and three-dimensional objects (up to 4.4 lb (2 kg)) Cassette Feeding: 17 lb to 34 lb (64 g/m 2 to 128 g/m 2) Multi-Purpose Feeder: 17 lb to 34 lb (64 g/m 2 to 128 g/m2) Plain paper - Canon imageCLASS MF5550 | imageCLASS MF5500 Series Basic Guide - Page 131
direct, Manual Exposure Paper Feeding System Cassette Feeding: 250 sheets of 17 lb (64 g/m 2) Multi document feeder tray is opened) Installation Space (W ¥ D) 19 1/8" ¥ 21 1/8" (486 mm ¥ 536.7 mm) [with the cassette attached] Weight MF5530: Approx. 32.6 lb (14.8 kg) (including cartridge) MF5550 - Canon imageCLASS MF5550 | imageCLASS MF5500 Series Basic Guide - Page 132
Customer support, 1-1 D DATE SETUP setting, 10-3 DATE/TIME SETTING setting, 10-3 DATE/TIME SETTING settings, 10-3 DEFAULT SETTINGS setting, 10-3 Appendix Document feeder tray, 1-2 loading, 3-4 orientation, 2-15 output tray, 1-2 11 placing, 3-3 positioning, 3-3 printing, 4-3 problem - Canon imageCLASS MF5550 | imageCLASS MF5500 Series Basic Guide - Page 133
, 1-4 FAX key, 1-5 11 Feeder document, 1-2 multi-purpose, 1-2 Front cover, 1-2 G General problems, 9-20 Guides, 1-2 11-4 Index H Heavy paper, 10-3 I Image Quality adjusting, 5-8 key, 1-6 IMAGE QUALITY setting, 10-5 INCORRECT PAPER SIZE message, 9-10 INSTALL CARTRIDGE message, 9-10 J Jammed - Canon imageCLASS MF5550 | imageCLASS MF5500 Series Basic Guide - Page 134
PAPER TYPE setting, 10-3 Periodic cleaning, 8-1 Plain paper, 5-4, 10-3 Platen glass, 1-3 glass cover, 1-3 Positioning documents, 3-3 Power socket, 1-4 PRESET setting, 10-5 Print media requirements, 2-1 size, 2-2 type, 2-2 weight, 2-2 Print quality problems, 9-16 Print yield, 8-5 PRINTER DATA ERROR - Canon imageCLASS MF5550 | imageCLASS MF5500 Series Basic Guide - Page 135
Size document, 3-1 marks, 3-3 print media, 2-2 Slide guides, 1-2 ADF, 1-2, 3-5 multi-purpose feeder, 2-13 Specifications, 11-1 STANDARD COPY QTY setting, 10-4 Standby display, 1-7 Start key, 1-6 Status Monitor key, 1-5 using, 7-1 Stop/Reset key, 1-6 SUPPLY REC. PAPER/TRAY: message, 9-11 SYSTEM ERROR - Canon imageCLASS MF5550 | imageCLASS MF5500 Series Basic Guide - Page 136
contents of this guide are printed on 70% recycled paper. CANON INC. 30-2, Shimomaruko 3-chome, Ohta-ku, Tokyo 146-8501, Japan CANON U.S.A., INC. One Canon Plaza, Lake Success, NY 11042, U.S.A. CANON CANADA INC. 6390 Dixie Road Mississauga, Ontario L5T 1P7, Canada CANON EUROPA N.V. Bovenkerkerweg
-
 1
1 -
 2
2 -
 3
3 -
 4
4 -
 5
5 -
 6
6 -
 7
7 -
8
-
9
-
10
-
11
-
12
-
13
-
14
-
15
-
16
-
17
-
18
-
19
-
20
-
21
-
22
-
23
-
24
-
25
-
26
-
27
-
28
-
29
-
30
-
31
-
32
-
33
-
34
-
35
-
36
-
37
-
38
-
39
-
40
-
41
-
42
-
43
-
44
-
45
-
46
-
47
-
48
-
49
-
50
-
51
-
52
-
53
-
54
-
55
-
56
-
57
-
58
-
59
-
60
-
61
-
62
-
63
-
64
-
65
-
66
-
67
-
68
-
69
-
70
-
71
-
72
-
73
-
74
-
75
-
76
-
77
-
78
-
79
-
80
-
81
-
82
-
83
-
84
-
85
-
86
-
87
-
88
-
89
-
90
-
91
-
92
-
93
-
94
-
95
-
96
-
97
-
98
-
99
-
100
-
101
-
102
-
103
-
104
-
105
-
106
-
107
-
108
-
109
-
110
-
111
-
112
-
113
-
114
-
115
-
116
-
117
-
118
-
119
-
120
-
121
-
122
-
123
-
124
-
125
-
126
-
127
-
128
-
129
-
130
-
131
-
132
-
133
-
134
-
135
-
136
 |
 |

Series
Basic Guide
Basic Guide