Cisco SLM2008PT-NA Administration Guide - Page 12
Connecting the Cisco SLM2008 Switch to the Network
 |
View all Cisco SLM2008PT-NA manuals
Add to My Manuals
Save this manual to your list of manuals |
Page 12 highlights
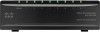
Connecting the Cisco SLM2008 Switch Connecting the Cisco SLM2008 Switch to the Network 3 STEP 3 Insert a screw into each hole and leave 3 mm of its head exposed. STEP 4 The wall-mount slots are two crisscross slots on the bottom panel of the switch. The wall-mount slots on the switch line up with the two screws. Wall mount slots 2-1/2 194450 STEP 5 Maneuver the switch to insert the screws into the two slots. Connecting the Cisco SLM2008 Switch to the Network The diagram shown here is an example of a typical network configuration. Cisco SLM2008 8-Port Gigabit Smart Switch with PD and AC Power Administration Guide 7
-
 1
1 -
2
-
3
-
4
-
5
-
6
-
 7
7 -
 8
8 -
 9
9 -
 10
10 -
 11
11 -
 12
12 -
 13
13 -
 14
14 -
 15
15 -
 16
16 -
 17
17 -
18
-
19
-
20
-
21
-
22
-
23
-
24
-
25
-
26
-
27
-
28
-
29
-
30
-
31
-
32
-
33
-
34
-
35
-
36
-
37
-
38
-
39
-
40
-
41
-
42
-
43
-
44
-
45
-
46
-
47
-
48
-
49
-
50
-
51
-
52
-
53
-
54
-
55
-
56
-
57
-
58
-
59
-
60
-
61
-
62
-
63
-
64
-
65
-
66
 |
 |

Connecting the Cisco SLM2008 Switch
Connecting the Cisco SLM2008 Switch to the Network
Cisco SLM2008 8-Port Gigabit Smart Switch with PD and AC Power Administration Guide
7
3
STEP 3
Insert a screw into each hole and leave 3 mm of its head exposed.
STEP 4
The wall-mount slots are two crisscross slots on the bottom panel of the switch.
The wall-mount slots on the switch line up with the two screws.
STEP 5
Maneuver the switch to insert the screws into the two slots.
Connecting the Cisco SLM2008 Switch to the Network
The diagram shown here is an example of a typical network configuration.
194450
Wall
mount
slots
2-1/2