D-Link DCS-1130 Product Manual
D-Link DCS-1130 - mydlink-enabled Wireless N Network Camera Manual
 |
UPC - 790069321627
View all D-Link DCS-1130 manuals
Add to My Manuals
Save this manual to your list of manuals |
D-Link DCS-1130 manual content summary:
- D-Link DCS-1130 | Product Manual - Page 1
- D-Link DCS-1130 | Product Manual - Page 2
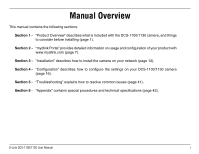
" describes how to configure the settings on your DCS-1100/1130 camera (page 16). Section 5 - "Troubleshooting" explains how to resolve common issues (page 41). Section 6 - "Appendix" contains special procedures and technical specifications (page 43). D-Link DCS-1100/1130 User Manual i - D-Link DCS-1130 | Product Manual - Page 3
as our services and websites develop and change. Please refer to the www.mydlink.com website for the most current information. Manual Revisions Revision 1.0 Date February 26, 2009 Description • DCS-1100/1130 Revision A1 with firmware version 1.00 Trademarks D-Link and the D-Link logo are - D-Link DCS-1130 | Product Manual - Page 4
27 Setup > Time and Date 28 Setup > Recording 29 Setup > Snapshot 31 Maintenance 34 Maintenance > Admin 34 Maintenance > System 36 Maintenance > Firmware Upgrade 37 Status 38 Status > Device Info 38 Status > Log 39 Help 40 Troubleshooting 41 D-Link DCS-1100/1130 User Manual iii - D-Link DCS-1130 | Product Manual - Page 5
Table of Contents Appendix A: Installing the DCS-1100/1130 on a Router Without UPnP 43 Appendix B: Technical Specifications 49 Contacting Technical Support 51 Warranty 52 Registration 58 D-Link DCS-1100/1130 User Manual iv - D-Link DCS-1130 | Product Manual - Page 6
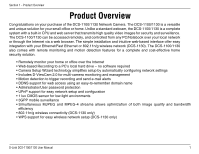
environments • 3GPP mobile surveillance • Simultaneous MJPEG and MPEG-4 streams allows optimization of both image quality and bandwidth efficiency • 802.11n/g wireless connectivity (DCS-1130 only) • WPS support for easy wireless network setup (DCS-1130 only) D-Link DCS-1100/1130 User Manual 1 - D-Link DCS-1130 | Product Manual - Page 7
connectivity, making the DCS-1130 easy to integrate into your existing network environment. The DCS1130 works with an Ethernet based network for traditional wired environments and also works with 802.11n/g/b routers or access points for added flexibility. D-Link DCS-1100/1130 User Manual 2 - D-Link DCS-1130 | Product Manual - Page 8
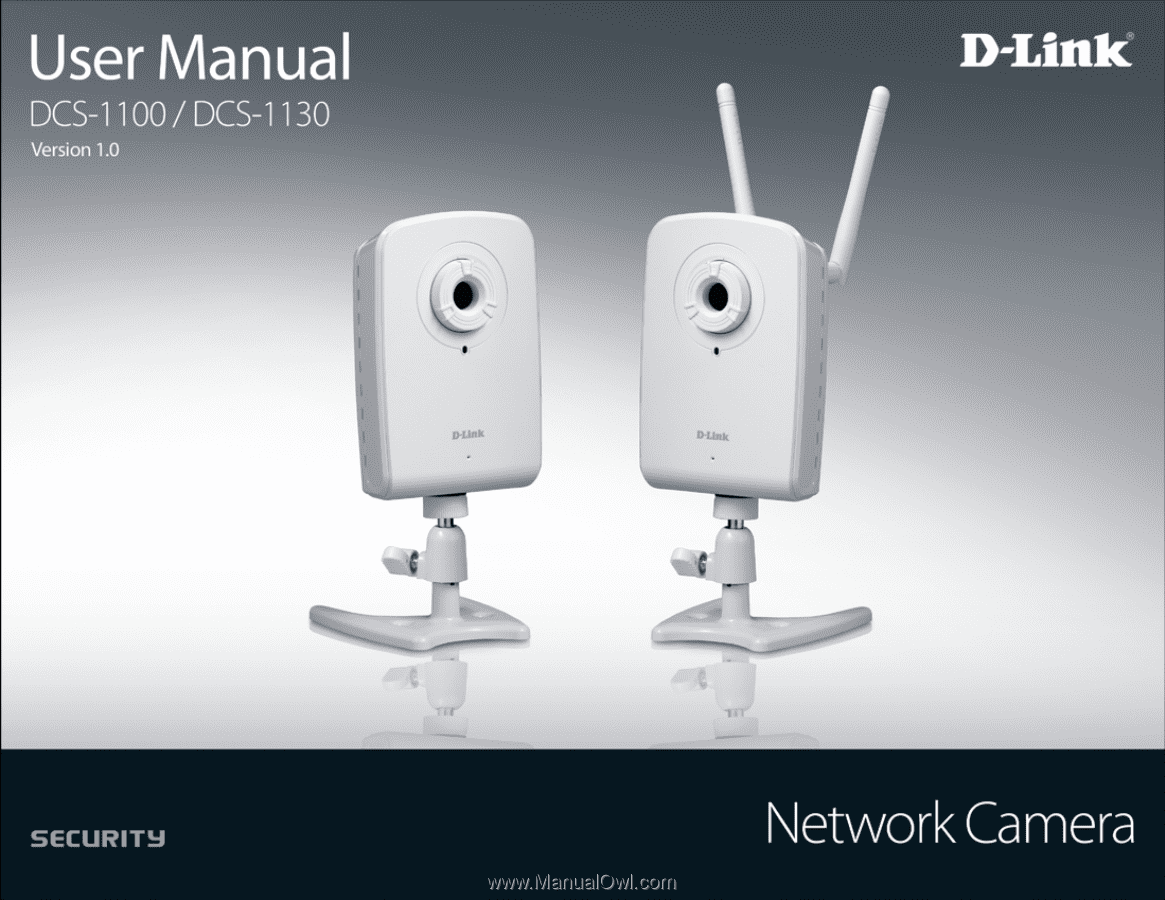
Section 1 - Product Overview Package Contents DCS-1100 Wired Network Camera or DCS-1130 Wireless N Network Camera Power Adapter CAT5 Ethernet Cable Camera Base and Mounting Kit Quick Installation Guide CD-ROM If any of the above items are missing from your package, please contact your - D-Link DCS-1130 | Product Manual - Page 9
to download the latest version. mydlink Website Requirements • Subscription with an Internet Service Provider (ISP) with 256 Kbps minimum bandwidth for remote video viewing • Computer with: Microsoft Internet Explorer 6 or higher with ActiveX controls enabled D-Link DCS-1100/1130 User Manual 4 - D-Link DCS-1130 | Product Manual - Page 10
a WPS router. Focus ring Turning the ring will allow you to focus the camera. Camera lens Records video from the surrounding area. Status LED Lights up and changes color to indicate the camera's status. Camera microphone Picks up sound from the surrounding area. D-Link DCS-1100/1130 User Manual 5 - D-Link DCS-1130 | Product Manual - Page 11
Hardware Overview Back Antenna connectors (DCS-1130) Connects to the wireless antennas. Camera base mounting points Allows you to attach the camera base or another mounting unit. D-Link DCS-1100/1130 User Manual Ethernet port Connects to a PC or network through an Ethernet connection. Power - D-Link DCS-1130 | Product Manual - Page 12
your DCS-1100/1130 camera with a mydlink account in the Camera Installation Wizard. You will be able to remotely access your camera from the www.mydlink.com website. After signing in to your mydlink account, you will see a screen similar to the following: D-Link DCS-1100/1130 User Manual 7 - D-Link DCS-1130 | Product Manual - Page 13
cable connections and make sure they are secure. • Check to make sure that the LED on your camera is lit solid green. If you still cannot access your camera, reset your camera and run the Camera Installation Wizard again from the CD-ROM included in your package. D-Link DCS-1100/1130 User Manual 8 - D-Link DCS-1130 | Product Manual - Page 14
by default. If the camera is available, a Live Video feed will be displayed. Video will be shown at VGA resolution (640x480) if viewing your camera from a PC on the same local network, or at QVGA resolution (320x240) if viewing your camera from a PC on a remote network. D-Link DCS-1100/1130 User - D-Link DCS-1130 | Product Manual - Page 15
2 - mydlink Portal Camera Settings The Camera Settings tab allows you to access your camera's configuration interface. To open your camera's configuration interface, click Camera web page and enter the password exactly as listed on the Camera Settings page. D-Link DCS-1100/1130 User Manual 10 - D-Link DCS-1130 | Product Manual - Page 16
: This shows you the MAC address of your device. Device activated On: This shows you the time and date that your device was added to mydlink. Support: This section provides you with links to various support websites and downloads related to your product. D-Link DCS-1100/1130 User Manual 11 - D-Link DCS-1130 | Product Manual - Page 17
to start the autorun program. The CD-ROM will open the Camera Installation Wizard. Simply click Start to go through the Installation Wizard, which will help you through the entire installation process from connecting your hardware to configuring your camera. D-Link DCS-1100/1130 User Manual 12 - D-Link DCS-1130 | Product Manual - Page 18
together. 2. Screw the camera base into the mounting point on either the back or the bottom of the camera and tighten the collar. You can adjust the angle and pivot of the camera by loosening the wheel and retightening it after moving it to the desired position. D-Link DCS-1100/1130 User Manual 13 - D-Link DCS-1130 | Product Manual - Page 19
the power adapter, you should see the status LED on the front of the camera turn on. The status LED will light red when it receives power, will light green after the camera connects to the network, and will flash green when the camera is being accessed. D-Link DCS-1100/1130 User Manual 14 - D-Link DCS-1130 | Product Manual - Page 20
's User Manual. The DCS-1130 will then automatically create a wireless connection to your router. While connecting, your camera's LED will flash and then your camera will reboot. After rebooting, the status LED on the front of the camera will turn solid green. D-Link DCS-1100/1130 User Manual 15 - D-Link DCS-1130 | Product Manual - Page 21
Wizard. If you did not create a password, the default password is blank. After entering your password, click OK. Note: If you are directly connecting your PC to the camera, or if you are using the camera on a closed network, the default IP is 192.168.0.20. D-Link DCS-1100/1130 User Manual 16 - D-Link DCS-1130 | Product Manual - Page 22
Section 4 - Configuration Web-based Configuration Utility Use the following sections to set up and configure your network camera: • LIVE VIDEO • SETUP • MAINTENANCE • STATUS • HELP D-Link DCS-1100/1130 User Manual 17 - D-Link DCS-1130 | Product Manual - Page 23
on the image. Video Profile: There are four different viewing profiles, which you can configure in Setup > Audio and Video. Full Screen: This allows you to view the video in full screen hear audio from the area surrounding your camera. Audio is on by default. D-Link DCS-1100/1130 User Manual 18 - D-Link DCS-1130 | Product Manual - Page 24
Connection Setup, and you can manually set up motion detection options by clicking on Manual Motion Detection Setup. You can also see these settings by clicking on the menu on the left panel (Network Setup / Wireless Setup / Motion Detection / Snapshot). D-Link DCS-1100/1130 User Manual 19 - D-Link DCS-1130 | Product Manual - Page 25
the camera should use. Secondary DNS: Enter the IP adress of the secondary DNS server that the camera should use. Note: If you need to use a static IP address and you do not know the network information, contact your Internet Service Provider (ISP) for assistance. D-Link DCS-1100/1130 User Manual - D-Link DCS-1130 | Product Manual - Page 26
22, for security purposes. If you have problems accessing your camera through HTTP, try using a port higher than 1024. After making any changes, click the Save Settings button to save your changes, or click the Don't Save Settings button to discard your changes. D-Link DCS-1100/1130 User Manual 21 - D-Link DCS-1130 | Product Manual - Page 27
use WEP, WPA-PSK, or WPA2-PSK authentication, enter the Key (also known as password) used for your wireless network. After making any changes, click the Save Settings button to save your changes, or click the Don't Save Settings button to discard your changes. D-Link DCS-1100/1130 User Manual 22 - D-Link DCS-1130 | Product Manual - Page 28
Password: Retype the password for the DDNS service. Timeout: This sets the number of hours between DDNS updates. After making any changes, click the Save Settings button to save your changes, or click the Don't Save Settings button to discard your changes. D-Link DCS-1100/1130 User Manual 23 - D-Link DCS-1130 | Product Manual - Page 29
will be on the left side of the screen and vice versa. Note: Mirror and Flip can be used if you choose to mount the DCS-1100/1130 upside down on the ceiling. D-Link DCS-1100/1130 User Manual 24 - D-Link DCS-1130 | Product Manual - Page 30
your camera's RTSP URL so you can view your camera's video with this video profile's settings. For example, if you enter "mpeg4" as your RTSP URL setting and your camera's IP is 192.160.0.20, you can view your camera's video with these settings through 192.160.0.20/mpeg4. D-Link DCS-1100/1130 User - D-Link DCS-1130 | Product Manual - Page 31
network bandwidth. For best viewing results on a mobile phone, we suggest setting the frame rate to 5 fps and bit rate to 20 Kbps. After making any changes, click the Save Settings button to save your changes, or click the Don't Save Settings button to discard your changes. D-Link DCS-1100/1130 - D-Link DCS-1130 | Product Manual - Page 32
4 - Configuration Setup > Motion Detection This option allows you to set up Motion Detection on your IP camera. In order to use motion detection, you must first check the Enable Video Motion checkbox. click the Don't Save Settings button to discard your changes. D-Link DCS-1100/1130 User Manual 27 - D-Link DCS-1130 | Product Manual - Page 33
the NTP (Network Time Protocol) Server. Daylight Saving can also be configured to automatically adjust the time when needed. Time Zone: Select your time zone from the drop down menu. Enable Daylight Saving: the Don't Save Settings button to discard your changes. D-Link DCS-1100/1130 User Manual 28 - D-Link DCS-1130 | Product Manual - Page 34
, and the Share name you chose for the Shared Folder. Click on the Test button to test your settings. Please note that when creating a simple network drive like this, all users on your local network will have access to the contents of this folder. D-Link DCS-1100/1130 User Manual 29 - D-Link DCS-1130 | Product Manual - Page 35
your Samba network drive's throughput camera to automatically record video during the specified times in the table below. After making any changes, click the Save Settings button to save your changes, or click the Don't Save Settings button to discard your changes. D-Link DCS-1100/1130 User Manual - D-Link DCS-1130 | Product Manual - Page 36
the camera to take snapshots continuously at intervals specified in FTP Server > Interval below according to schedule you define by checking days and entering the times you want to record between. You can only save to an FTP server when taking scheduled snapshots. D-Link DCS-1100/1130 User Manual - D-Link DCS-1130 | Product Manual - Page 37
E-mail Address: Enter the e-mail address you want to send your snapshots to. Port: Enter the port used by your SMTP server. Test: Clicking this button will take a snapshot and will try to upload it to your FTP server using the settings you have entered. D-Link DCS-1100/1130 User Manual 32 - D-Link DCS-1130 | Product Manual - Page 38
Enter the prefix you want to attach to your snapshot files. Port: Enter the port used by the FTP server. Interval: Enter the time interval the camera will wait before taking a new snapshot. Passive Mode: If the Don't Save Settings button to discard your changes. D-Link DCS-1100/1130 User Manual 33 - D-Link DCS-1130 | Product Manual - Page 39
Password: Re-enter the password for the new user account for verification. After entering the password again, click Add to add the new user account. User List: Here, you can view the current list of users by using the dropdown box. You can also delete a user by D-Link DCS-1100/1130 User Manual - D-Link DCS-1130 | Product Manual - Page 40
various other settings for your camera. Camera Name: Enter the name of your camera. Enable OSD: This will enable the information bar On camera's front LED indicator on or off. After making any changes to this section, click the Save button to save your changes. D-Link DCS-1100/1130 User Manual 35 - D-Link DCS-1130 | Product Manual - Page 41
new configuration. Restore To Factory Defaults: Click this button to reset all settings to their factory defaults. If you choose to reset your settings, you will need to set up your camera again. Reboot Device: Clicking the Reboot button will reboot your device. D-Link DCS-1100/1130 User Manual 36 - D-Link DCS-1130 | Product Manual - Page 42
the firmware will not change any of your system settings, but it is recommended that you save your system configuration before doing a firmware upgrade. Note: It is recommended that you use a wired connection for your computer and camera when upgrading the firmware. D-Link DCS-1100/1130 User Manual - D-Link DCS-1130 | Product Manual - Page 43
Section 4 - Configuration Status Status > Device Info This screen shows you various information about your camera and its current settings. D-Link DCS-1100/1130 User Manual 38 - D-Link DCS-1130 | Product Manual - Page 44
Section 4 - Configuration Status > Log The log shows you a list of events that have happened recently. You can download the log by clicking the Download button, or you can empty the log by clicking the Clear button. D-Link DCS-1100/1130 User Manual 39 - D-Link DCS-1130 | Product Manual - Page 45
Section 4 - Configuration Help The Help screen provides you with support information about the DCS-1100/1130 for your reference. D-Link DCS-1100/1130 User Manual 40 - D-Link DCS-1130 | Product Manual - Page 46
router is upgraded to the latest firmware ...you have tried rebooting your router by unplugging it, then plugging it back in After checking the above items, you can click the Retry button to refresh the summary screen to see if Remote Access has been enabled. D-Link DCS-1100/1130 User Manual 41 - D-Link DCS-1130 | Product Manual - Page 47
going to http://12345678.mydlink.com This URL will open a webpage where you will be asked to log in by entering your camera's password. After entering your password, your camera's Live View window will open, and you will be able to configure your camera as well. D-Link DCS-1100/1130 User Manual 42 - D-Link DCS-1130 | Product Manual - Page 48
from a computer on the same local (home) network • Click on the MAINTENANCE tab, and select Device Management • Enter a unique Camera Name for your camera Note: Giving your camera a unique name is important when setting up multiple cameras on your network. D-Link DCS-1100/1130 User Manual 43 - D-Link DCS-1130 | Product Manual - Page 49
of 192.168.0.20. If you wish to use a different IP address, be sure that the camera settings correspond to your network settings. The Default Gateway will be the IP address of your router's local IP address (e.g.192.168.0.1, if you are using a D-Link router). D-Link DCS-1100/1130 User Manual 44 - D-Link DCS-1130 | Product Manual - Page 50
something else, like 800. If you are behind a residential gateway, you will need to open a corresponding port on your gateway as well. Not all gateways are the same. Please refer to your gateway's user's manual for specific instructions on how to forward ports. D-Link DCS-1100/1130 User Manual 45 - D-Link DCS-1130 | Product Manual - Page 51
Appendix A - Installing the DCS-1100/1130 on a Router Without UPnP Router Setup The following steps generally apply to any router that you have on your network. The D-Link DIR-301 is used as an example to clarify the configuration process. Note: Because a dynamic WAN IP address can change from - D-Link DCS-1130 | Product Manual - Page 52
Port Forwarding list, a check mark appearing before the camera name will indicate that the port forwarding rule is enabled. • Click Save Settings to save your settings. You will need to repeat these steps to open an RTSP port for your camera (port 554 by default). D-Link DCS-1100/1130 User Manual - D-Link DCS-1130 | Product Manual - Page 53
to view video from your camera. Consult your router/firewall's User Manual, and use the following information to set up port triggering: • Port trigger: 554 (if you have changed the RTSP port on your camera, use that number here) • Ports to open: 6970-6990 D-Link DCS-1100/1130 User Manual 48 - D-Link DCS-1130 | Product Manual - Page 54
Port Forwarding Wireless Connectivity (DCS-1130 only) • 802.11 n/g Wireless with WEP/WPA/WPA2 Security • WPS Support Sensor • ¼ inch color VGA CMOS Sensor Lens • Focal length: 5.01mm, F2.8 Microphone • Signal/noise ratio: 40dB +/- 3dB, Omni-directional Reset Button • Reset to factory default Video - D-Link DCS-1130 | Product Manual - Page 55
) • DCS-1130: 280g (without bracket and stand) Operation Temperature • 0˚ to 40˚C (32˚ to 104˚F) Storage Temperature •- 20˚ to 70˚C (-4˚ to 158˚F) Humidity • 20-80% RH non-condensing Emission (EMI), Safety & Other Certifications • FCC Class B • IC • C-Tick • CE D-Link DCS-1100/1130 User Manual 50 - D-Link DCS-1130 | Product Manual - Page 56
questions and answers to technical issues. For customers within the United States: Phone Support: (877) 354-6555 Internet Support: http://support.dlink.com For customers within Canada: Phone Support: (877) 354-6560 Internet Support: http://support.dlink.ca D-Link DCS-1100/1130 User Manual 51 - D-Link DCS-1130 | Product Manual - Page 57
defective Hardware will be refunded by D-Link upon return to D-Link of the defective Hardware. All Hardware or part thereof that is replaced by D-Link, or for which the purchase price is refunded, shall become the property of D-Link upon replacement or refund. D-Link DCS-1100/1130 User Manual 52 - D-Link DCS-1130 | Product Manual - Page 58
Link's option, to replace the non-conforming Software (or defective media) with software that substantially conforms to D-Link's functional specifications for the Software or to refund the portion of the actual purchase price ID Number at https://rma.dlink.com/. D-Link DCS-1100/1130 User Manual 53 - D-Link DCS-1130 | Product Manual - Page 59
software, firmware or other products or services provided by anyone other than D-Link; and Products that have been purchased from inventory clearance or liquidation sales or other sales in which D-Link , FITNESS FOR A PARTICULAR PURPOSE AND NONINFRINGEMENT. D-Link DCS-1100/1130 User Manual 54 - D-Link DCS-1130 | Product Manual - Page 60
D-Link Corporation/D-Link Systems, Inc., as stipulated by the United States Copyright Act of 1976 and any amendments thereto. Contents are subject to change without prior notice. Copyright ©2009 by D-Link Corporation/D-Link Systems, Inc. All rights reserved. D-Link DCS-1100/1130 User Manual 55 - D-Link DCS-1130 | Product Manual - Page 61
and, if not installed and used in accordance with the instructions, may cause harmful interference to radio communication. However, there firmware programmed at the factory to match the intended destination. The firmware setting is not accessible by the end user. D-Link DCS-1100/1130 User Manual - D-Link DCS-1130 | Product Manual - Page 62
applicable to products purchased outside the United States, please contact the corresponding local D-Link office. Industry Canada Notice: This device complies with RSS-210 of the Industry regulations of Industry Canada. The required antenna impedance is 50 ohms. D-Link DCS-1100/1130 User Manual 57 - D-Link DCS-1130 | Product Manual - Page 63
Appendix E - Registration Registration Product registration is entirely voluntary and failure to register will not diminish your warranty rights. Version 1.3 March 03, 2009 D-Link DCS-1100/1130 User Manual 58
-
 1
1 -
 2
2 -
 3
3 -
 4
4 -
 5
5 -
 6
6 -
 7
7 -
8
-
9
-
10
-
11
-
12
-
13
-
14
-
15
-
16
-
17
-
18
-
19
-
20
-
21
-
22
-
23
-
24
-
25
-
26
-
27
-
28
-
29
-
30
-
31
-
32
-
33
-
34
-
35
-
36
-
37
-
38
-
39
-
40
-
41
-
42
-
43
-
44
-
45
-
46
-
47
-
48
-
49
-
50
-
51
-
52
-
53
-
54
-
55
-
56
-
57
-
58
-
59
-
60
-
61
-
62
-
63
 |
 |