D-Link DP 300 Manual - Page 118
etc/hosts, ps-142634, ps-142634.dlink.com.tw, admintool, Printer Manger, Add Print, Printer Name,
 |
UPC - 790069212314
View all D-Link DP 300 manuals
Add to My Manuals
Save this manual to your list of manuals |
Page 118 highlights
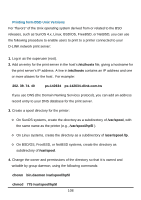
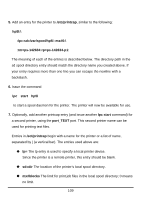
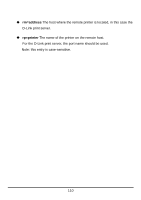
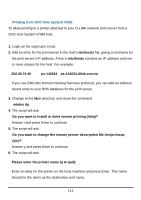
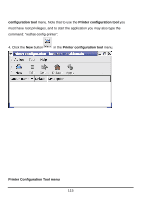
Printing from Solaris To allow printing from a Sun Solaris workstation, 1. Log in as the superuser (root). 2. Add an entry for the print server in the host's /etc/hosts file, giving a hostname for the print server's IP address. A line in /etc/hosts contains an IP address and one or more aliases for the host . For example: 202.39.74.40 ps-142634 ps-142634.dlink.com.tw If you use DNS (the Domain Naming Services protocol), you can add an address record entry to your DNS database for the print server. 3. In OpenWindows, start the admintool program. 4. Click on the Printer Manger icon. 5. From the Edit menu, select Add Print, then Add Access to Remote Printer... 6. Enter values for the fields as follow: ◊ Printer Name This field should contain the name of the printer port you wish to use. The field is case-sensitive. ◊ Printer Server This field should contain the IP address of the print server, or the alias name you added in step 2. ◊ Printer Server OS This field should be set to BSD. 7. Confirm the addition. 8. Optionally repeat the addition to add another printer for printing text files, with_TEXT appended to the port name. Once you have added the new printer, you can use the lp command to print files to the printer. Consult your Solaris documentation for details. 113
-
 1
1 -
2
-
3
-
4
-
5
-
6
-
7
-
8
-
9
-
10
-
11
-
12
-
13
-
14
-
15
-
16
-
17
-
18
-
19
-
20
-
21
-
22
-
23
-
24
-
25
-
26
-
27
-
28
-
29
-
30
-
31
-
32
-
33
-
34
-
35
-
36
-
37
-
38
-
39
-
40
-
41
-
42
-
43
-
44
-
45
-
46
-
47
-
48
-
49
-
50
-
51
-
52
-
53
-
54
-
55
-
56
-
57
-
58
-
59
-
60
-
61
-
62
-
63
-
64
-
65
-
66
-
67
-
68
-
69
-
70
-
71
-
72
-
73
-
74
-
75
-
76
-
77
-
78
-
79
-
80
-
81
-
82
-
83
-
84
-
85
-
86
-
87
-
88
-
89
-
90
-
91
-
92
-
93
-
94
-
95
-
96
-
97
-
98
-
99
-
100
-
101
-
102
-
103
-
104
-
105
-
106
-
107
-
108
-
109
-
110
-
111
-
112
-
 113
113 -
 114
114 -
 115
115 -
 116
116 -
 117
117 -
 118
118 -
 119
119 -
 120
120 -
 121
121 -
 122
122 -
 123
123 -
124
-
125
-
126
-
127
-
128
-
129
-
130
-
131
-
132
-
133
-
134
-
135
-
136
-
137
-
138
-
139
-
140
-
141
-
142
-
143
-
144
-
145
-
146
-
147
-
148
-
149
-
150
-
151
-
152
 |
 |