D-Link DSN-6110 User Manual for DSN-6110 & DSN-6110 with DSN-610 - Page 61
Snapshot
 |
View all D-Link DSN-6110 manuals
Add to My Manuals
Save this manual to your list of manuals |
Page 61 highlights
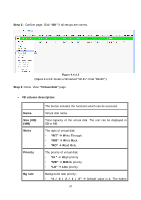
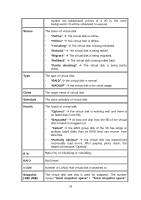
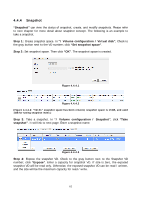
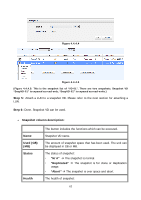
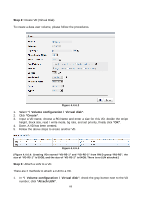
4.4.4 Snapshot "Snapshot" can view the status of snapshot, create, and modify snapshots. Please refer to next chapter for more detail about snapshot concept. The following is an example to take a snapshot. Step 1: Create snapshot space. In "/ Volume configuration / Virtual disk", Check to the gray button next to the VD number; click "Set snapshot space". Step 2: Set snapshot space. Then click "OK". The snapshot space is created. Figure 4.4.4.1 Figure 4.4.4.2 (Figure 4.4.4.2: "VD-01" snapshot space has been created, snapshot space is 15GB, and used 1GB for saving snapshot index.) Step 3: Take a snapshot. In "/ Volume configuration / Snapshot", click "Take snapshot". It will link to next page. Enter a snapshot name. Figure 4.4.4.3 Step 4: Expose the snapshot VD. Check to the gray button next to the Snapshot VD number; click "Expose". Enter a capacity for snapshot VD. If size is zero, the exposed snapshot VD will be read only. Otherwise, the exposed snapshot VD can be read / written, and the size will be the maximum capacity for read / write. 61
-
 1
1 -
2
-
3
-
4
-
5
-
6
-
7
-
8
-
9
-
10
-
11
-
12
-
13
-
14
-
15
-
16
-
17
-
18
-
19
-
20
-
21
-
22
-
23
-
24
-
25
-
26
-
27
-
28
-
29
-
30
-
31
-
32
-
33
-
34
-
35
-
36
-
37
-
38
-
39
-
40
-
41
-
42
-
43
-
44
-
45
-
46
-
47
-
48
-
49
-
50
-
51
-
52
-
53
-
54
-
55
-
 56
56 -
 57
57 -
 58
58 -
 59
59 -
 60
60 -
 61
61 -
 62
62 -
 63
63 -
 64
64 -
 65
65 -
 66
66 -
67
-
68
-
69
-
70
-
71
-
72
-
73
-
74
-
75
-
76
-
77
-
78
-
79
-
80
-
81
-
82
-
83
-
84
-
85
-
86
-
87
-
88
-
89
-
90
-
91
-
92
-
93
-
94
-
95
-
96
-
97
-
98
-
99
-
100
-
101
-
102
-
103
-
104
-
105
-
106
-
107
-
108
-
109
-
110
-
111
-
112
-
113
-
114
-
115
-
116
-
117
-
118
-
119
-
120
-
121
-
122
-
123
-
124
-
125
-
126
-
127
-
128
-
129
-
130
-
131
-
132
-
133
-
134
-
135
 |
 |
