DIRECTV D11 System Manual
DIRECTV D11 Manual
 |
View all DIRECTV D11 manuals
Add to My Manuals
Save this manual to your list of manuals |
DIRECTV D11 manual content summary:
- DIRECTV D11 | System Manual - Page 1
NON-DVR RECEIVERS USER GUIDE DIRECTV® HD RECEIVER DIRECTV® STANDARD RECEIVER - DIRECTV D11 | System Manual - Page 2
our environment. However, ENERGY STAR labeled HD DVR set-top boxes qualify for ENERGY STAR only when configured with the DIRECTV Whole-Home DVR service. All other ENERGY STAR labeled set-top boxes, when used in conjunction with a DIRECTV subscription, meet ENERGY STAR criteria without requiring - DIRECTV D11 | System Manual - Page 3
3 - DIRECTV D11 | System Manual - Page 4
4 DIRECTV® NON-DVR USER GUIDE - DIRECTV D11 | System Manual - Page 5
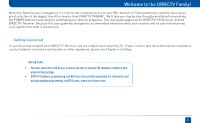
of TV programming, satellite music and a great selection of the biggest box office movies from DIRECTV CINEMA™. We'll take you step by step through everything from pushing the POWER button to searching for and finding your favorite programs. This user guide applies to the DIRECTV® HD Receiver and - DIRECTV D11 | System Manual - Page 6
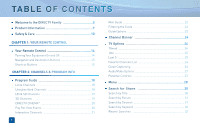
18 Local Channels 18 Unsubscribed Channels 18 HD & SD Channels 19 3D Channels 19 DIRECTV CINEMA 20 Pay Per View Events 20 Interactive Channels 21 6 Mini Guide 22 Filtering the Guide 22 Guide Options 23 Channel Banner 24 TV Options 24 TVmail 24 Info 25 Last 5 25 Favorite Channels List - DIRECTV D11 | System Manual - Page 7
Activation 52 Guided Setup 52 Activate Your DIRECTV® Service 52 Connections 53 Your Phone Connection 53 Your Internet Connection 53 Connections for Auxiliary Equipment 54 System Setup 59 CHAPTER 5: HELP & TROUBLESHOOTING Help 70 Troubleshooting Tips 71 Reset/Reauthorize Your Receiver 71 - DIRECTV D11 | System Manual - Page 8
Day Warranty 84 DIRECTV Protection Plan 87 FCC Customer Information 88 Terms & Conditions for Use of Software 92 APPENDICES Appendix 1: Receivers Front and Back Panel ........104 High-Definition Receiver 104 Standard-Definition Receiver 108 Appendix 2: How to Network Your HD Receiver .....112 - DIRECTV D11 | System Manual - Page 9
your receipt to obtain warranty parts and service and for proof of acquisition. Attach it here and record the serial and model numbers in case you need them. *These numbers are typically located behind the card door on the front panel of your receiver. Model No. * Serial No. Acquisition Date Dealer - DIRECTV D11 | System Manual - Page 10
required when the apparatus has been damaged in any way, such as power-supply cord or plug is damaged, liquid has been spilled or objects have fallen into the apparatus, the apparatus has been exposed to rain or moisture, does not operate normally, or has been dropped. 10 DIRECTV® NON-DVR USER GUIDE - DIRECTV D11 | System Manual - Page 11
Always unplug the DIRECTV® Receiver, TV and other equipment before you connect or disconnect any cables. • The only way to disconnect the DIRECTV® Receiver from the power supply is to remove the power cord. The DIRECTV® Receiver unit must therefore be installed next to the power point which must be - DIRECTV D11 | System Manual - Page 12
12 DIRECTV® NON-DVR USER GUIDE - DIRECTV D11 | System Manual - Page 13
CHAPTER 1 - YOUR REMOTE CONTROL YOUR REMOTE CONTROL 14 Turning Your Equipment On and Off 14 Navigation and Destination Buttons 15 Shortcut Buttons 15 13 - DIRECTV D11 | System Manual - Page 14
one press, it means the batteries (size AA) are getting low and need to be replaced. Mode Switch 14 DIRECTV® NON-DVR USER GUIDE These two buttons turn your TV and DIRECTV® Receiver on or off together. If your DIRECTV® System was installed professionally, your remote has already been programmed to - DIRECTV D11 | System Manual - Page 15
Buttons The buttons in the middle of the remote are navigation and destination keys. Press the GUIDE button to go to the program guide screen. Press the ACTIVE button to go to the DIRECTV Interactive Services home page. The LIST button takes you to the To Do List. Press EXIT to get out of any menu - DIRECTV D11 | System Manual - Page 16
16 DIRECTV® NON-DVR USER GUIDE - DIRECTV D11 | System Manual - Page 17
CHAPTER 2 - CHANNELS & PROGRAM INFO PROGRAM GUIDE 18 Mini-Guide 22 Filtering the Guide 22 Guide Options 23 CHANNEL BANNER 24 TV OPTIONS 25 MENU 28 SEARCH FOR SHOWS 30 PARENTAL CONTROLS 33 FAVORITE CHANNELS 38 MANAGE AUTOTUNES 39 17 - DIRECTV D11 | System Manual - Page 18
for HD receivers and 3 1/2 days of programming for SD receivers. You can navigate in the guide as follows: use the ARROW buttons to move one cell at a time up/down/left/right; use the CHAN/PAGE button to scroll a whole page up or down; type in the channel number to go directly there. Look - DIRECTV D11 | System Manual - Page 19
to see only the HD version of a channel in the guide go to Chapter 4, "System Setup, Display" for instructions. Program Guide Chapter Chapter Chapter Chapter Chapter Chapter 1 2 3 4 5 3D Channels High-Definition Receivers Just like the 3D experience in movie theatres, DIRECTV 3D makes you - DIRECTV D11 | System Manual - Page 20
, highlight the title and press INFO on your remote. Select the Buy option and follow the onscreen instructions. As long as your receiver is connected to a land-based phone line or the Internet, you can use your remote to order. Otherwise, order at directv. com. If you order a movie in advance, you - DIRECTV D11 | System Manual - Page 21
. Move the yellow highlight box around using the direction arrows on your remote to hear the audio associated with each channel. If you want to see one of the channels full-screen, move the yellow highlight box over it and press SELECT. Program Guide 2 3 4 5 6 Chapter 2 - Channels & Program - DIRECTV D11 | System Manual - Page 22
the BLUE button to display a one-line mini program guide. You can use it for the current channel or guide to see how it is being filtered. One-line mini-guide Note: Since the filtering is temporary, it only lasts as long as you keep the program guide up on the screen. 22 DIRECTV® NON-DVR USER GUIDE - DIRECTV D11 | System Manual - Page 23
that match your selection. Jump to a Date & Time Select "Jump to a date & time" to quickly go to a future date and time in the guide. Change Favorites List By default, your program guide displays all channels offered by DIRECTV, some of which may not be in your programming package. "Change favorites - DIRECTV D11 | System Manual - Page 24
On High-Definition Receivers the channel banner also provides easy access to TVmail, the last five channels you watched, Favorite Channels, Closed Captioning, Audio and Video options, and Parental Controls. Use the ARROW keys to highlight an option, then press SELECT. 24 DIRECTV® NON-DVR USER GUIDE - DIRECTV D11 | System Manual - Page 25
, Closed Captioning, Audio and Video options, and Parental Controls. On Standard-Definition Receivers, press the YELLOW button on your remote to display the TV Options menu. TVmail Select "TVmail," to see your messages. DIRECTV sends messages to you for important news items or special promotions. We - DIRECTV D11 | System Manual - Page 26
list. On Standard-Definition Receivers, press the YELLOW button on your remote and select "Change favorites list". Closed Captioning High-Definition Receivers Select the "CC" option, then select either "DIRECTV turn the display of subtitles or closed captioning off.) 26 DIRECTV® NON-DVR USER GUIDE - DIRECTV D11 | System Manual - Page 27
settings. The current settings are shown in gray text. Select a language from options listed. Not all programs have alternate languages. On Standard-Definition Receivers, press the YELLOW button on your remote and then select "Audio Options". Parental Controls Select "Parental" to quickly lock or - DIRECTV D11 | System Manual - Page 28
access key system features. Press MENU on your remote to display the menu and press MENU again (or EXIT) to make it go away. My Playlist High-Definition Receivers An optional menu item that appears at the top of your menu if you enable DIRECTV® Whole-Home DVR service. To learn more, go to Chapter - DIRECTV D11 | System Manual - Page 29
your home (assuming you have connected a land line and subscribe to Caller ID phone service from your telephone provider). Help High-Definition Receivers A list of help topics and frequently asked questions that explain how to use your DIRECTV Receiver. On HD Receivers (except model H20) "Help" can - DIRECTV D11 | System Manual - Page 30
. This powerful tool finds all programs that match your criterion within the 7-day (3 ½-day for SD receivers) program guide. Press MENU on the remote, select screen. Standard-Definition Receivers SD receivers do not have a "Recent Searches" button on the keypad. 30 DIRECTV® NON-DVR USER GUIDE - DIRECTV D11 | System Manual - Page 31
to find it instead of surfing through the large DIRECTV Program Guide. Enter the first few letters of the channel name. In this case we typed in "BL" to find Bloomberg. Select your desired channel from the list on the right you will get a list of the shows scheduled on that channel. Search for - DIRECTV D11 | System Manual - Page 32
feature looks through show titles and descriptions for the keyword. The more specific you can be with your keyword, the better your search results will be in Washington." Recent Searches This handy feature lets you go back to a list of your 25 most recent searches in case you want to update or reuse - DIRECTV D11 | System Manual - Page 33
the whole family. Press MENU, select "Parental, Fav's & Setup," select "Parental Controls," and then "Edit Settings". You'll see the current status, showing any restrictions. The system default is "unlocked" for all categories. On High-Definition Receivers you can also access Parental Controls by - DIRECTV D11 | System Manual - Page 34
one and enter your passcode. On High-Definition Receivers you can also unlock Parental Control by pressing INFO while watching TV. Select "Parental" then "Unlock All" and enter your passcode. Note: If you forget your passcode, call 1-800-531-5000 to reset it. You must be the registered account - DIRECTV D11 | System Manual - Page 35
1 2 Movies Select the button next to the ratings limit you wish to impose. Brief descriptions of the ratings appear for your guidance. TV Programs Select the TV ratings limit you desire. In addition, you can also set ratings limits for particular types of content (for example, Fantasy Violence (FV - DIRECTV D11 | System Manual - Page 36
from viewing pre-selected channels. Select "Channel Blocks" (or "Chan Blocks" on SD Receivers). Scroll down the channel list and select those you wish to block. You can also key in channel numbers for quicker access. Use "Block All" or "Allow All" to save time. 36 DIRECTV® NON-DVR USER GUIDE - DIRECTV D11 | System Manual - Page 37
Pay Per View purchase. Select "Spending Limits" (or "Spending" on Standard-Definition Receiver). Then enter your preferred spending dollar limit using the numbers on your remote. Viewing Hours Specify days and times when TV watching is allowed in your household. Select "Viewing Hours" (or "Hours - DIRECTV D11 | System Manual - Page 38
listed in the guide as well as, when you're channel surfing in live TV. You can create up to two custom lists on this receiver. You can also choose "Channels I Get" to see only the channels that are in your DIRECTV programming package. Press MENU on your remote, select "Parental, Fav's & Setup - DIRECTV D11 | System Manual - Page 39
receiver to automatically tune to the program when it airs. This way, you can be sure never to miss a favorite program, or, you can use autotune to record a program using a connected video recorder. From the Guide or Mini Guide Do List "To Do List" contains all of the autotunes your receiver is set - DIRECTV D11 | System Manual - Page 40
select "Manual Autotune" and enter all of the options as you wish, including whether you want this to be a one-time or recurring autotune (i.e. every Tuesday), channel, day and date, start time and duration. You can schedule a manual autotune up to 12 days in advance. 40 DIRECTV® NON-DVR USER GUIDE - DIRECTV D11 | System Manual - Page 41
CHAPTER 3 - EXTRAS CALLER ID 42 DIRECTV® WHOLE-HOME DVR SERVICE (HD Receivers) ....43 GAMESEARCH 48 GSN GAME LOUNGE 48 QUICKTUNE 49 SCOREGUIDE 49 TV APPS 50 41 - DIRECTV D11 | System Manual - Page 42
to caller ID service through your phone company and your receiver must be connected to a phone line. To set up your receiver to display Caller ID, press MENU, select "Caller ID" then select "Turn On Notices." When the Notification option is on, you'll see a notice on your TV screen whenever a call - DIRECTV D11 | System Manual - Page 43
with DECA) for each TV, a SWiM network, HD Access, DVR service and DIRECTV® Whole-Home DVR service. There is a limit of one remote viewing per DVR at a time. For Whole-Home DVR to function, your receivers should never have an Ethernet cable connected, unless it is connected to a DECA. H24, H25, HR24 - DIRECTV D11 | System Manual - Page 44
® Whole-Home DVR Service (High-Definition Receivers) 2. Activate DIRECTV® Whole-Home DVR Service: Once DIRECTV® Whole-Home DVR service is activated on your account, press the LIST button on your remote. The message on the right will display, confirming the service has been enabled. Select "Continue - DIRECTV D11 | System Manual - Page 45
Chapter Chapter Chapter 1 2 3 DIRECTV® Whole-Home DVR Service (High-Definition Receivers) 4. Set Playlist Sharing Options (HD DVR only): During initial setup, if the receiver is an HD DVR, you'll be prompted to set the following Playlist sharing options: Share Playlist An HD DVR has the option - DIRECTV D11 | System Manual - Page 46
-Home DVR Service (High-Definition Receivers) 6. Record Programs: If you're in a room with an HD DVR, and you've authorized DIRECTV® WholeHome DVR service, you'll still record programs in the same way you did before. If you're in a room with an HD Non-DVR receiver, once you authorize DIRECTV® Whole - DIRECTV D11 | System Manual - Page 47
Chapter 1 2 DIRECTV® Whole-Home DVR Service (High-Definition Receivers) Recordings can be deleted from any connected receiver. However, to check the status of scheduled recordings on the To Do List or to change the priority of a series you've scheduled to record, go to the HD DVR, press MENU and - DIRECTV D11 | System Manual - Page 48
. GSN Game Lounge The GSN Game Lounge service contains memory and skill games that you can play onscreen using only your remote. There are free as well as subscription-only games to play. If you become a top scoring player, you will see your name on the leader board. 48 DIRECTV® NON-DVR USER GUIDE - DIRECTV D11 | System Manual - Page 49
High-Definition Receivers Use QuickTune to get to your 9 "must see" channels fast! While watching live TV, press the UP arrow on your remote control. A display with spots for 9 channels will appear on screen. To fill the spots, press the GREEN button on your remote the on-screen instructions to use - DIRECTV D11 | System Manual - Page 50
at the press of a button. To enjoy TV Apps, your HD Receiver must be connected to the Internet. See Appendix 2: How to Network your HD Receiver for instructions. How It Works: Press the Right Arrow button on your remote control to launch TV Apps. Select the DIRECTV App Store icon at the top of the - DIRECTV D11 | System Manual - Page 51
CHAPTER 4 - SETTINGS SETUP AND ACTIVATION 52 CONNECTIONS 53 SYSTEM SETUP 59 Info & Test 59 Display 60 Audio 62 HDTV 63 Network Setup 65 Remote Control 65 Satellite 66 Whole-Home 67 Reset 67 51 - DIRECTV D11 | System Manual - Page 52
"Acquiring Satellite Info". Your receiver is gathering information from the satellite for the onscreen program guide. Next you'll be asked in you want to program your remote to control other equipment such as your TV and/or DVR player. Activate Your DIRECTV® Service Once all the setup processes are - DIRECTV D11 | System Manual - Page 53
your warranty. Your Internet Connection Connecting your DIRECTV Receiver to the Internet and your home network gives you access to features like TV Apps and more. The instructions for connecting to a network are different depending upon whether you have Whole-Home DVR Service. Please see Appendix - DIRECTV D11 | System Manual - Page 54
of each list. Not all connectors are available on all receivers and TV models. SD receivers do not support HDMI, component video or digital audio. Note: Not all cables come with your digital satellite receiver; you may need to purchase additional cables depending on your setup. Never connect an IN - DIRECTV D11 | System Manual - Page 55
between them and your receiver. Refer to the manuals for that equipment to see the connection options specific to each make and model. The following images show examples of how your receiver may be connected, using the supported video and audio connections for the TV, the surround sound, and - DIRECTV D11 | System Manual - Page 56
, connecting to a DIRECTV HD Receiver. This example also shows using a DVD burner with RCA audio and component video connectors. Example: TV with Component Video Connectors Here is an example using a TV that also shows using a VCR with RCA audio and video connectors. 56 DIRECTV® NON-DVR USER GUIDE - DIRECTV D11 | System Manual - Page 57
HD receivers have a special A/V Out connector that supports either component or RCA (composite) video. Receiver model H25 comes with the A/V Out cable that supports example using a TV that has an HDMI connector as the best audio/video input. This example also shows connecting your receiver to a DVD - DIRECTV D11 | System Manual - Page 58
audio connectors. Example: TV with RCA Connectors Here is an example of a TV that has RCA connectors as the best video input and RCA audio connectors as the best audio input. This example also shows using a VCR with component video connectors and RCA audio connectors. 58 DIRECTV® NON-DVR USER GUIDE - DIRECTV D11 | System Manual - Page 59
review or change your system settings which include: audio options, video format, TV resolution, network setup, remote control setup and more. Info & Test Select "Info & Test" to display the System Info & Test screen. Select "Run System Test" to initiate a test of the tuners, access card, receiver - DIRECTV D11 | System Manual - Page 60
remote to move between the Preferences, TV Ratio and Time Zone screens. Preferences These are user interface display settings which include: Guide HD Channels (HD Receivers ONLY): Choose whether you want the guide to show you HD disappears after moving to a new channel. 60 DIRECTV® NON-DVR USER GUIDE - DIRECTV D11 | System Manual - Page 61
Captioning High-Definition Receivers On HD receivers, select "Captioning" to turn closed captioning on or off, and to select the font style, size and color for the display of captions. Clock Select "Clock" (or "Time Zone" on SD Receivers) to set your time zone and whether you want the receiver to - DIRECTV D11 | System Manual - Page 62
Setup system. Not all TV programs deliver Dolby Digital 5.1 audio. Look Receivers select "Audio" and then press the GREEN and RED buttons on your remote to move between the Language, Sound Effects and Dolby® Digital screens. SD Receivers HD Receivers 62 DIRECTV® NON-DVR USER GUIDE - DIRECTV D11 | System Manual - Page 63
HDTV High-Definition Receivers Select "HDTV" and then select either "Video", "TV Ratio" or "TV Resolution". You may want to review Appendix 3, About High-Definition, which describes HD formats and resolutions. You can also access these setting by pressing INFO, then select Audio/Video and choose the - DIRECTV D11 | System Manual - Page 64
System Setup High-Definition Receivers Screen Format: When a program is broadcast in a format that does not fit your TV screen, your receiver adjusts the picture size. Options include Original Format, Pillar Box (Widescreen 16:9 HDTVs only), Letterbox (Standard 4:3 HDTVs only), Stretch and Crop. If - DIRECTV D11 | System Manual - Page 65
-Definition Receivers Select "Network Setup" to configure and test the connection of your receiver to the Internet. See Appendix 2 for details. Note: This option is not available on model H20. Remote Control When the MODE switch on your remote is in the left-most position, it controls your DIRECTV - DIRECTV D11 | System Manual - Page 66
Setup High-Definition Receivers Certain remote control models feature RF (radio frequency) capability. Refer to the model number printed on the top left corner of your DIRECTV Remote Control. Look for the letter(s) "R" or "RB" at the end of the model number which indicates that the remote supports - DIRECTV D11 | System Manual - Page 67
3 System Setup Whole-Home High-Definition Receivers If you're using DIRECTV® Whole-Home DVR service use this option to name this receiver location. Select "Whole-Home", then "Name Location" and follow the on screen instructions. To learn more, read the "DIRECTV® Whole-Home DVR service" section in - DIRECTV D11 | System Manual - Page 68
to how it was set at the factory. "Reset Everything" Completely erases everything from system memory and starts over like a new receiver, starting over with Guided Setup. Note: If Parental Controls are locked, you must enter your password to reset the receiver. 68 DIRECTV® NON-DVR USER GUIDE - DIRECTV D11 | System Manual - Page 69
CHAPTER 5 - HELP & TROUBLESHOOTING HELP 70 TROUBLESHOOTING TIPS 71 FREQUENTLY ASKED QUESTIONS 74 69 - DIRECTV D11 | System Manual - Page 70
remote control, receiver features, and troubleshooting. To exit the Customer Information channel, press CHAN UP/DOWN, press GUIDE, or enter a channel number to tune to. You can also find answers to all your questions on DIRECTV's Answer Center at support.directv.com. 70 DIRECTV® NON-DVR USER GUIDE - DIRECTV D11 | System Manual - Page 71
and follow the onscreen instructions. You will need to be logged into your account on directv.com to complete this process. Running the System Test (later in this section) can also help you diagnose and solve many common problems. Troubleshooting Tips HD & SD Receivers Reset Button (Your equipment - DIRECTV D11 | System Manual - Page 72
second line displays instructions to follow. Most on-screen messages supply a code in parentheses. That code is used by DIRECTV Customer Service to help troubleshoot your call. the update is complete. Your receiver must be plugged in to AC power to receive any updates. 72 DIRECTV® NON-DVR USER GUIDE - DIRECTV D11 | System Manual - Page 73
Standard-Definition receivers, press GREEN on your remote, then select "Run Test". 6. If your system does not pass the System Test, check any of these potential trouble areas: cabling, pointing the satellite dish, phone connection and access card. 7. If you continue to have problems, call DIRECTV - DIRECTV D11 | System Manual - Page 74
tune the show as requested. - Your TV's timer may have been activated. Solution: - Check your To Do List to see if there are other scheduled autotunes. Press MENU, select "Manage Recordings", then "To Do list". - Check your TV owner's manual to turn off the TV's timer. 74 DIRECTV® NON-DVR USER GUIDE - DIRECTV D11 | System Manual - Page 75
video source. - Press the TV/VCR button on the VCR remote or on the VCR's front panel. - If problems persist, turn off all equipment connected to your TV, wait a few minutes, then turn the DIRECTV® Receiver back on. - Check your connections and cables. Chapter 5 - Help & Troubleshooting 75 4 5 6 - DIRECTV D11 | System Manual - Page 76
it is not controlled by a wall switch. • If receiver is plugged into a power strip, make sure power strip is working. • If the power strip is not working, press the reset button on the power strip OR unplug and plug back in (not all power strips have a reset button). 76 DIRECTV® NON-DVR USER GUIDE - DIRECTV D11 | System Manual - Page 77
. - Consult an electrician if the problem is frequent or severe, especially if other household appliances or electronics are affected. - If parental limits are active, turn your DIRECTV® Receiver back on and enter your parental lock code at the prompt. Chapter 5 - Help & Troubleshooting 77 4 5 6 - DIRECTV D11 | System Manual - Page 78
problems in your area, reset your DIRECTV® Receiver using the red RESET button behind the door on the front of the receiver or by unplugging the receiver for 15 seconds and then plugging it back in. - You can also check all the cable connections between your DIRECTV® Receiver and the satellite - DIRECTV D11 | System Manual - Page 79
from the left menu, then select "Repeat Satellite Setup." Follow the steps. From the Satellite Dish Type screen, make sure the proper dish type is selected. - To refresh your receiver information, go to directv.com, click on Customer Service, Troubleshooting, On-Screen Messages, Please Call Customer - DIRECTV D11 | System Manual - Page 80
is no sound. Possible Causes: - A setting (such as mute or volume) may have changed on the receiver or your TV. - The cables between your TV and the receiver may not be connected properly, or there may be a problem with an external stereo or surround sound system. 80 DIRECTV® NON-DVR USER GUIDE - DIRECTV D11 | System Manual - Page 81
subscribe to Caller ID service through your local phone company. - The Caller ID feature in your DIRECTV® Receiver is turned off. See "Caller ID" in Chapter 3. - You are using a wireless phone jack, which usually will not transmit Caller ID information. Chapter 5 - Help & Troubleshooting 81 4 5 6 - DIRECTV D11 | System Manual - Page 82
. If not, connect a standard phone cable to your receiver or replace your wireless phone jack. Remote Control Solutions - Check that nothing is between the remote control and the remote sensor. - Make sure the remote control MODE switch is in the left-most position (DIRECTV Mode). Slide the - DIRECTV D11 | System Manual - Page 83
CHAPTER 6 - WARRANTY AND OTHER INFORMATION LIMITED 90-DAY WARRANTY 84 DIRECTV PROTECTION PLAN 87 FCC CUSTOMER INFORMATION 88 TERMS & CONDITIONS FOR USE OF SOFTWARE 92 83 - DIRECTV D11 | System Manual - Page 84
LIMITATION MAY NOT APPLY TO YOU. What is Excluded? Your warranty does NOT cover: Labor charges for installation or setup of the product. Installation, performance of, or repair of: audio/video cabling, telephone line, or accessory attachments used with the product. 84 DIRECTV® NON-DVR USER GUIDE - DIRECTV D11 | System Manual - Page 85
. DIRECTV makes no warranty that the access connection will be a local (not long distance) phone call. The continued provisioning of any of the programming and other services delivered through the Receiver including but not limited to television programming, show information, program guide data - DIRECTV D11 | System Manual - Page 86
EVENT WILL DIRECTV BE LIABLE FOR ANY AMOUNT GREATER THAN THE RETAIL PRICE OF THE DIRECTV® Receiver. DIRECTV SHALL NOT SPECIFIC LEGAL RIGHTS. YOU MAY HAVE OTHER RIGHTS WHICH VARY FROM STATE TO STATE. DIRECTV, Inc. 2230 E. Imperial Hwy El Segundo, CA 90245 1-800-DIRECTV 86 DIRECTV® NON-DVR USER GUIDE - DIRECTV D11 | System Manual - Page 87
In-home service calls when needed Dedicated Technical Support 24-hour a day Power surge related repairs including those caused by lightning Unlimited dish antenna alignments Cables, switches, and associated wiring throughout Replacement of defective receiver equipment your home (if problem can - DIRECTV D11 | System Manual - Page 88
Responsible Party: DIRECTV, Inc. 2230 E. Imperial Hwy El Segundo, CA 90245 1-800-DIRECTV • Trade Name: DIRECTV • Type of Equipment: DIRECTV Satellite Receiver • Model Numbers to provide reasonable protection against harmful interference in a residential installation. 88 DIRECTV® NON-DVR USER GUIDE - DIRECTV D11 | System Manual - Page 89
satellite dish antenna. • Increase the separation between the equipment and the DIRECTV® Receiver. • Connect the equipment into an outlet on a circuit different from that to which the DIRECTV® Receiver is connected. • Consult the dealer or an experienced radio/TV technician for help. • CAUTION - DIRECTV D11 | System Manual - Page 90
advance in order for you to make necessary modifications to maintain uninterrupted service. Connection to party line service is subject to state tariffs. Contact the state public utility commission, public service commission or corporation commission for information. 90 DIRECTV® NON-DVR USER GUIDE - DIRECTV D11 | System Manual - Page 91
you disconnect the equipment until the problem is resolved. DIRECTV, Inc. 2230 E. Imperial Hwy El Segundo, CA 90245 1-800-DIRECTV If your home has specially wired alarm equipment connected to the telephone line, ensure the installation of this DIRECTV Satellite Receiver does not disable your alarm - DIRECTV D11 | System Manual - Page 92
execute any document reasonably requested by DIRECTV to evidence such ownership rights. Certain third party software used in connection with the Receiver may be made directly available to you by the providers thereof to the terms of such licenses, and not these Terms. 92 DIRECTV® NON-DVR USER GUIDE - DIRECTV D11 | System Manual - Page 93
Receiver to DIRECTV or DIRECT, INDIRECT, CONSEQUENTIAL, SPECIAL, PUNITIVE OR INCIDENTAL DAMAGE (INCLUDING LOSS OF PROFITS, LOST SAVINGS, LOSS OF DATA OR THE COST OF PROCUREMENT OF SUBSTITUTE GOODS, TECHNOLOGY OR SERVICES) ARISING OUT OF THE USE OR THE INABILITY TO USE THE SOFTWARE, EVEN IF DIRECTV - DIRECTV D11 | System Manual - Page 94
be found in the DIRECTV website located at www.directv.com, and the GNU website located at www.gnu.org, specifically at (http:// www. DIRECTV at: Attention: Vice President, STB Engineering DIRECTV, Inc. 2230 E. Imperial Highway El Segundo, CA 90245 94 DIRECTV® NON-DVR USER GUIDE - DIRECTV D11 | System Manual - Page 95
to share and change it. By contrast, the GNU General Public License is intended to guarantee your freedom to share price. Our General Public Licenses are designed to make sure that you have the freedom to distribute copies of free software (and charge for this service if you wish), that you receive - DIRECTV D11 | System Manual - Page 96
that what they have is not the original, so that any problems introduced by others will not reflect on the original authors' reputations. distribute verbatim copies of the Program's source code as you receive it, in any medium, provided that you conspicuously and DIRECTV® NON-DVR USER GUIDE - DIRECTV D11 | System Manual - Page 97
Chapter Chapter Chapter Chapter Chapter Chapter 1 2 3 TERMS AND CONDITIONS FOR USE OF SOFTWARE ("TERMS") along with the Program. You may charge a fee for the physical act of transferring a copy, and you may at your option offer warranty protection in exchange for a fee. 2. You may modify your - DIRECTV D11 | System Manual - Page 98
, plus any associated interface definition files, plus the scripts used to control compilation and installation of the executable. However, terminate your rights under this License. However, parties who have received copies, or rights, from you under this License will not DIRECTV® NON-DVR USER GUIDE - DIRECTV D11 | System Manual - Page 99
distribute the Program at all. For example, if a patent license would not permit royalty-free redistribution of the Program by all those who receive copies directly or indirectly through you, then the only way you could satisfy both it and this License would be to refrain entirely from distribution - DIRECTV D11 | System Manual - Page 100
differ in detail to address new problems or concerns. Each version is given guided by the two goals of preserving the free status of all derivatives of our free software and of promoting the sharing ASSUME THE COST OF ALL NECESSARY SERVICING, REPAIR OR CORRECTION. 12. IN 100 DIRECTV® NON-DVR USER GUIDE - DIRECTV D11 | System Manual - Page 101
even the implied warranty of MERCHANTABILITY or FITNESS FOR A PARTICULAR PURPOSE. See the GNU General Public License for more details. You should have received a copy of the GNU General Public License along with this program; if not, write to the Free Software Foundation, Inc., 51 Franklin Street - DIRECTV D11 | System Manual - Page 102
proprietary applications with the library. If this is what you want to do, use the GNU Lesser General Public License instead of this License. 102 DIRECTV® NON-DVR USER GUIDE - DIRECTV D11 | System Manual - Page 103
APPENDICES APPENDIX 1: RECEIVERS FRONT AND BACK PANELS .........104 High-Definition Receiver 104 Standard-Definition Receiver 108 APPENDIX 2: HOW TO NETWORK YOUR HD RECEIVER .......112 APPENDIX 3: ABOUT HIGH-DEFINITION 119 103 - DIRECTV D11 | System Manual - Page 104
Appendix 1: Receivers Front and Back Panels High-Definition Receiver Front Panel Examples 1 2 3 4 56 7 8 9 9 2 145 6 37 Your equipment may not look exactly like the model illustrated. 104 DIRECTV® NON-DVR USER GUIDE - DIRECTV D11 | System Manual - Page 105
With an optional RF remote you can place your receiver inside a cabinet or any nonmetal enclosure and it will receive the remote control commands up to 200 feet away. 3. GUIDE - Displays the on-screen program guide. 4. MENU - Brings up the main menu to access settings and services. 5. ARROWS - Move - DIRECTV D11 | System Manual - Page 106
Appendix 1: Receivers Front and Back Panels High-Definition Receiver Back Panel Examples 1 2 4 5 6 7 8 9 3 1 1 3 4 2 5 7 8 9 Your equipment may not look exactly like the model illustrated. 106 DIRECTV® NON-DVR USER GUIDE - DIRECTV D11 | System Manual - Page 107
best HD picture quality. 6. ETHERNET - For future use. Not available on all models. 7. USB - For future use. (USB 2.0 Host 5V = 500mA) 8. PHONE JACK - Connect your phone line here to enable Pay Per View purchasing and Caller ID (if your phone service package includes it). 9. POWER - Your receiver - DIRECTV D11 | System Manual - Page 108
and Back Panels DIRECTV® Receiver Standard-Definition Front Panel: The buttons on the front panel perform the same functions as similarly named buttons on the remote control. You can use the front panel buttons at any time, but they are especially useful if you misplace your remote control or the - DIRECTV D11 | System Manual - Page 109
DIRECTV® Receiver on or off. Your DIRECTV® Receiver still tunes and receives messages when powered off. The power light flashes when you press a key on the remote to let you know it has received the command. 2. REMOTE SENSOR - The infrared sensor picks up commands from the remote control. 3. GUIDE - DIRECTV D11 | System Manual - Page 110
Appendix 1: Receivers Front and Back Panels Standard-Definition Back Panel: 1 2 3 4 5 6 7 8 9 10 Your equipment may not look exactly like the model illustrated. 110 DIRECTV® NON-DVR USER GUIDE - DIRECTV D11 | System Manual - Page 111
SATELLITE IN - Use to connect the DIRECTV Receiver to the satellite dish antenna. 2. OUT TO TV - Connects the DIRECTV Receiver to your TV or VCR using RF coaxial cable. This jack provides the most basic connection, carrying good sound and video quality. 3. OFF-AIR IN - Connect a standard TV antenna - DIRECTV D11 | System Manual - Page 112
Receiver (models HR20 or later) or DIRECTV Plus® DVR (model R22). Model H25 can only be connected using Whole-Home DVR service. A broadband Internet connection, with a minimum connection speed of 750 kbps or higher (DSL or cable). A network router with an available Ethernet port. The instructions - DIRECTV D11 | System Manual - Page 113
your DIRECTV receivers, only a professionally installed Cinema Connection Kit can be used to connect to the Internet. Never connect an Ethernet cable to an HR24, H24, or H25 receiver with Whole-Home DVR service; this will disable the Whole-Home network and disable playlist sharing. If you have DECA - DIRECTV D11 | System Manual - Page 114
to Network Your HD Receiver (High-Definition Receivers) If you do not have Whole-Home DVR service: Wired Step 1 - Connect your DIRECTV HD Receiver to your router Connect one end of your Ethernet cable to the Ethernet port on the back of your router. Direct Connection Ethernet Cable Connect the - DIRECTV D11 | System Manual - Page 115
(High-Definition Receivers) Step 2 - Verify that you are connected To verify you are connected: Press MENU on your DIRECTV Remote Select Parental, Fav's & Setup Select System Setup Select Network Setup Choose Connect Now Select Continue after successfully connecting to DIRECTV via the Internet - DIRECTV D11 | System Manual - Page 116
HD Receiver, so your receiver can access the Internet. Along with the Network Requirements at the beginning of Appendix 2 your will need: Ethernet Cable A wireless adapter that uses an Ethernet port to connect to a media device. [USB devices are not supported by the DIRECTV HD Receiver] Wireless - DIRECTV D11 | System Manual - Page 117
2: How to Network Your HD Receiver (High-Definition Receivers) Step 2 - Ensure the wireless adapter is recognized by your home network. Once your router detects the wireless adapter it will prompt you to configure the two devices. Select Set Up Now. Highlight your wireless network and press SELECT - DIRECTV D11 | System Manual - Page 118
to Network Your HD Receiver (High-Definition Receivers) Step 3 - Verify that you are connected Press MENU on your DIRECTV Remote Select Parental, Fav's & Setup Select System Setup Select Network Setup Choose Connect Now Select Continue after successfully connecting to DIRECTV via the Internet (See - DIRECTV D11 | System Manual - Page 119
control and the RES (Resolution) key on the front panel of the DIRECTV HD Receiver. Pressing the FORMAT button on your remote will cycle the resolutions that you've indicated in System Setup as being supported by your TV, as well as, the screen formats in conjunction with each individual resolution - DIRECTV D11 | System Manual - Page 120
Fav's & Setup", "System Setup", "HDTV" and then select "TV Resolutions." Mark or unmark the TV Resolutions to display the resolutions supported by your television. Resolution (RES) Key on Receiver Front Panel This key is used to through cycle all available resolutions on your DIRECTV HD DVR. It does - DIRECTV D11 | System Manual - Page 121
High-Definition Supported Resolutions The following table shows the resolutions that can be output from each type of connection: Output Connection Parental, Fav's & Setup", "System Setup", "HDTV" and then "Video." Select the desired bar color. See your TV's owner's manual for information on the best - DIRECTV D11 | System Manual - Page 122
Appendix 3: About High-Definition - Stretch In the Stretch setting, instead of adding . If your display is a 4:3 format TV or monitor, your format options include these: For 4:3 program signals: Fills TV Screen For 16:9 program signals: Letterbox 122 DIRECTV® NON-DVR USER GUIDE Stretch Crop - DIRECTV D11 | System Manual - Page 123
Appendix 3: About High-Definition 16:9 TVs Showing 4:3 programs For a wide screen 16:9 TV showing a standard 4:3 TV program, the program is too tall to fit the screen. Your choices here include: - Pillar Box Here the 4:3 image is shrunk until the entire height of the program fits on your TV. Since - DIRECTV D11 | System Manual - Page 124
Appendix 3: About High-Definition If your display is a 16:9 format TV or monitor, your format options include these: For 4:3 program signals: For 16:9 program signals: Pillar Box Stretch Fills TV Screen Crop 124 DIRECTV® NON-DVR USER GUIDE - DIRECTV D11 | System Manual - Page 125
Care - 58, 94 Customize Guide see Favorite Chan List D 3D Channels - 19 Date & Time - 23 Defaults - 68 Deleting - 45 Destination Buttons - 15 Digital Audio - 54-58, 62, 107 DIRECTV CINEMA™ - 20 DIRECTV Mode - 14, 73, 82 DIRECTV PROTECTION PLAN - 87 DIRECTV® Whole-Home DVR Service - 43-47, 67 Display - DIRECTV D11 | System Manual - Page 126
back cover Icons - 25, 30, 39, inside back cover Installation - 52-58 Interactive Channels - 21 K Keyword Search - 32 N Navigation Buttons - 15 Network - 54, 59, 66, Appendix 2 News Mix Channels - 20 126 DIRECTV® NON-DVR USER GUIDE O Other Ratings - 35 P Parental Controls - 27, 33 adult channels - DIRECTV D11 | System Manual - Page 127
- 14, 65 problems - 82 Repair - 11, 84, 85, 86, 87, 91 Reset passcode - 34 receiver - 71, 74, 76, 105, 109 Resolution - 27, 63, 64, 105, 119, 120, 121 Resolution Indicator - 105 Restart - 68 RF Remote - 66 Router - 112, 113, 114, 116, 117 S Satellite Data Acquisition - 78 Satellite Signal Strength - DIRECTV D11 | System Manual - Page 128
Index U Unsubscribed Channels - 18 V VCR - 54, 55, 56, 57, 58, 107, 111 Video - 21, 25, 27, 39, 54-58, 63, 80 W Warranty - 84-86 Whole-Home DVR Service - 43-47, 67 Wired Connection - 114-115 Wireless Connection - 116-118 128 DIRECTV® NON-DVR USER GUIDE - DIRECTV D11 | System Manual - Page 129
may restrict viewing in high-definition and/or recording with certain consumer electronics equipment attached to the receiver. Please contact the manufacturer USE. ADDITIONAL INFORMATION MAY BE OBTAINED FROM MPEG LA, L.L.C. SEE HTTP://WWW.MPEGLA.COM. Non-DVR User Guide - Version 1.7 - 060611 129 - DIRECTV D11 | System Manual - Page 130
end time is earlier or later than is visible in the Guide program cell. LEFT and RIGHT arrows on the remote offer special functionality. Objects are scrollable above or below the visible window UP and DOWN arrows on the receiver front panel offer special functionality. Indicates a program is set to - DIRECTV D11 | System Manual - Page 131
blocked. Used to create/enter passcodes in parental controls. On screen color hint indicating a special function activated by pressing the related color button on the remote control. Indicates a fee applies for viewing program. Indicates the program is/will be broadcast in High-Definition format. - DIRECTV D11 | System Manual - Page 132
volume. MUTE Toggles sound volume on/off. NUMBERS & DASH Tune to a channel directly; also input numbers when needed in on-screen menus. DIRECTV & TV POWER ON Turns your DIRECTV® Receiver and TV on and off at the same time. POWER Turns on /off whichever equipment the MODE switch is set to. ADVANCE
-
 1
1 -
 2
2 -
 3
3 -
 4
4 -
 5
5 -
 6
6 -
 7
7 -
8
-
9
-
10
-
11
-
12
-
13
-
14
-
15
-
16
-
17
-
18
-
19
-
20
-
21
-
22
-
23
-
24
-
25
-
26
-
27
-
28
-
29
-
30
-
31
-
32
-
33
-
34
-
35
-
36
-
37
-
38
-
39
-
40
-
41
-
42
-
43
-
44
-
45
-
46
-
47
-
48
-
49
-
50
-
51
-
52
-
53
-
54
-
55
-
56
-
57
-
58
-
59
-
60
-
61
-
62
-
63
-
64
-
65
-
66
-
67
-
68
-
69
-
70
-
71
-
72
-
73
-
74
-
75
-
76
-
77
-
78
-
79
-
80
-
81
-
82
-
83
-
84
-
85
-
86
-
87
-
88
-
89
-
90
-
91
-
92
-
93
-
94
-
95
-
96
-
97
-
98
-
99
-
100
-
101
-
102
-
103
-
104
-
105
-
106
-
107
-
108
-
109
-
110
-
111
-
112
-
113
-
114
-
115
-
116
-
117
-
118
-
119
-
120
-
121
-
122
-
123
-
124
-
125
-
126
-
127
-
128
-
129
-
130
-
131
-
132
 |
 |
USER GUIDE
NON-DVR RECEIVERS
NON-DVR RECEIVERS
USER GUIDE
DIRECTV
®
HD RECEIVER
DIRECTV
®
STANDARD RECEIVER
DIRECTV
®
HD RECEIVER
DIRECTV
®
STANDARD RECEIVER