Dell 1110 User Guide
Dell 1110 - Laser Printer B/W Manual
 |
UPC - 708562765657
View all Dell 1110 manuals
Add to My Manuals
Save this manual to your list of manuals |
Dell 1110 manual content summary:
- Dell 1110 | User Guide - Page 1
Dell™ Laser Printer 1110 User's Guide Click the links to the left for information on the features, options, and operation of your printer. For information on other documentation included with your printer, see "Finding Information". To order replacement toner cartridges or supplies from Dell: 1. - Dell 1110 | User Guide - Page 2
Dell 1110 Mar 2006 SRV XG041 Rev. A00 Finding Information What Are You Looking For? • Drivers for my printer Drivers and Utilities CD • My User's Guide Find It Here • Safety information • How to use my printer • Warranty information You can use the Drivers and Utilities CD to install - Dell 1110 | User Guide - Page 3
Setup Diagram Express Service Code Express Service Code • Latest drivers for my printer • Answers to technical service and support questions • Documentation for my printer Identify your printer when you use support.dell.com or contact technical support. Enter the Express Service Code to direct - Dell 1110 | User Guide - Page 4
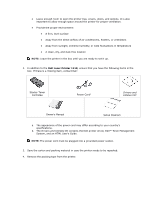
ready to set it up. 2. In addition to the Dell Laser Printer 1110, ensure that you have the following items in the box. If there is a missing item, contact Dell: Starter Toner Cartridge Power Corda Drivers and Utilities CDb Owner's Manual Setup Diagram a. The appearance of the power cord may - Dell 1110 | User Guide - Page 5
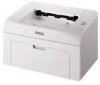
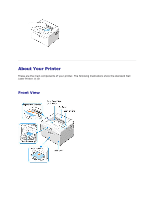
About Your Printer These are the main components of your printer. The following illustrations show the standard Dell Laser Printer 1110: Front View - Dell 1110 | User Guide - Page 6
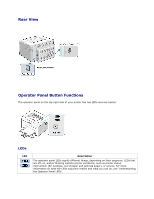
LEDs signify different things, depending on their sequence. LEDs that are off, on, and/or blinking indicate printer conditions, such as printer status, intervention (for example, out of paper and jammed paper), or service. For more information on what the LEDs sequence means and what you can do, see - Dell 1110 | User Guide - Page 7
in the tray, when you select Manual Feed for Source from your software application. For detailed information, see "Using Manual Feed Mode". Press during printing. blinks red while the print job is cleared from both the printer and the computer, and the printer then returns to Ready mode. This may - Dell 1110 | User Guide - Page 8
expose the toner cartridge to light for more than a few minutes. CAUTION: Do not touch the green underside of the toner cartridge. Use the handle on the cartridge to avoid touching this area. 5. 3. Pull the tape to remove the protective paper. 4. Locate the cartridge slots inside the printer, one on - Dell 1110 | User Guide - Page 9
cartridge life of approximately 1,000 pages for the starter toner cartridge that is shipped with the printer (2,000 pages for a standard toner cartridge). Loading Paper Load up to 150 sheets of plain paper in the paper tray. NOTE: To print a document, set the paper type and size in your software - Dell 1110 | User Guide - Page 10
loading paper into the paper tray. See "Paper Tab". To load paper: 1. Open the paper input tray. Pull on the length and width guides to extend the tray. 2. Flex the sheets back and forth to loosen them, and then fan them out. Do not fold or crease the print - Dell 1110 | User Guide - Page 11
lightly touches the side of the stack. NOTE: Improper adjustment of paper guides can result in paper jams. Connecting a Printer Cable To print from your computer, you need to connect your printer to your computer with a Universal Serial Bus (USB) cable. USB cables are sold separately. Contact Dell - Dell 1110 | User Guide - Page 12
an available USB port on the computer. Do not use the USB keyboard port. Powering On the Printer CAUTION: The fusing area at the rear part of the inside of your printer becomes hot once the printer is powered on. Be careful not to be burned when you access this area. CAUTION: Do not - Dell 1110 | User Guide - Page 13
Printing a Demo Page Print a demo page to make sure that the printer is operating correctly. 1. Wait approximately 30 seconds for the printer to warm up, then press and hold on the operator panel for 2 seconds to print a demo page. 2. The Demo page shows the printer's current configuration. - Dell 1110 | User Guide - Page 14
replacement toner cartridges. User's Guide- HTML documentation provides detailed information about using your printer. Installing Software Before you begin, ensure that your system meets the minimum requirements. NOTE: For Windows 2000/XP, the system administrator should install Dell software - Dell 1110 | User Guide - Page 15
. Follow the instructions to install the software. 2. 2. Insert the Drivers and Utilities CD. 3. If necessary, select a language by pressing the Language button on the main screen. 4. Select Typical Installation to install the User's Guide, the printer driver, and Dell Toner Management System™ as - Dell 1110 | User Guide - Page 16
if your driver installation fails. You can remove the software using the Drivers and Utilities CD or the Windows uninstall. NOTE: Close all programs before uninstalling software. 1. From the Start menu, select Programs Dell Printers Dell Laser Printer 1110 Dell Printer Software uninstall. 2. Select - Dell 1110 | User Guide - Page 17
from the Printing Status window, the Programs window, or the desktop icon. You can order toner by phone or from the Web. For details, see "Ordering Supplies". Paper Handling Print Media Guidelines Verifying the Output Location Loading Print Media in the Paper Tray Using Manual Feed Mode Printing on - Dell 1110 | User Guide - Page 18
in "Paper Specifications" can cause problems that may require service. This service is not covered by the warranty or service agreements. Types, Input Modes, and Capacities Paper Type Plain Paper Envelopesb Labelsb Transparenciesb Card Stockb Input Mode/Capacitya Automatic Feed Manual Feed 150 - Dell 1110 | User Guide - Page 19
recommended for laser printers. Before loading envelopes in the tray, make sure that they are undamaged and are not stuck together. Do not feed stamped envelopes. For transparencies: Place them on a flat surface after removing them from the printer. Do not leave them in the paper tray for - Dell 1110 | User Guide - Page 20
Use only labels recommended for laser printers. For Card Stock or Custom software. Inserting paper long-edge first may cause a paper jam. Do not print on media smaller than 3.0 in.(76 mm) wide or 5.0 in.(127 mm) long. For preprinted paper: Letterheads must be printed with heat-resistant ink - Dell 1110 | User Guide - Page 21
tray does not become overloaded. Loading Print Media in the Paper Tray Proper paper loading helps prevent paper jams and ensures trouble-free printing. Do not remove the paper in the tray while a job is printing. Doing so may cause a paper jam. See "Types, Input Modes, and Capacities" for acceptable - Dell 1110 | User Guide - Page 22
paper jams and print quality problems. NOTE: Flatten any curl on postcards, envelopes, and labels before loading them into the tray. To use the manual feed mode: 1. Load a sheet of print material in the paper tray with the side to be printed on facing up. Adjust the paper length and width guides - Dell 1110 | User Guide - Page 23
types. 3. Adjust the length and width guides against the print material without bending it. 4. To print on special material, you must select Manual Feed for Source from the software application, and then select the appropriate paper size and type. For details, see "Paper Tab". 5. Press to start. See - Dell 1110 | User Guide - Page 24
other, do not let the printed sheets stack up as they are printed out. NOTE: Place transparencies on a flat surface after removing them from the printer. NOTE: Do not use transparencies that are separating from the backing sheet. - Dell 1110 | User Guide - Page 25
in the tray with the design face up, top edge toward the printer. NOTE: Before you load letterhead, verify that the ink on the paper is dry. During the fusing process, wet ink can come off preprinted paper. Printing Printing a Document Printer Settings Printing Multiple Pages on One Sheet of - Dell 1110 | User Guide - Page 26
. The features provided by the printer driver are as follows: Feature Toner Save Print Quality Option Poster Printing Multiple Pages per Sheet (N-up) Fit to Page Printing Scale Printing Watermark Overlay Printer Driver Windows 98/Me/2000/XP Y Y Y Y Y Y Y Y The following procedure describes the - Dell 1110 | User Guide - Page 27
OK to close the printer properties window. 5. To start the print job, click Print or OK, depending on the program or operating system in the Print window. Canceling a Print Job There are two ways to cancel a print job: To stop a print job from the operator panel: Press . In Manual Feed mode, you can - Dell 1110 | User Guide - Page 28
click Settings. 2. Select to Printers (Windows 98/Me/2000) or Printers and Faxes (Windows XP) to open the Printers window and double-click the Dell Laser Printer 1110 icon. 3. From the Document menu, click Cancel (Windows 2000/XP) or Cancel Printing (Windows 98/Me). Printer Settings You can use the - Dell 1110 | User Guide - Page 29
98/Me/2000, click Settings and point to Printers. For Windows XP, click Printers and Faxes. c. Point to the Dell Laser Printer 1110 icon. d. Right-click on the printer icon and: For Windows 98/Me, click Properties. For Windows 2000/XP, click Print Setup or click Properties and point to Printing - Dell 1110 | User Guide - Page 30
Double-sided Printing allows you to print two-sided jobs manually. For details, see "Printing on Both Sides of Paper (Manual Duplex)". Paper Tab Use the following options to set paper handling needs when you access printer properties. See step 3 in "Printing a Document" for more information about - Dell 1110 | User Guide - Page 31
. You need to load one sheet at a time into the paper tray. See "Using Manual Feed Mode". If the paper source is set to Auto Select, the printer automatically picks up print materials from the paper tray. Make sure that Type is set to Printer Default. If you load a different type of print material - Dell 1110 | User Guide - Page 32
Toner Selecting this option extends the life of your toner cartridge and reduces your cost Save Mode per page without a significant reduction in print quality. • On: Select this option to allow the printer to use less toner option determines what the driver tells the printer about how to print - Dell 1110 | User Guide - Page 33
you use Windows 98. • Download as Bit Image: When this option is selected, the driver downloads the font a Document" for more information about accessing printer properties. Click the Extras tab to access preprinted forms and letterhead paper. See "Using Overlays". Print Order: You can set - Dell 1110 | User Guide - Page 34
tab. You can adjust the printer configuration. 1. Click the Windows Start menu. 2. For Windows 98/Me/2000, select Settings and then Printer. For Windows XP, select Printers and Faxes. 3. Select the Dell Laser Printer 1110 icon. 4. Right-click on the printer icon and select Properties. 5. Click - Dell 1110 | User Guide - Page 35
power save mode from the Time Delay drop-down list. The minimum time you can select is 5 Minutes. Display Printing Status Window When this option is checked, the Printing Status window, which shows the status of your printer, displays on the computer screen each time you send a print job to the - Dell 1110 | User Guide - Page 36
Help button in the printer's properties window. These help screens give detailed information about the printer features provided by the printer driver. You can also click from the upper right hand corner, and then click on any setting. Printing Multiple Pages on One Sheet of Paper You can select the - Dell 1110 | User Guide - Page 37
sheet. Print Page Border or Page Order is enabled only if the Pages per Side setting is set to a number greater than one. 5. Click the Paper tab and select the paper source, size, and type. 6. Click OK and print the document. Printing Posters - Dell 1110 | User Guide - Page 38
can print a single-page document onto 4, 9, or 16 sheets of paper, for the purpose of pasting the sheets together to form one poster-sized document. 1. To change the print settings from your software application, access printer properties. See step 3 in "Printing a Document". 2. From the Layout tab - Dell 1110 | User Guide - Page 39
paper. Paper jamming and damage to the printer may result. NOTE: To use double-sided printing, you can use only the following paper sizes: A4, Letter, Legal, and Folio, with a weight of 20~24 lbs (75~90 g/m2). To manually print a 2-sided document: 1. To change the print settings from your software - Dell 1110 | User Guide - Page 40
side of your job has printed, the following window appears and blinks red. 6. Load the paper back into the printer with the already-printed side down and the top of the page toward the front of the tray according to the instructions in the above window. 7. Press to print the other side of your - Dell 1110 | User Guide - Page 41
Document You can scale your print job on a page. 1. To change the print settings from your software application, access printer properties. See step 3 in "Printing a Document". 2. From the Paper tab, select Reduce/Enlarge from the Type drop-down list. 3. Enter the scaling rate in the Percentage - Dell 1110 | User Guide - Page 42
type in Paper Options. a document. There are several predefined watermarks that come with your printer, and they can be modified or you can add new ones Existing Watermark 1. To change the print settings from your software application, access printer properties. See step 3 in "Printing a Document". - Dell 1110 | User Guide - Page 43
The preview image shows how the page will look when it is printed. Creating a Watermark 1. To change the print settings from your software application, access printer properties. See step 3 in "Printing a Document". 2. Click the Extras tab and click Edit in the Watermark section. The Edit Watermark - Dell 1110 | User Guide - Page 44
OK. Deleting a Watermark 1. To change the print settings from your software application, access printer properties. See step 3 in "Printing a Document". 2. From the Extras tab, click Edit in the Watermark section. The Edit Watermark window appears. 3. Select the watermark you want to delete from the - Dell 1110 | User Guide - Page 45
letterhead paper. Rather settings from your software application, access printer properties. See step 3 in "Printing a Document". 3. Click the Extras tab and click Edit in the Overlay section. 4. In the Edit Overlay window, click Create Overlay. 5. In the Create Overlay window - Dell 1110 | User Guide - Page 46
1. Create or open the document you want to print. 2. To change the print settings from your software application, access printer properties. See step 3 in "Printing a Document". 3. Click the Extras tab. 4. Select the overlay load the file from that source when you access this Load Overlay window. - Dell 1110 | User Guide - Page 47
. 7. Click OK or Yes until printing starts. The overlay is downloaded with your print job and printed on your document. Deleting a Page Overlay You can delete page overlays that are no longer used. 1. In the printer properties window, click the Extras tab. 2. Click Edit in the Overlay section - Dell 1110 | User Guide - Page 48
shared by other users on the network through a Windows 98, Me, 2000, or XP network printer connection. Before you can share your printer, you must first set up a Microsoft Windows network. In Windows 98/Me Setting Up the Host Computer 1. Start Windows. 2. Click the Start button, select Control Panel - Dell 1110 | User Guide - Page 49
the Start button Settings Printers. For Windows XP, click the Start button and select Printers and Faxes. 3. Double-click your printer icon. 4. Click the Printer menu and select Sharing. 5. For Windows 2000, check the Shared As box. For Windows XP, check the Share this printer box. 6. Fill in the - Dell 1110 | User Guide - Page 50
the Toner Cartridge Ordering Supplies Cleaning Your Printer To maintain print quality, follow the cleaning procedures below, each time the toner cartridge is replaced or if print quality problems occur. NOTE: Do not touch the transfer roller located under the toner cartridge when cleaning inside - Dell 1110 | User Guide - Page 51
3. Gently pull the toner cartridge out, being careful not to scratch against the printer, and lift it up and away from the printer. Set it on a clean flat surface. CAUTION: To prevent damage to the toner cartridge, do not expose the toner cartridge to light for more than a few minutes. CAUTION: Do - Dell 1110 | User Guide - Page 52
. Oil from your fingers may cause print quality problems. 5. Reinsert the toner cartridge and close the front cover. 6. Plug in the power cord and power the printer on. Maintaining the Toner Cartridge Storing the Toner Cartridge Store the toner cartridge in the original packaging until you are ready - Dell 1110 | User Guide - Page 53
if the problem is caused by low toner. In the Printing Status window, you will see how much toner is remaining. Redistributing Toner When the toner cartridge is near the end of its life, white streaks or light printing occur. on the printer's operator panel lights orange. Thoroughly shake - Dell 1110 | User Guide - Page 54
" for information on ordering toner cartridges. CAUTION: For best results, use Dell toner cartridges. Print quality and printer reliability are not guaranteed if you do not use Dell supplies. To replace the toner cartridge: 1. Open the front cover. 2. Pull the used toner cartridge out and lift it up - Dell 1110 | User Guide - Page 55
toner into fabric. CAUTION: Do not touch the green underside of the toner cartridge. Use the handle on the cartridge to avoid touching this area. CAUTION: To prevent damage to the toner cartridge, do not expose it to light for more than a few minutes. 4. Pull the tape to remove the protective paper - Dell 1110 | User Guide - Page 56
in the Printing Status window each time you send a job to print, the printer's operator panel LED sequences tell you about the status of your supplies. When lights orange, your toner cartridge is low and you should order a new toner cartridge. 1. Double-click the Dell Toner Reorder Program icon - Dell 1110 | User Guide - Page 57
OR From the Start menu, click Programs Dell Printers Dell Laser Printer 1110 Dell Toner Reorder Program. OR In the Printing Status window, click the Order Supplies button. 2. The Order Toner Cartridges window appears. Click Visit Dell's cartridge ordering web site to order supplies online. If - Dell 1110 | User Guide - Page 58
paper jam occurs, on the operator panel lights red. Find and remove the jammed paper. If you cannot see it, look inside the printer. To avoid tearing the paper, pull the jammed paper out gently and slowly. Follow the steps below to clear the jam. Paper Feed Jam 1. Remove any misfed paper by pulling - Dell 1110 | User Guide - Page 59
set the toner into the fabric. 1. If the paper jams as it exits to the output tray and a long portion of the paper is visible, pull the paper straight out pages. 2. If you cannot see the paper in the output tray or the paper does not move when pulled, stop pulling and open the top cover and the - Dell 1110 | User Guide - Page 60
if it is caught in the heat roller. Then remove the paper by gently pulling it out. CAUTION:When removing jammed paper, be careful not to touch the heat roller (located underneath the inner cover). It is hot and could cause burns! 4. Close the inner cover(1) and - Dell 1110 | User Guide - Page 61
NOTICE: The fuser area is hot. Take care when removing paper from the printer. 1. Open the front cover. 2. Gently pull the toner cartridge out, being careful not to scratch against the printer, and lift it up and away from the printer. 3. Remove the paper by gently pulling it toward you. - Dell 1110 | User Guide - Page 62
there is no other paper in the printer. 5. Reinstall the toner cartridge and close the front cover. Your printer resumes printing the document from failed pages. Tips for Avoiding Paper Jams By selecting the correct paper types, most paper jams can be avoided. When a paper jam occurs, follow the - Dell 1110 | User Guide - Page 63
A paper jam has occurred. To solve the problem, see "Clearing Jams in the Paper Tray". • The front cover is open. Close the front cover. • The top cover is open. Close the top cover. • The paper tray is empty. Load paper in the tray. See "Loading Paper". • A toner cartridge is not installed. Install - Dell 1110 | User Guide - Page 64
to start printing. The toner cartridge is nearly empty. Redistribute the toner to temporarily extend the life of the toner cartridge. If this does not improve print quality, install a new toner cartridge. See "Replacing the Toner Cartridge". Troubleshooting Checklist If the printer is not working - Dell 1110 | User Guide - Page 65
jam. See "Clearing Jams in the Paper Tray". • No paper is loaded. • Load paper. See "Loading Paper" • A toner cartridge is not installed or the installed toner cartridge is not the correct type. • Install a toner cartridge. See "Replacing the Toner Cartridge". The printer may be in Manual Feed - Dell 1110 | User Guide - Page 66
try a new printer cable. The wrong printer driver was selected. Check the application's printer selection menu to ensure that your printer is selected. The software application is malfunctioning. Try printing a job from another application. Pages print, but are The toner cartridge is defective - Dell 1110 | User Guide - Page 67
Printing Problems"). Install a new toner cartridge and check print quality (see "Replacing the Toner Cartridge"). Printing Quality Problems The inside of the printer may be dirty or improper paper loading may reduce print quality. See the table below to clear the problem. Condition Light or - Dell 1110 | User Guide - Page 68
drum inside the toner cartridge has probably been scratched. Install a new toner cartridge. See "Replacing the Toner Cartridge". Gray background If the amount of background shading becomes unacceptable: • Change to lighter weight paper. See "Paper Specifications". • Check the printer's environment - Dell 1110 | User Guide - Page 69
the page at even intervals: • Clean the inside of the printer. See "Cleaning the Interior". After cleaning the inside of the printer, if you still have the same problems, install a new toner cartridge. See "Replacing the Toner Cartridge". • Parts of the printer may have toner on them. If the defects - Dell 1110 | User Guide - Page 70
toner cartridge may be defective and need replacing. Install a new toner cartridge. See "Replacing the Toner Cartridge". • The printer may require repair. Contact a service representative. • Clean the inside of the printer. See "Cleaning the Interior". • Check the paper type and quality. See "Paper - Dell 1110 | User Guide - Page 71
the toner cartridge and reinsert. • The toner cartridge may be defective. Install a new toner cartridge. See "Replacing the Toner Cartridge". • If the problem persists, the printer may require repair. Contact a service representative. If the printed paper is curled or the paper does not feed into - Dell 1110 | User Guide - Page 72
that does not meet the guidelines outlined in this User's Guide can cause the following problems: Poor print quality Increased paper jams Premature wear on the printer NOTE: Some paper may meet all of the guidelines in this guide and still not produce satisfactory results. This may be the - Dell 1110 | User Guide - Page 73
agreements. Supported Sizes of Paper Paper Plain Paper Letter A4 A5 90 g/m²ond (16 to 24 lb) for the paper tray • 60 to 163 g/m² bond(16 to 43 lb) for manual feed mode • 150 sheets of 75 g/m² bond (20 lb) paper for the paper tray • 1 sheet of paper for manual feed mode 4.12 x 9.5 in. (105 x - Dell 1110 | User Guide - Page 74
for manual feed mode 60 to 120 g/m² bond (16 to 32 lb) for manual feed mode a. The printer supports a problems may cause print quality deviations, jamming, or even damage to the printer: Symptom Poor print quality or toner adhesion, problems with feeding Dropout, jamming, curl Problem with Paper - Dell 1110 | User Guide - Page 75
rear output slot. • Use long-grain paper. Jamming, damage to printer Cutouts or perforations Do not use paper with cutouts or perforations. Problems with feeding Ragged edges Use good quality paper. NOTE: Do not use letterhead paper printed with low-temperature inks, such as those used in some - Dell 1110 | User Guide - Page 76
humidity to increase in a room. As paper is opened and used it absorbs any excess moisture, causing light print and dropouts. Also, as paper loses and gains moisture it can become distorted. This can cause paper jams. Care should be taken not to purchase more paper than can be used in a short time
-
 1
1 -
 2
2 -
 3
3 -
 4
4 -
 5
5 -
 6
6 -
 7
7 -
8
-
9
-
10
-
11
-
12
-
13
-
14
-
15
-
16
-
17
-
18
-
19
-
20
-
21
-
22
-
23
-
24
-
25
-
26
-
27
-
28
-
29
-
30
-
31
-
32
-
33
-
34
-
35
-
36
-
37
-
38
-
39
-
40
-
41
-
42
-
43
-
44
-
45
-
46
-
47
-
48
-
49
-
50
-
51
-
52
-
53
-
54
-
55
-
56
-
57
-
58
-
59
-
60
-
61
-
62
-
63
-
64
-
65
-
66
-
67
-
68
-
69
-
70
-
71
-
72
-
73
-
74
-
75
-
76
 |
 |
Dell™ Laser Printer 1110 User's Guide
Click the links to the left for information on the features, options, and operation of your printer. For
information on other documentation included with your printer, see
"Finding Information"
.
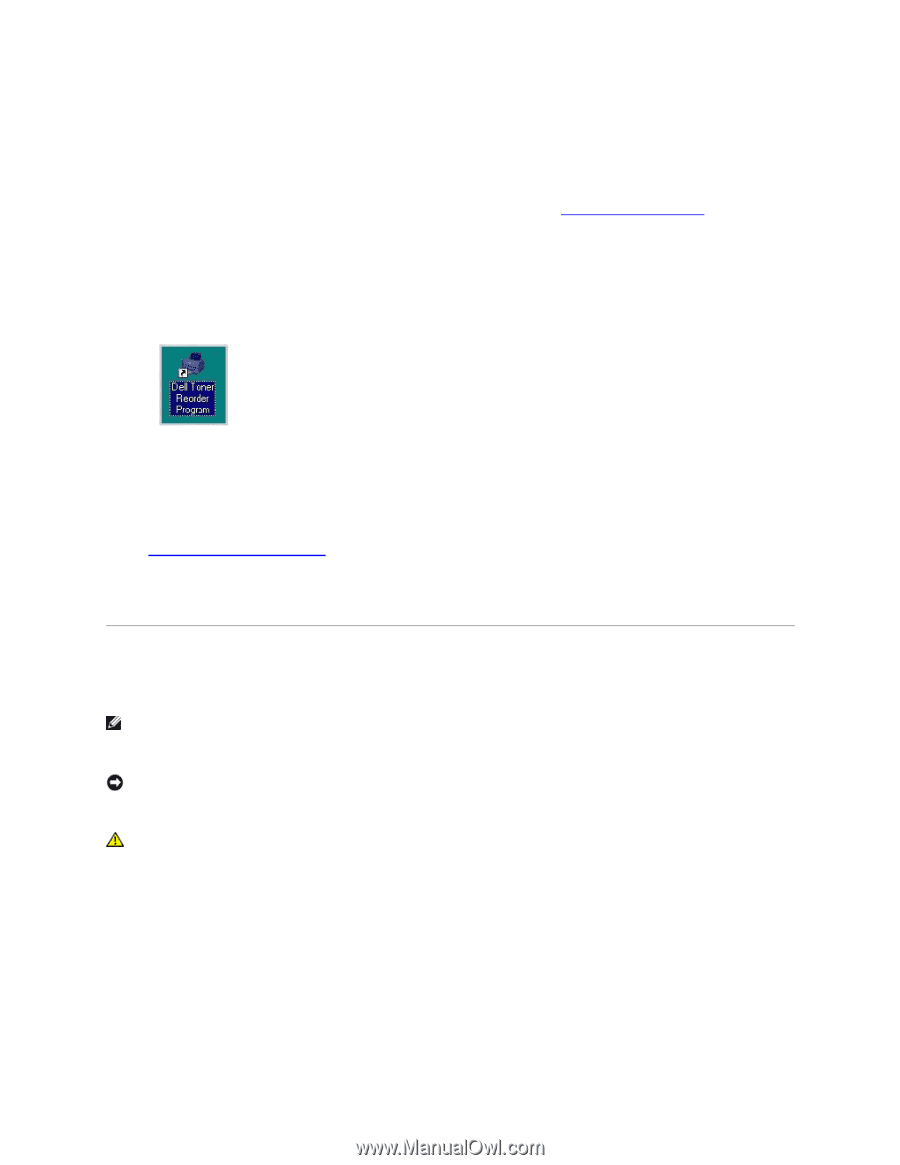
To order replacement toner cartridges or supplies from Dell:
1.
Double
-
click the Dell Toner Reorder Program icon on your desktop.
OR
2.
Visit Dell's website, or order Dell printer supplies by phone.
www.dell.com/supplies
Notes, Notices, and Cautions
NOTE:
A
NOTE
indicates important information that helps you make better use of your
printer.
NOTICE:
A
NOTICE
indicates either potential damage to hardware or loss of data and tells
you how to avoid the problem.
CAUTION:
A CAUTION indicates a potential for property damage, personal injury, or
death.
-----------------------------------------------------------------
Information in this document is subject to change without notice.
© 2005 Dell Inc.. All rights reserved.
Reproduction in any manner whatsoever without the written permission of Dell