Dell C9000 Line Cards Networking C9010 Getting Started Guide - Page 18
Left front rail with attached subassembly and, Right ReadyRail bracket for 2-post racks
 |
View all Dell C9000 Line Cards manuals
Add to My Manuals
Save this manual to your list of manuals |
Page 18 highlights
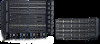
• Front rails for the left and right posts of 2- and 4-post racks (items 5 and 6 in Figure 10) • Rear rails that fit into the left and right front rails on 4-post racks (items 7 and 8 in Figure 10) • Two spacers that allow you to secure the chassis flanges flush on the front rack posts (items 9 and 10 in Figure 10) Figure 10. Dell ReadyRails for 2- and 4-Post Racks 1. Left chassis rail 2. 3. Left ReadyRail bracket for 2-post racks 4. 5. Left front rail with attached subassembly and 6. thumb screw Right chassis rail Right ReadyRail bracket for 2-post racks Right front rail with attached subassembly and thumb screw 18 Installing the Hardware
-
 1
1 -
2
-
3
-
4
-
5
-
6
-
7
-
8
-
9
-
10
-
11
-
12
-
 13
13 -
 14
14 -
 15
15 -
 16
16 -
 17
17 -
 18
18 -
 19
19 -
 20
20 -
 21
21 -
 22
22 -
 23
23 -
24
-
25
-
26
-
27
-
28
-
29
-
30
-
31
-
32
-
33
-
34
-
35
-
36
-
37
-
38
-
39
-
40
-
41
-
42
-
43
-
44
-
45
-
46
-
47
-
48
-
49
-
50
-
51
-
52
-
53
-
54
-
55
-
56
 |
 |

•
Front rails for the left and right posts of 2- and 4-post racks (items 5 and 6 in Figure 10)
•
Rear rails that fit into the left and right front rails on 4-post racks (items 7 and 8 in Figure 10)
•
Two spacers that allow you to secure the chassis flanges flush on the front rack posts (items 9 and 10
in Figure 10)
Figure 10. Dell ReadyRails for 2- and 4-Post Racks
1.
Left chassis rail
2.
Right chassis rail
3.
Left ReadyRail bracket for 2-post racks
4.
Right ReadyRail bracket for 2-post racks
5.
Left front rail with attached subassembly and
thumb screw
6.
Right front rail with attached subassembly
and thumb screw
18
Installing the Hardware