Dell C9000 Line Cards Networking C9010 Getting Started Guide - Page 28
Installing RPMs and Line Cards
 |
View all Dell C9000 Line Cards manuals
Add to My Manuals
Save this manual to your list of manuals |
Page 28 highlights
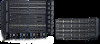
1. Slide the first fan module into fan slot 0 by pushing the handle (item 1 in Figure 19) forward into the uppermost fan slot (item 2 in Figure 19). 2. Gently push the front of the module until it clicks into place. The fan module should be flush with the chassis. 3. Repeat Steps 1 and 2 to install the second and third fan modules in fan slots 1 and 2. 4. To remove a fan module, press the orange button on the handle and pull out the module. Figure 19. Installing a Fan Module NOTE: The switch does not have an air filter; ensure that you regularly clean the installation site and the chassis. NOTE: The fan module LED remains green when the chassis is powered up and the fan module is functioning properly. Installing RPMs and Line Cards The C9010 chassis supports up to ten line cards and two route processor modules. WARNING: Always wear an ESD-preventive wrist or foot-heel ground strap when handling an RPM or a line card. Always place RPMs and line cards on an antistatic surface or in an antistatic bag when not in use or when carrying them. ESD damage can occur when components are mishandled. Do not use the ejector handle to carry an RPM or line card. 28 Installing the Hardware
-
 1
1 -
2
-
3
-
4
-
5
-
6
-
7
-
8
-
9
-
10
-
11
-
12
-
13
-
14
-
15
-
16
-
17
-
18
-
19
-
20
-
21
-
22
-
 23
23 -
 24
24 -
 25
25 -
 26
26 -
 27
27 -
 28
28 -
 29
29 -
 30
30 -
 31
31 -
 32
32 -
 33
33 -
34
-
35
-
36
-
37
-
38
-
39
-
40
-
41
-
42
-
43
-
44
-
45
-
46
-
47
-
48
-
49
-
50
-
51
-
52
-
53
-
54
-
55
-
56
 |
 |
