Dell Force10 E600i Quick Start Guide - Page 18
E600i DC Power Modules, unplated metal contact surfaces.
 |
View all Dell Force10 E600i manuals
Add to My Manuals
Save this manual to your list of manuals |
Page 18 highlights
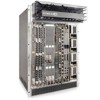
Step Task 3 Secure the power supply into place by tightening the two locking screws to 5 in-lbs. 4 Plug an AC power cord into the socket on the front of the unit: a Loosen the power cord retainer thumb screw. b Rotate the retainer clockwise away from the socket and plug the power cord into the socket. c Rotate the retainer counter clockwise over the power cord, and tighten the thumb screw to secure the power cord. 5 Plug the AC power cord into an AC outlet. 6 Toggle the power supply switch to the ON position, and verify that Status LED lights green. E600i DC Power Modules The system requires a minimum of one load-sharing PEM to operate, but two are recommended for redundancy. Connect the E600 PEMs to the appropriate branch circuit protection as defined by local electrical codes. You must provide your own cables to connect to a remote power source in your equipment rack. Verify that your cables are: • Rated for at least 80A service to allow for a fully loaded E600i system at low input voltage per your local electrical codes. • Limit voltage drop across the cable length to 0.5V or less. Before you make the cable connections, apply a coat of anti-oxidant paste to unplated metal contact surfaces. File unplated connectors, braided straps, and bus bars to a shiny finish. It is not necessary to file and coat tinned connectors or other plated connection surfaces, such as on the PEM studs. Installing a DC PEM Step Task 1 Make sure that the remote power source (the circuit breaker panel) is in the OFF position. 2 Make sure that the over current protector (located on the PEM front panel) is in the OFF position. 16 Installing the Hardware
-
 1
1 -
2
-
3
-
4
-
5
-
6
-
7
-
8
-
9
-
10
-
11
-
12
-
 13
13 -
 14
14 -
 15
15 -
 16
16 -
 17
17 -
 18
18 -
 19
19 -
 20
20 -
 21
21 -
 22
22 -
 23
23 -
24
-
25
-
26
-
27
-
28
-
29
-
30
-
31
-
32
-
33
-
34
-
35
-
36
-
37
-
38
-
39
-
40
-
41
-
42
-
43
-
44
-
45
-
46
-
47
-
48
-
49
-
50
 |
 |
