Dell Inspiron N5010 Service Manual - Page 29
Replacing the Keyboard
 |
View all Dell Inspiron N5010 manuals
Add to My Manuals
Save this manual to your list of manuals |
Page 29 highlights
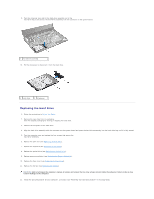
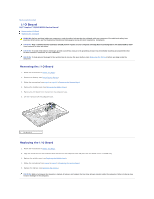
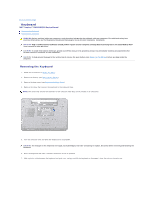
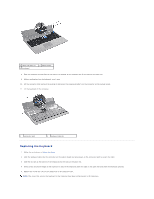
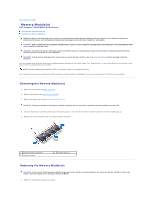
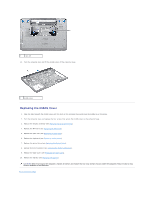
1 palm rest tabs (4) 3 keyboard 2 plastic scribe 8. Ease the keyboard up and slide the six tabs at the bottom of the keyboard out of the slots on the palm rest. 9. Without pulling hard on the keyboard, turn it over. 10. Lift the connector latch and pull the pull-tab to disconnect the keyboard cable from the connector on the system board. 11. Lift the keyboard off the computer. 1 connector latch 2 keyboard tabs (6) Replacing the Keyboard 1. Follow the instructions in Before You Begin. 2. Slide the keyboard cable into the connector on the system board and press down on the connector latch to secure the cable. 3. Slide the six tabs at the bottom of the keyboard into the slots on the palm rest. 4. Gently press around the edges of the keyboard to secure the keyboard under the tabs on the palm rest and slide the keyboard upwards. 5. Replace the screw that secures the keyboard to the computer base. NOTE: The screw that secures the keyboard to the computer base may not be present in all computers.
-
 1
1 -
2
-
3
-
4
-
5
-
6
-
7
-
8
-
9
-
10
-
11
-
12
-
13
-
14
-
15
-
16
-
17
-
18
-
19
-
20
-
21
-
22
-
23
-
 24
24 -
 25
25 -
 26
26 -
 27
27 -
 28
28 -
 29
29 -
 30
30 -
 31
31 -
 32
32 -
 33
33 -
 34
34 -
35
-
36
-
37
-
38
-
39
-
40
-
41
-
42
-
43
-
44
-
45
-
46
-
47
-
48
-
49
-
50
-
51
 |
 |
